Updated: April 16th, 2024
For years, we have made hard boiled eggs, not in the oven, but on the stove top in a large pot of boiling water on high heat until the eggs start to boil. Then we turn the burner down to medium heat and let the eggs finish cooking for about 12 to 15 more minutes.
But, have you ever forgotten about the eggs boiling on the stove? For example, have you gone outside or left the kitchen to go do something else? Then, when you go back into the kitchen, you see that the eggs have exploded on the countertops and the kitchen floor because the pot ran out of water! I have to confess that I have done this. And what a mess it was!
That is why I think you are going to love this oven method to make hard boiled eggs. It’s quick, easy, and stress free.
There are so many ways to eat hard-boiled eggs. Eat a hard-boiled egg right out of the shell with a little bit of butter, salt, and pepper on it. Or you can chop up the eggs with a fork, add mayonnaise, salt, and pepper, and have egg salad sandwiches. You can also use hard-boiled eggs in potato salad or in Thanksgiving recipes such as Southern cornbread dressing, and Southern deviled eggs.
🥚 Key Ingredients
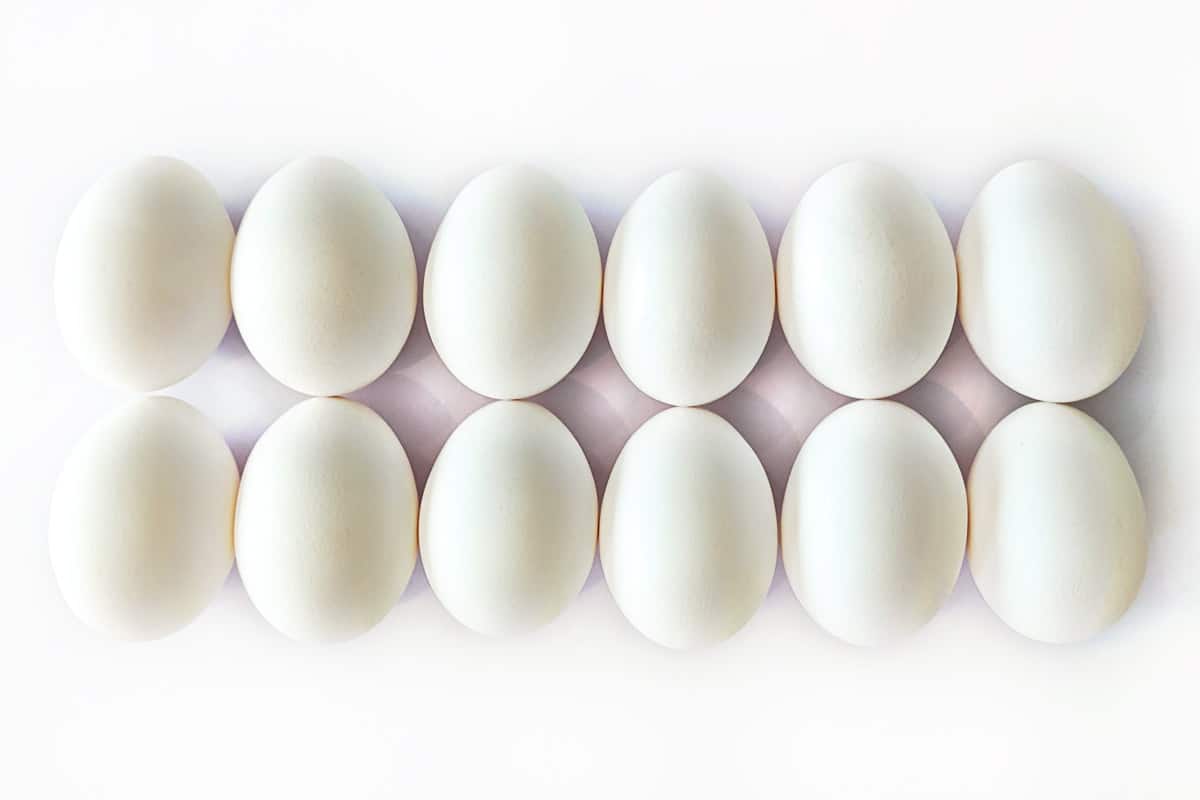
- 12 large eggs
- 1 large bowl of ice water
- Pats of butter (optional)
- Sprinkle of table salt and ground black pepper (optional)
👩🍳 How to Make Hard Boiled Eggs in the Oven
These step-by-step instructions are accompanied by detailed photos for enhanced clarity and guidance.
Step 1. Preheat the Oven
Preheat your oven to 325 degrees Fahrenheit.
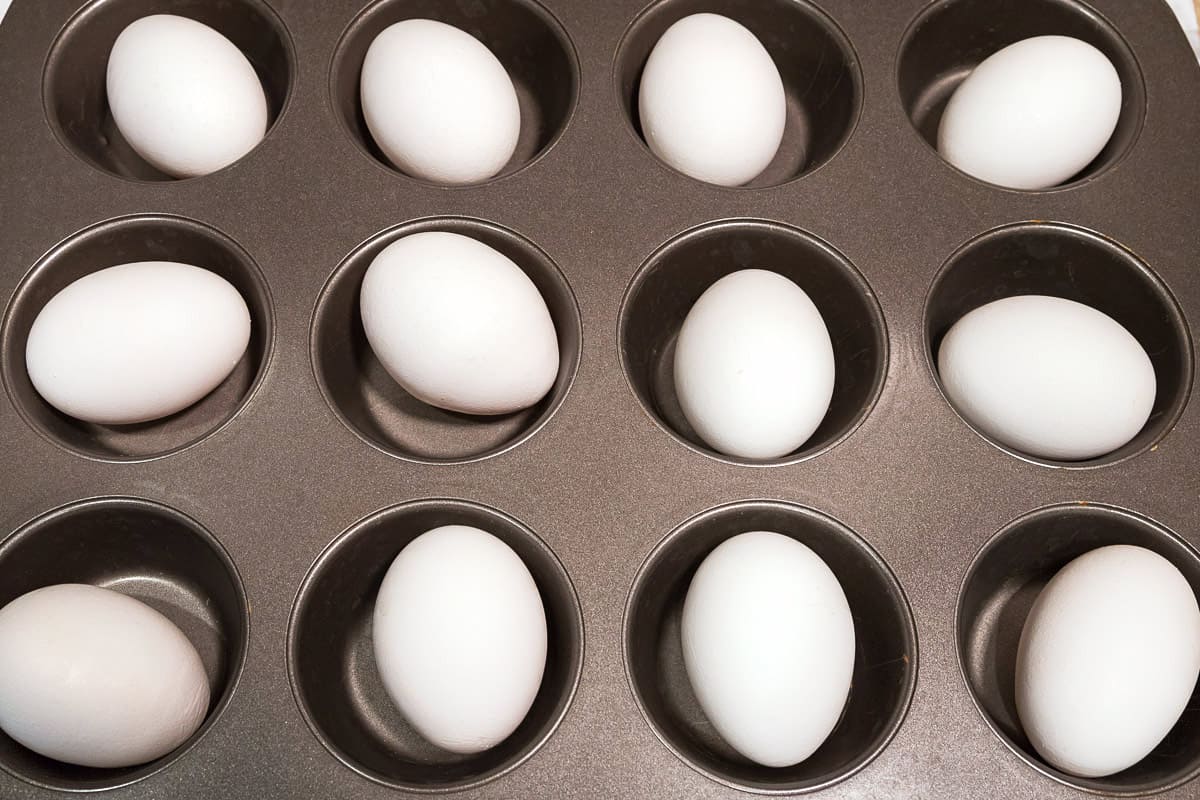
Step 2. Fill the Muffin Tin with Eggs
Get yourself a regular muffin tin. Gently lay 1 egg in each cup. No greasing the pan, just lay the eggs in the muffin pan. Super easy! You can put any amount of eggs in the muffin tin though, it doesn’t have to be 12 eggs.
Tip: We are using a 12-cup muffin tin because there are six of us eating them. We make a big batch which gives each one of us two eggs apiece. But, depending on how many eggs you want to hard boil, a 6-cup muffin pan or a or a mini muffin tin will work just as well if you don’t have a 12 cup muffin tin. And of course, you will only need 6 eggs then. If you don’t have a muffin pan you can use a casserole dish. You can also put two 6-cup muffin pans in the oven at the same time.
Note: There will be a small brown spot on the bottom of each egg shell where it was laying in the muffin pan, and it will be on the hard boiled eggs too. Don’t worry though, that is normal and there is nothing wrong with the egg – the egg is safe to eat. If you prefer, you can cut the little brown spot off each egg after you remove the egg shell, or you can leave it there.
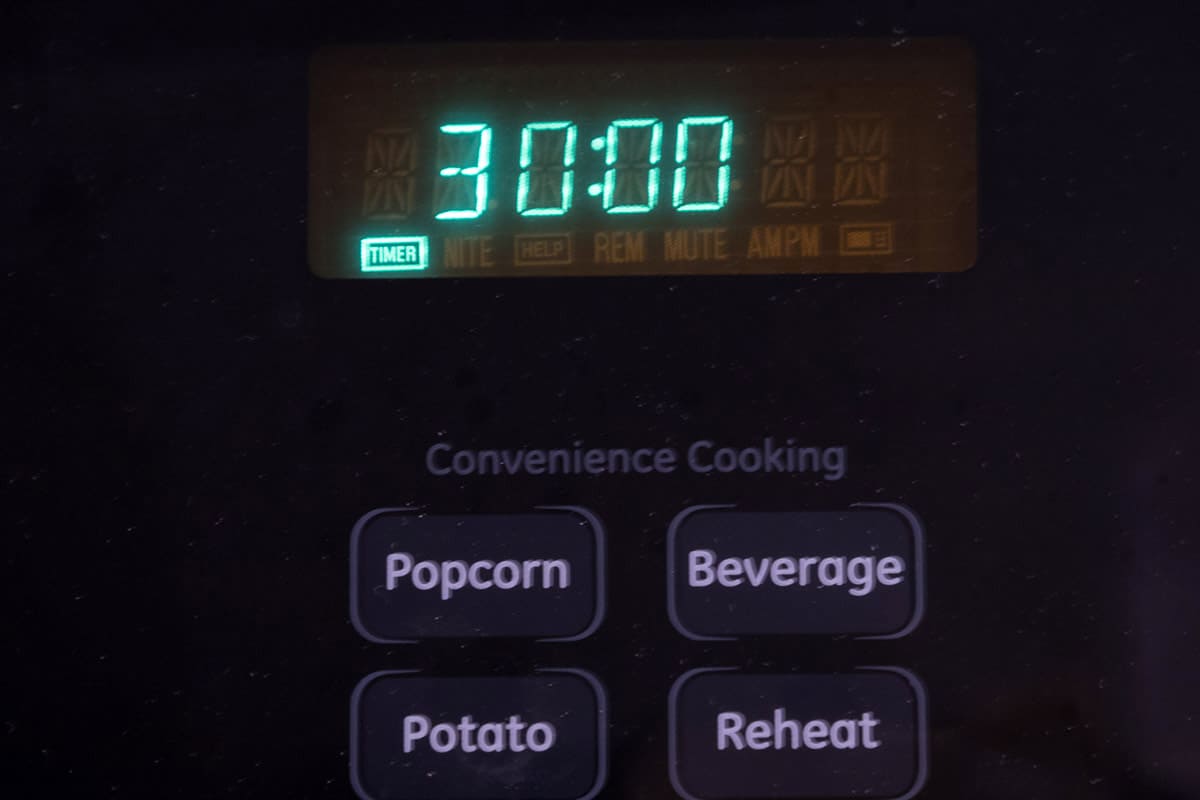
Step 3. Set the Oven Timer For Thirty Minutes
Place the oven rack in the middle of the oven. After the oven reaches 325 degrees Fahrenheit, place the muffin pan with the eggs in it in the preheated oven on the rack. Then, set the oven timer for 30 minutes of baking time.
Below is a simple guide that shows how long to bake your eggs in the oven. This will assist you in determining your desired level of doneness, whether you prefer your hard-boiled eggs to be soft or firm. Keep in mind that not all oven temperatures are the same. Some ovens may produce hotter heat than others or vice versa. The different bake times below may need to be slightly adjusted.
- 18 to 22 minutes for soft-boiled eggs
- 24 to 27 minutes for medium boiled eggs
- 28 to 30 minutes for hard-boiled eggs
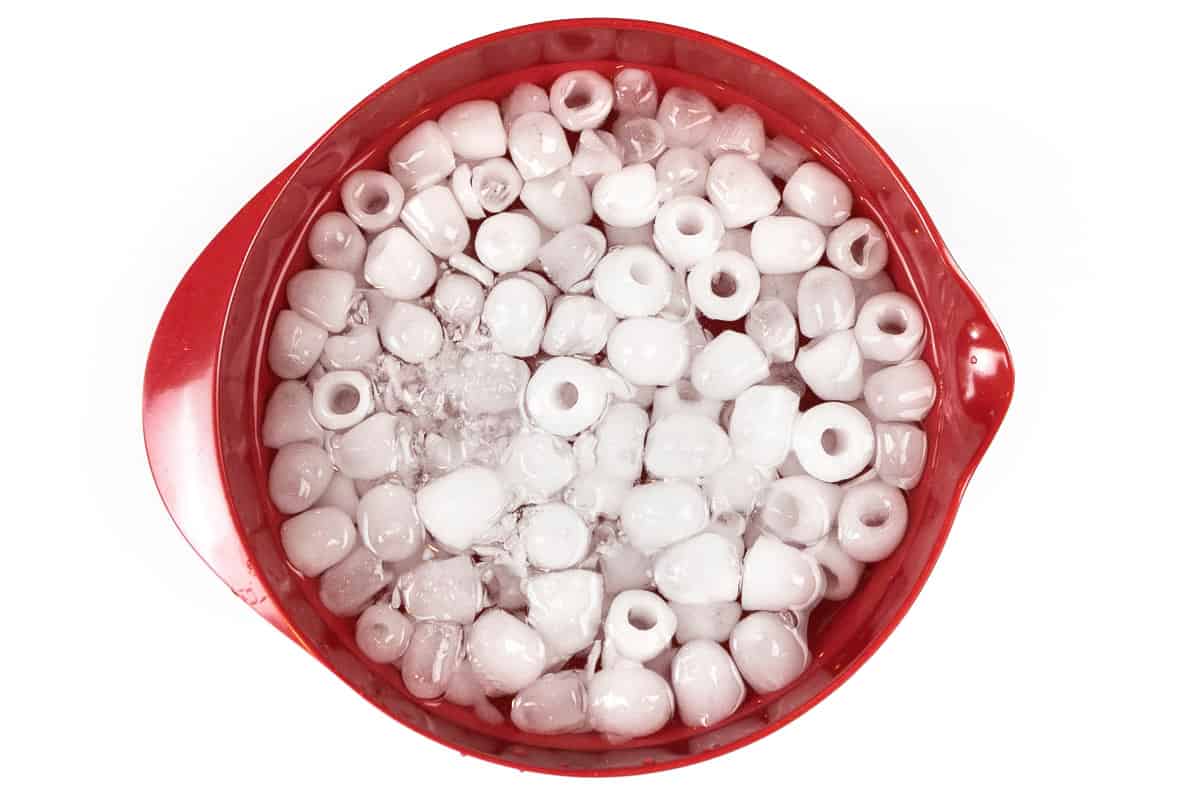
Step 4. Prepare the Ice Bath
While the eggs are baking in the oven, about 5 minutes before the timer goes off, make an ice water bath. To do that, fill a large bowl with ice cubes and water. If you are wondering why we are doing this, it is because the cold water from the ice cubes will finalize the cooking and cooling of the hard-boiled eggs.
Note: If you can’t make a bowl of ice water becauce you don’t have any ice, just go ahead and fill a bowl with cold tap water. Even slightly cool water from the tap will suffice.
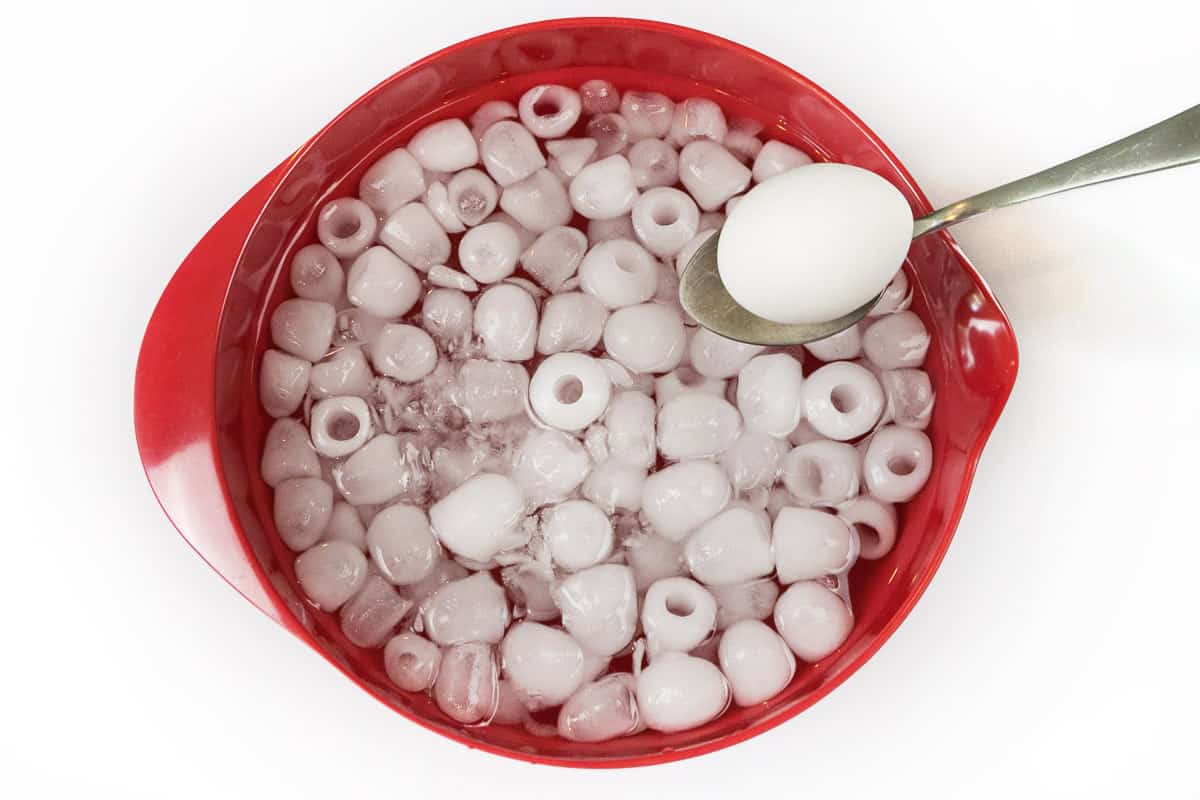
Step 5. Put the Eggs in the Ice Water Bath
After the eggs are baked for 30 minutes, use heat-resistant oven mitts to take the muffin pan with the eggs in it out of the oven. Then, turn the oven off and put the 12 eggs in the ice water bath.
Note: As mentioned before, if you don’t have any ice, use cold water, then let the eggs sit in the cold water until you can hold one in your hand without it being too hot to handle. Add more cold water if needed.
Step 6. Leave Eggs in Ice Water Bath For 10 Minutes
Leaving the eggs in the ice water bath for 10 minutes not only stops the cooking process but also helps to make it easier to peel the eggshells off of the eggs. After 10 minutes, remove the eggs from the ice water bath.
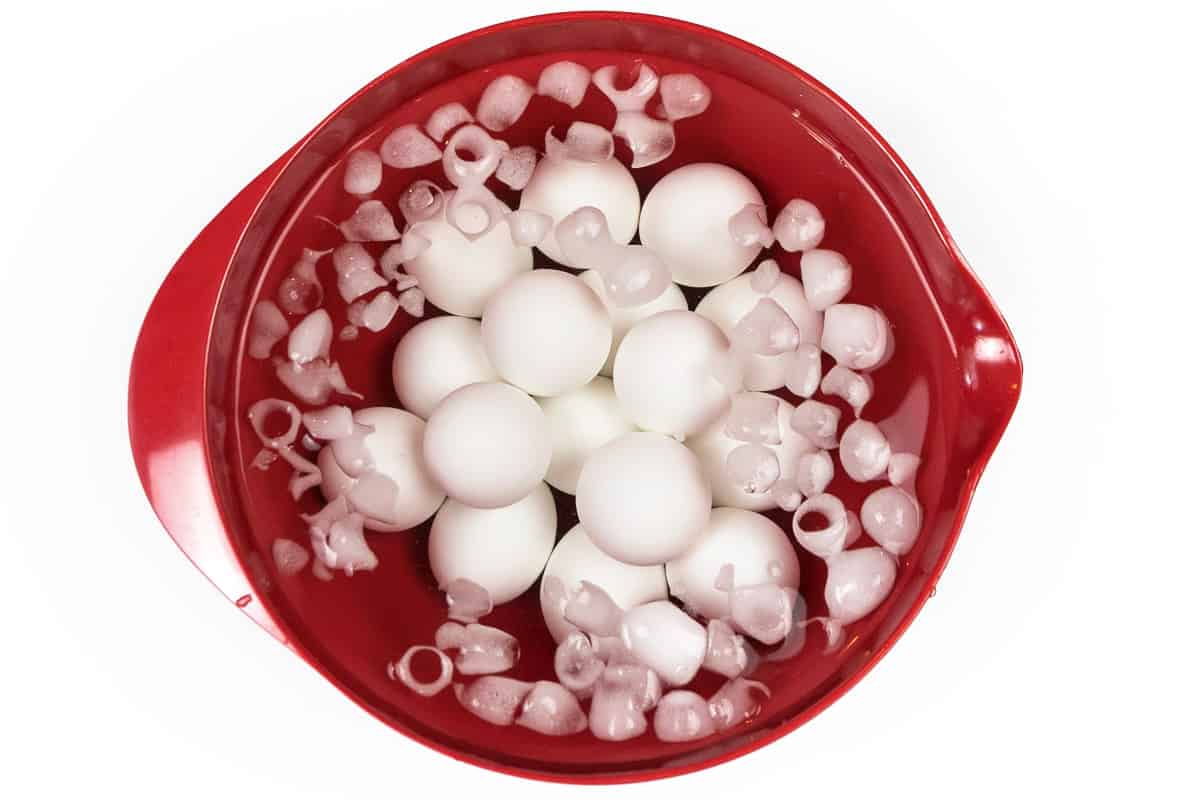
Step 7. Remove the Shells
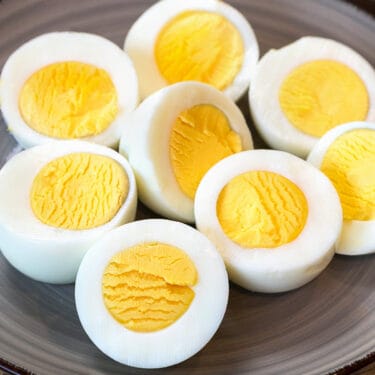
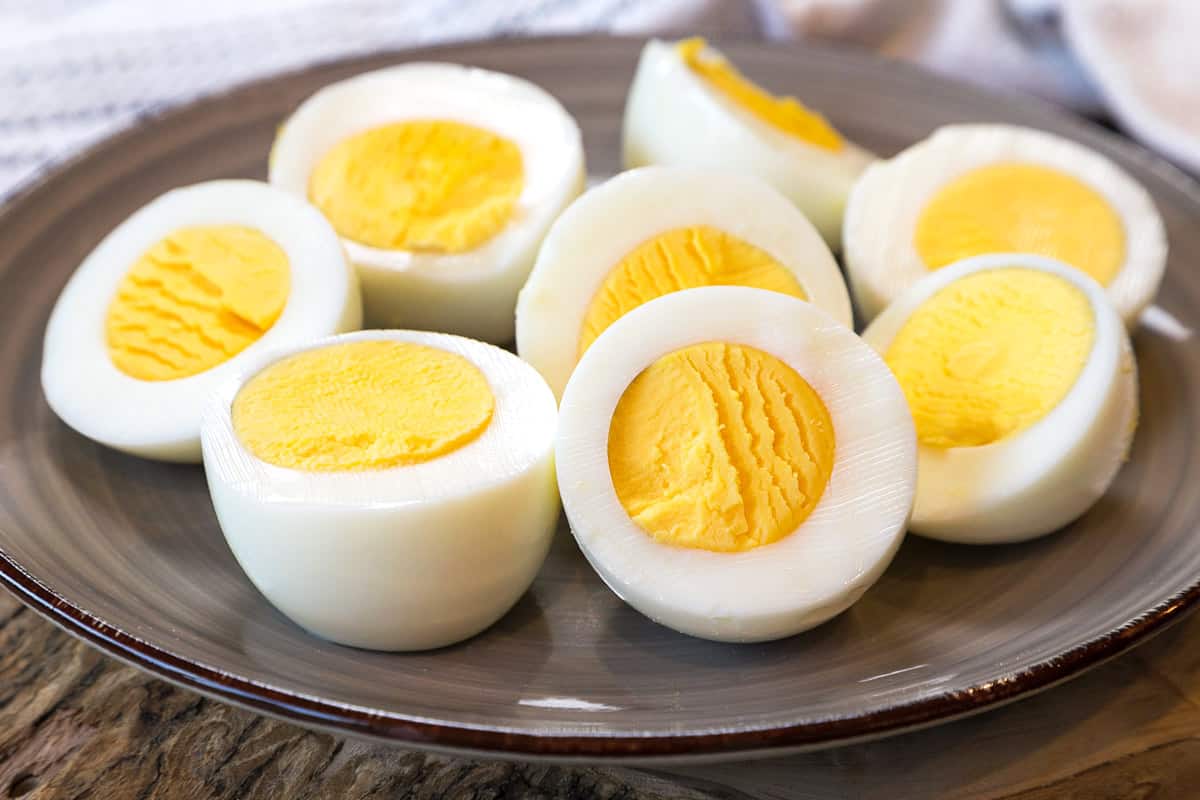
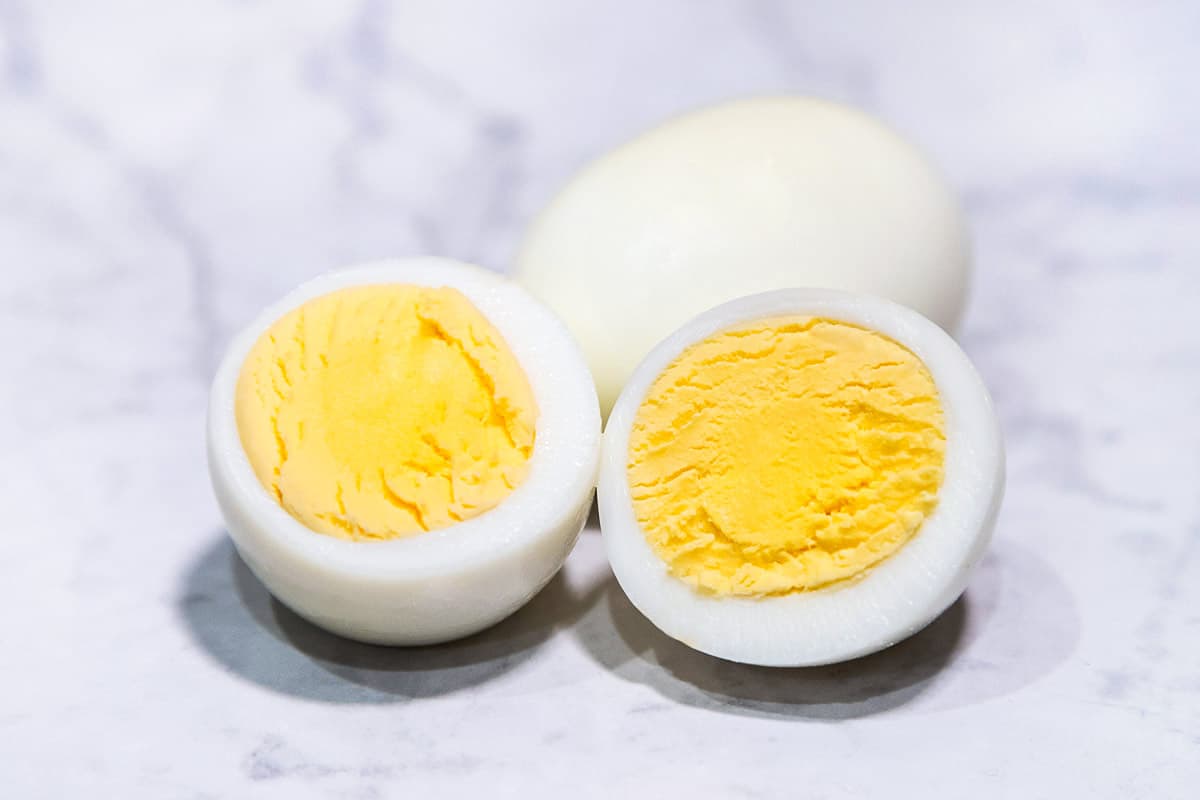
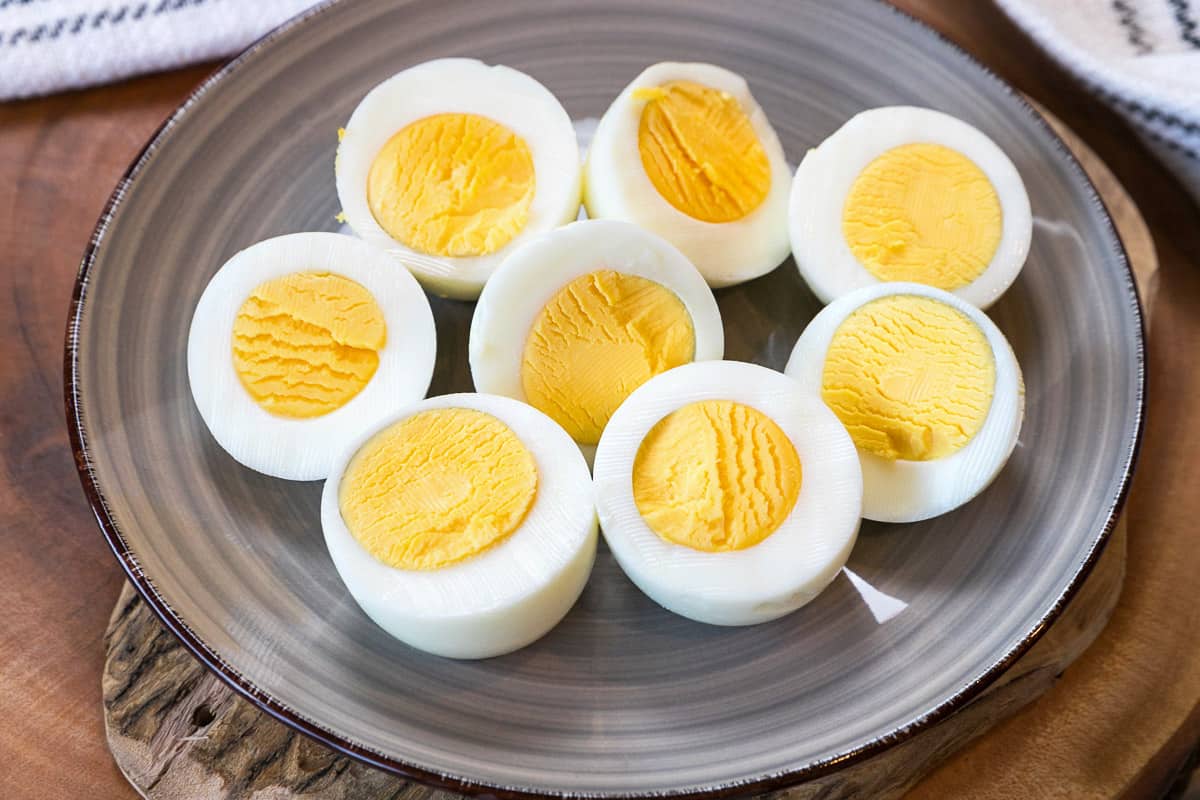
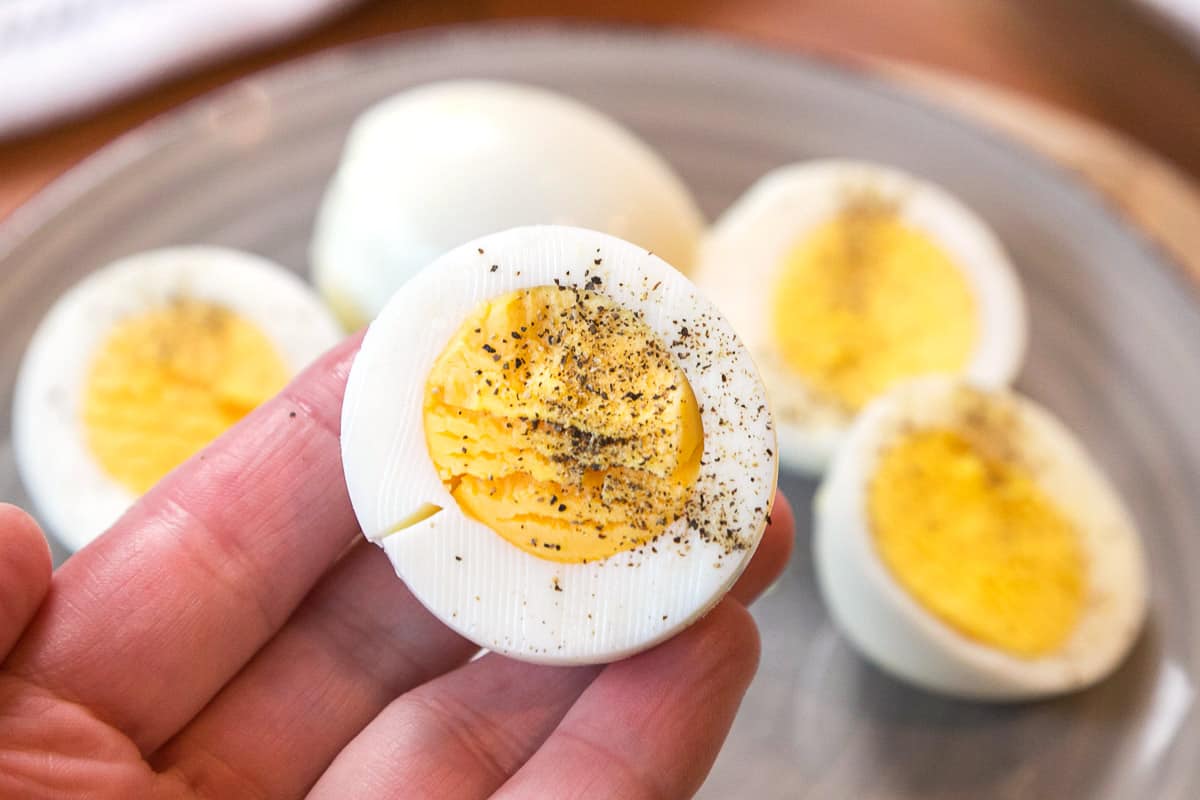
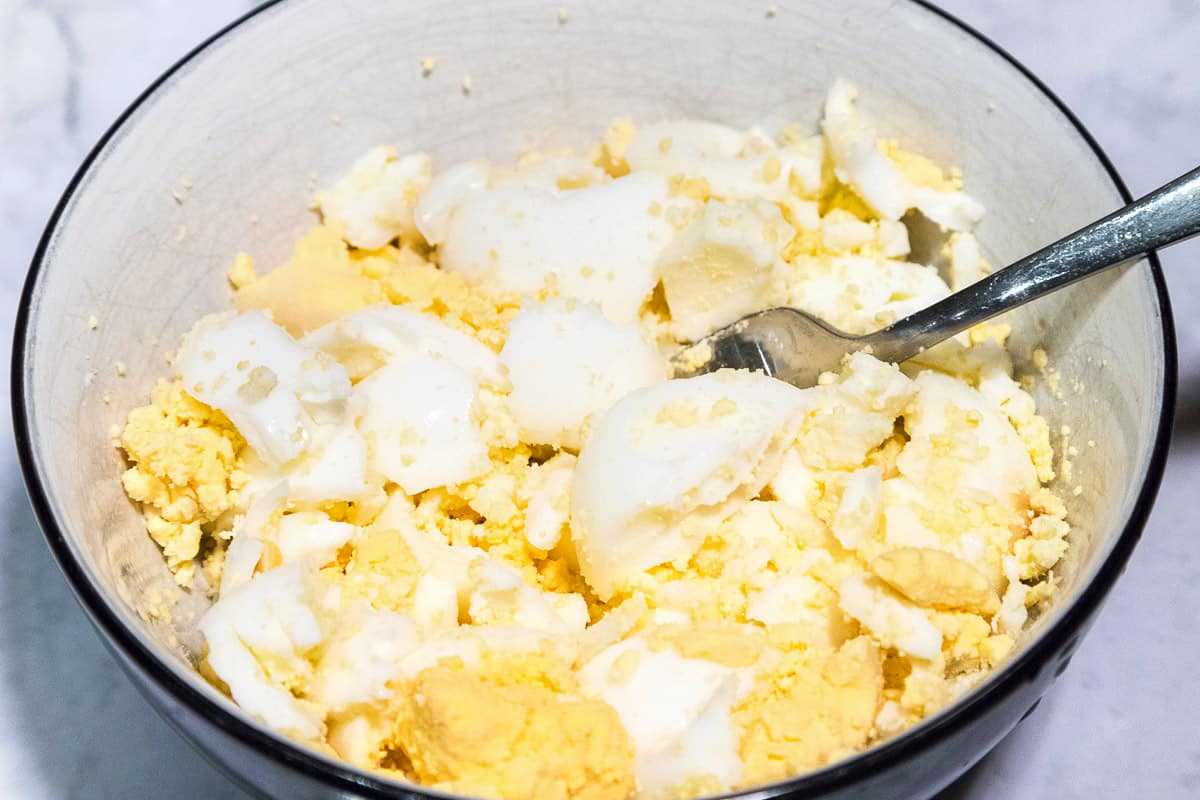
After removing the eggs from the ice water, remove the shells from the eggs and serve with a pat of butter and a sprinkle of salt, pepper, paprika, cayenne pepper, or any of your favorite seasonings on top of the eggs. Or, store the eggs (with the shells on) in the refrigerator for up to 7 days, or in an airtight container for about 3 days if the shells are removed.
🐔 Easy Peeling Tips for Removing Shells from Hard Boiled Eggs
Peeling the shells off of hard-boiled eggs can be annoying sometimes, but it doesn’t mean that the eggs didn’t turn out right. I have baked eggs in the oven and boiled eggs on the stove many times. Sometimes I have had no issues with removing the shells, and at other times, I want to scream (but not that often). Here is my easy way to peel an egg:
- First, get a crack started in the shell. To do that for hard-cooked eggs, slightly hit the egg on the countertop. Then, roll the egg with the palm of your hand on the countertop for just a bit.
- After that, start peeling the egg at the (larger) rounder end of the egg. If you look at a drawing of the anatomy of an egg, it will show that this area (inside of the egg) is where the air cell is.
- Once you get the outer membrane of the shell started in the air cell area, peeling is more tolerable. The outer membrane is the thin clear translucent membrane attached to the inside of the eggshell.
- However, after I do all of the above, I find the best way is to run cold tap water over the egg while removing the shell which helps a lot.

❓ FAQs
The dark brown spots – or you may see them as orange or reddish-orange – are where the egg touched the hot tin while baking in the muffin pan in the oven. Nothing is wrong with the egg. It’s still good to eat. You can remove the brown spot if it bothers you.
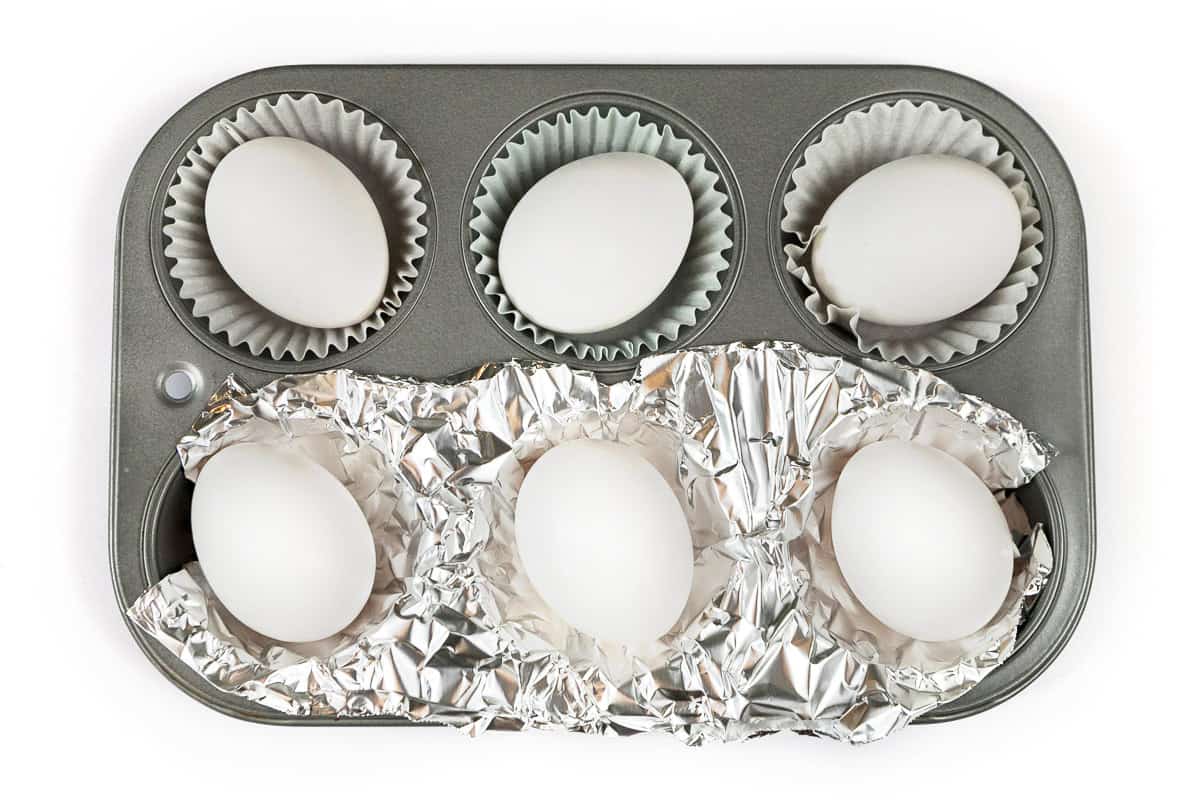
We did a test to see which technique worked the best to eliminate the brown spots. On one side of the muffin pan, we put a single cupcake holder in one of the cups and two cupcake holders in another cup and laid an egg in each one. Then we put heavy-duty aluminum foil on the other side of the muffin pan and laid the eggs on the aluminum foil. We baked them for the same amount of time and the same temperature – 30 minutes at 325 degrees Fahrenheit.
Test Results – both the single-layer cupcake holder and the double-layer cupcake holder produced a brown spot on each of the eggs. The aluminum foil did not produce a brown spot on the eggs, except a tiny spot on the outer membrane of one egg. The best results were tested on a silicone muffin pan and there were no brown spots on the eggs.
So if the little brown spot on each egg bothers you, you can use aluminum foil or buy a silicone muffin pan. I have read that you can use a casserole dish, but I have not tried that yet. If you have, let me know how it worked out.
⭐️ Why Didn’t My Hard-Boiled Eggs Baked in the Oven Turn Out?
🌟Altitude – One factor could be the altitude if you live above 3,000 feet. If you live at a higher elevation, that can affect baking times and temperatures. Certain foods take longer to cook, for example, boiling eggs or baking eggs in the oven. I’ve read that you need to increase the temperature by about 15 to 25 degrees Fahrenheit and reduce the time by about 5 to 8 minutes or so, but I can’t test those times and temperatures because I live at 574 feet above sea level.
✨ Oven Difference – Another reason could be your oven may be a few degrees off, such as bakes hotter or not as hot as mine.
🥚 Does the Type of Egg Matter?
🌟 Don’t Use Fresh Eggs – I’ve read a few other hard-boiled egg recipes online, and some say not to use fresh eggs, but to use older eggs, at least about 5 days old or more is better. Some say one to two weeks old.
✨ Don’t Use Cold Eggs – Some recipes also say to let the eggs sit at room temperature for a few minutes, like 10 to 15 minutes before baking.
With that said, I didn’t obey these two rules when I baked hard boiled eggs today and they turned out just as I expected, perfect hard-boiled eggs. Well, I guess maybe the eggs were at room temperature for however long it took me to get out of the Walmart and drive through the traffic to get home. It was about 15 minutes. Also, how old are eggs by the time we buy them in the store? Good question! But be aware of these two factors just in case.
The Bottom Line: I have baked hard-boiled eggs in the oven countless times, and they always turn out great. If you are having any issues with baking hard-boiled eggs in the oven, I would suggest doing a test run by putting one or two eggs in the oven, then, after that, you can figure out what went wrong.
📄 Final Thoughts
Too many times many of us may have ruined hard-boiled eggs with the boiling pot of water method. Maybe the eggs were cooked too long, or maybe not long enough. Or some of the eggs decided to crack while in the boiling water. So, we tried the muffin tin method and baked the eggs in the oven, and they turned out great. We are always happy with the results.
If you haven’t tried the muffin tin way of cooking hard-boiled eggs, you must! The eggs come out perfect every time! It is so hard to mess up this recipe! So put the saucepan back into the cupboard, and get the muffin tin out. I hope this simple method of baking hard boiled eggs in the oven becomes your favorite method.
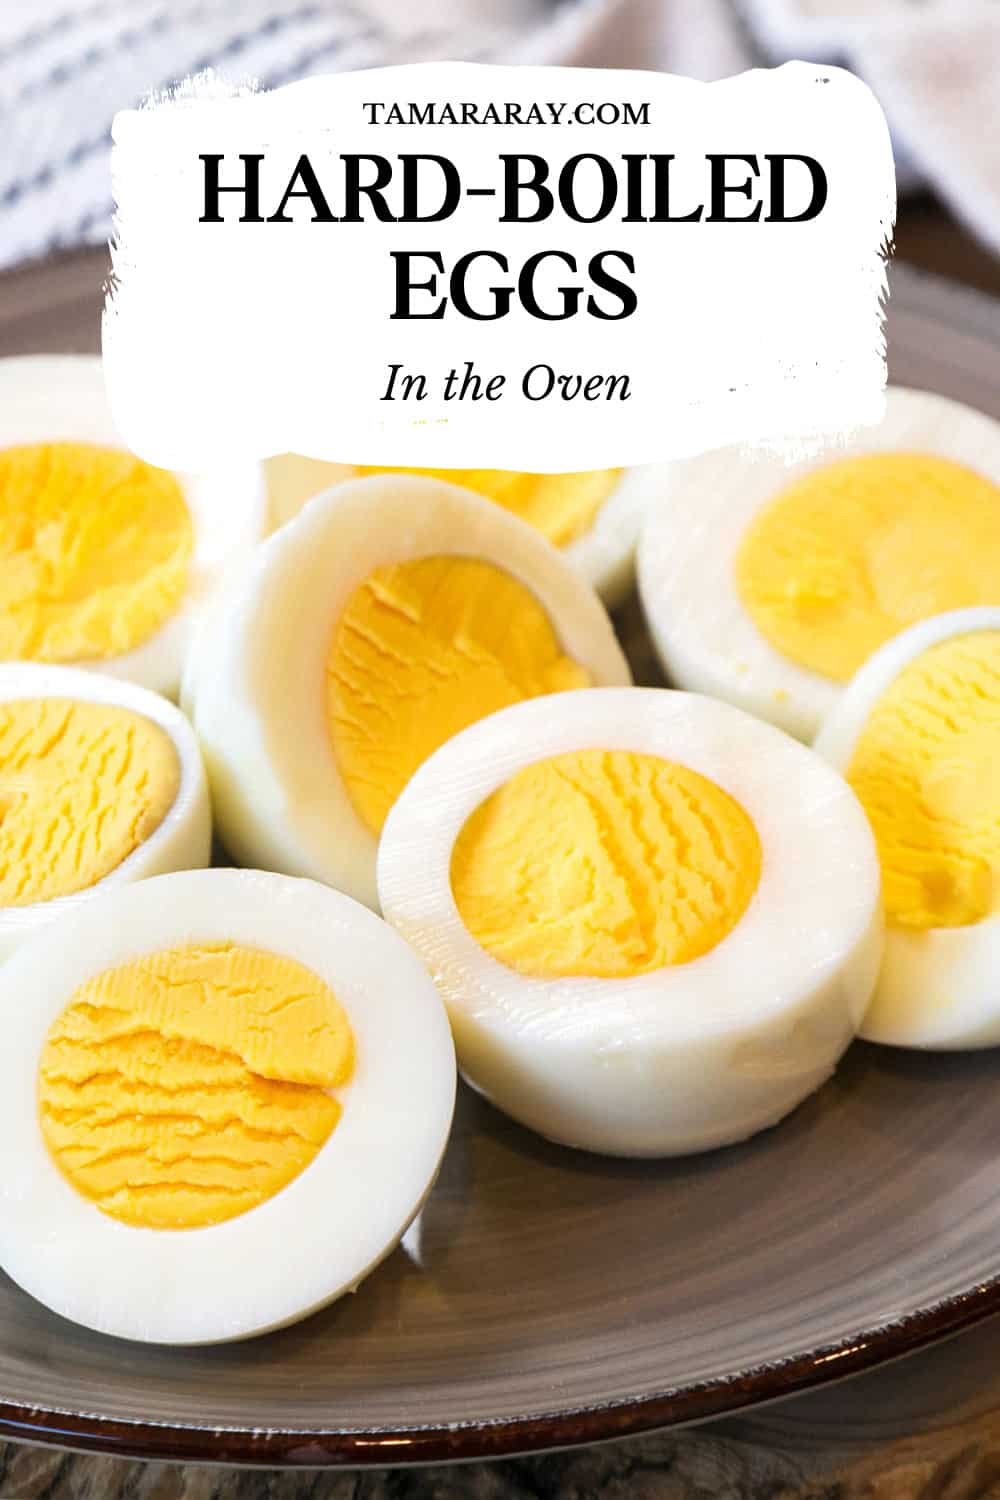
These perfect hard boiled eggs baked-in-the-oven look perfect, they are delicious, and they are healthy for you. You can also toss some sliced hard-boiled eggs on top of a lettuce salad and add your favorite salad dressing. And don’t forget about using hard-boiled eggs in a cobb salad or avocado salad.
📂 Recipe Card
Hard Boiled Eggs in the Oven Recipe
🧂 Ingredients
- 12 eggs
- 1 bowl ice water (for cooling)
👩🍳 Instructions
- Preheat the oven to 325 degrees Fahrenheit.
- Put eggs in the muffin pan.
- Place the muffin pan in the oven.
- Set the timer for 30 minutes.
- Ice bath – add some ice cubes to a large bowl and fill it with cold water.
- After 30 minutes, remove the eggs in the oven with heat-resistant oven mitts. Put the eggs in the ice water for 10 minutes. This ice bath quickly cools the eggs and stops the cooking process.
- Remove the shells from the eggs and enjoy!
*️⃣ Recipe Notes
- Take note that there will be a tiny little brown spot on the bottom of each egg where it was laying in the muffin pan. Don’t worry, that is normal and there is nothing wrong with the egg. The egg is safe to eat. Try lining the muffin pan with aluminum foil to avoid the brown spots. More info about that is in the post.
- You can use a smaller 6-cup muffin pan to hard-boil 6 eggs if 12 is too much for you.
- Hard-boiled eggs with shells still on them can last up to 7 days in the refrigerator, and about 3 days if the shells are removed.
✨ More Favorite Recipes You Will Love
- Olive Oil Scrambled Eggs (Without Milk) – No milk or butter in the recipe, but with olive oil instead. This recipe takes just a few minutes to make and is so delicious.
- Noodles with Scrambled Eggs (Fried) – Cooked pasta noodles that are fried, then smothered in scrambled eggs. Seasoned with salt and pepper or any other herbs and spices you prefer.
- Teriyaki Chicken Fried Rice (Canned Chicken) – A delicious and healthy chicken fried rice. Ingredients includes scrambled eggs, canned premium chunk chicken breast, onions, peas, and carrots.
A wife, a mother to a son and a daughter, and a grandmother to three granddaughters. Flo loves sharing recipes passed down from her own mother, her mother-in-law, and her grandmother as well as new recipes created with her daughter, Tamara Ray.
More by Flo ➜