
Updated: May 1st, 2024
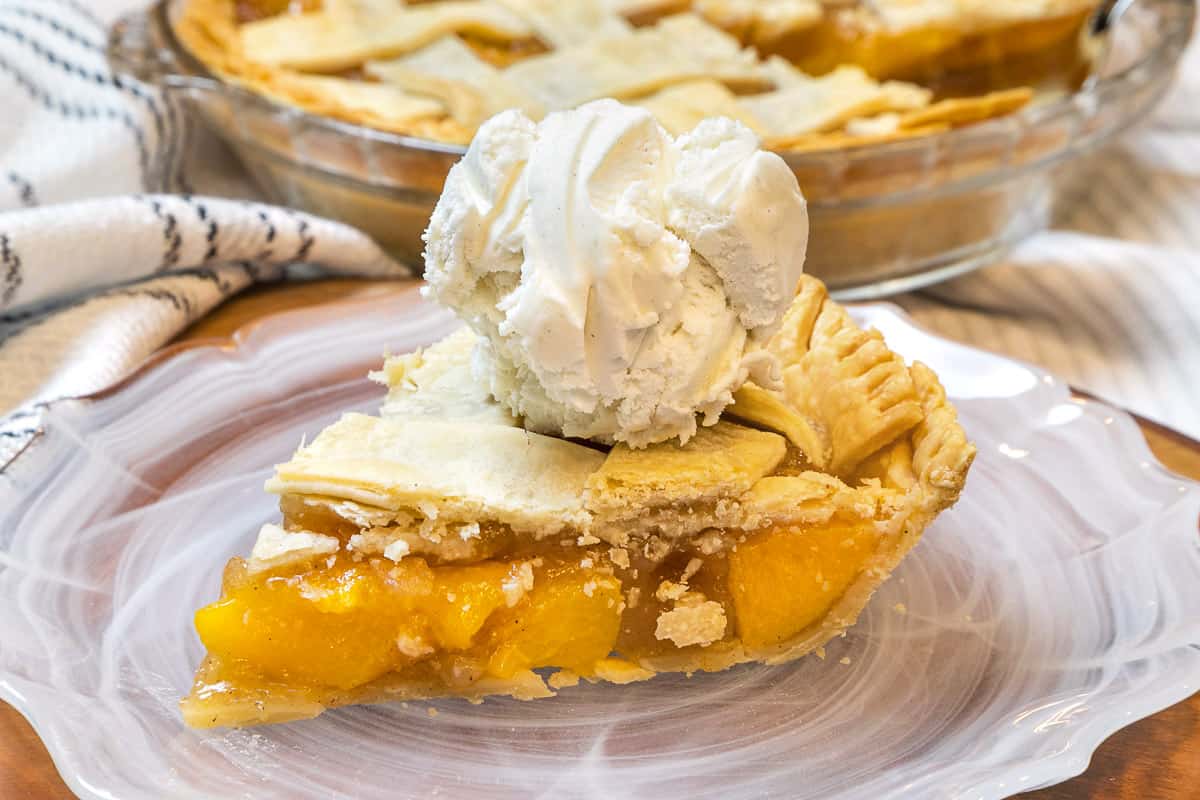
Peach pie with canned peaches is a super easy recipe to make and tastes delicious, especially with a scoop of vanilla ice cream on top. Of course, you can use fresh peaches, but when it’s not peach season, or you just don’t have the time to cut up all of those peaches, using canned peaches is the way to go. Canned peaches also work great with our Bisquick peach cobbler recipe!
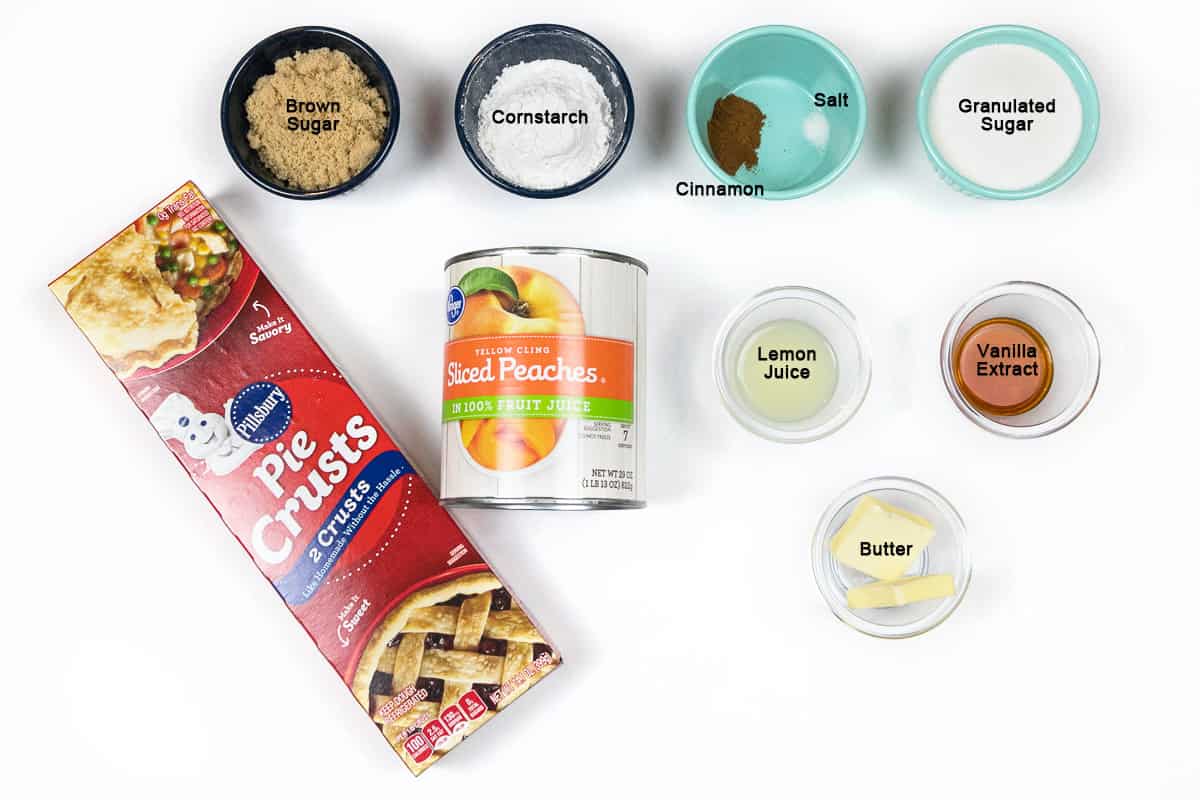
This recipe uses simple ingredients you probably already have in your kitchen at all times, except for the pie crust. But, if you always have the basic ingredients in your kitchen, you can make a homemade pie crust at any given time that uses ingredients such as all purpose flour, salt, butter or vegetable oil, sugar, and water or milk.
The pie we are making requires a double crust, one for the bottom which is put inside the pie dish, and then one for the top of the pie, which we will make a lattice crust design for that.
For this peach pie, we used two ready-made pie crusts that were store bought in the refrigerated section at the local grocery store.
🍑 Key Ingredients
Top Crust & Bottom Crust
- 2 refrigerated pie crusts – from the grocery store (or you can make homemade pie crusts)
Peach Filling
- 1 can of sliced peaches (29 ounces) and the juice from the peaches
- 1/2 cup of granulated sugar
- 1/4 cup of brown sugar
- 1/3 cup of cornstarch
- 1 tablespoon of lemon juice
- 1 teaspoon vanilla extract
- 1/8 teaspoon of table salt
- 1/2 teaspoon ground cinnamon
- 1 tablespoon of butter
For the Top of the Pie Crust
- 1 tablespoon unsalted butter (melted)
🥧 How to Make Peach Pie
These step-by-step instructions are accompanied by detailed photos for enhanced clarity and guidance.
The peach pie prep time for this recipe is about 20 minutes. It includes setting out the refrigerated pie crust on the countertop for 15 minutes, getting your can of peaches from the pantry, and measuring all of the ingredients.
Step 1. Set Out the Pie Crust at Room Temperature
Take the 2 pie crusts out of the refrigerator and let them sit on the countertop at room temperature to soften up the dough a bit. This usually takes about 15 minutes.
Step 2. Preheat the Oven
After that, preheat the oven temperature to 350 degrees Fahrenheit.
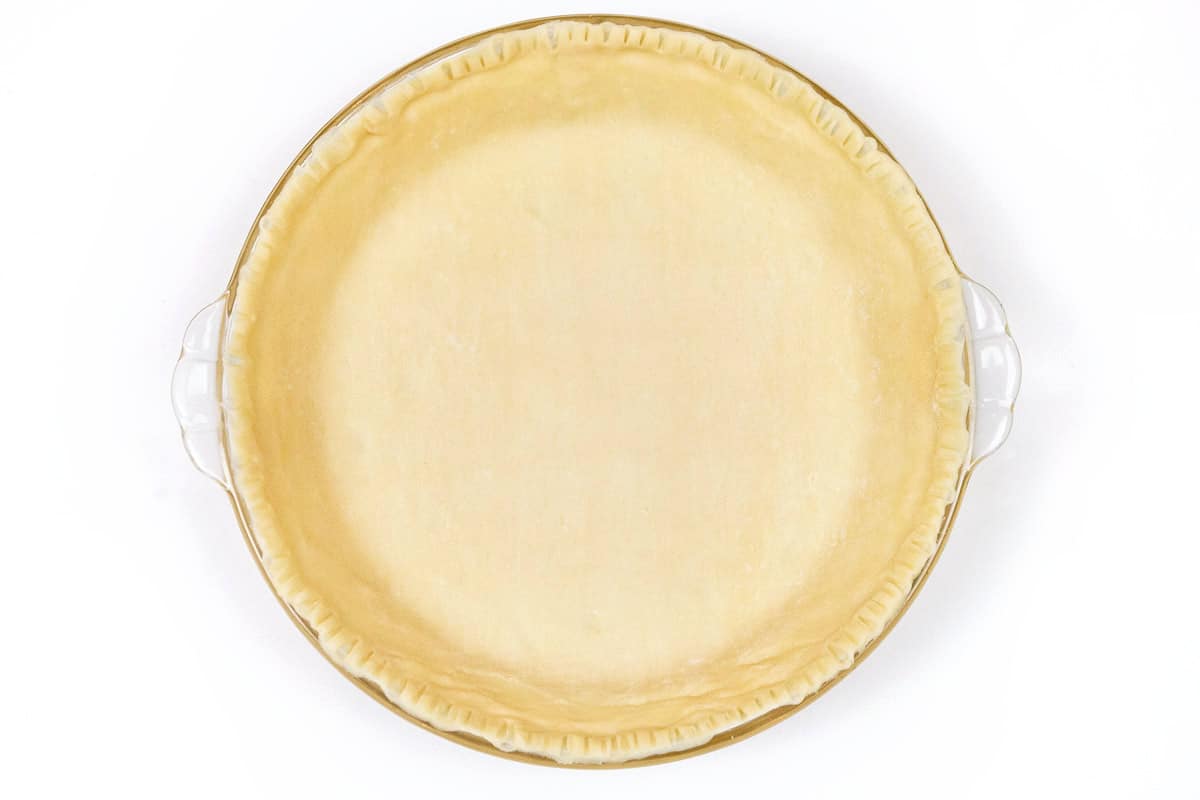
Step 3. Prepare Bottom Pie Crust
While the oven is warming up and the pie crust has softened, take one pie crust and place it evenly in a 9 inch pie pan, or glass pie dish.
You can put a decorative design around the edges of the pie crust if you choose to. To do that, take a fork and very lightly press down all around the rim of the pie shell. After that, set it aside for now or in the refrigerator if you prefer while we do the next few steps.
Step 4. Drain the Juice from the Peaches into a Saucepan
The next step is to dump the can of peaches into a colander and let the juice from the peaches drain into a medium saucepan.
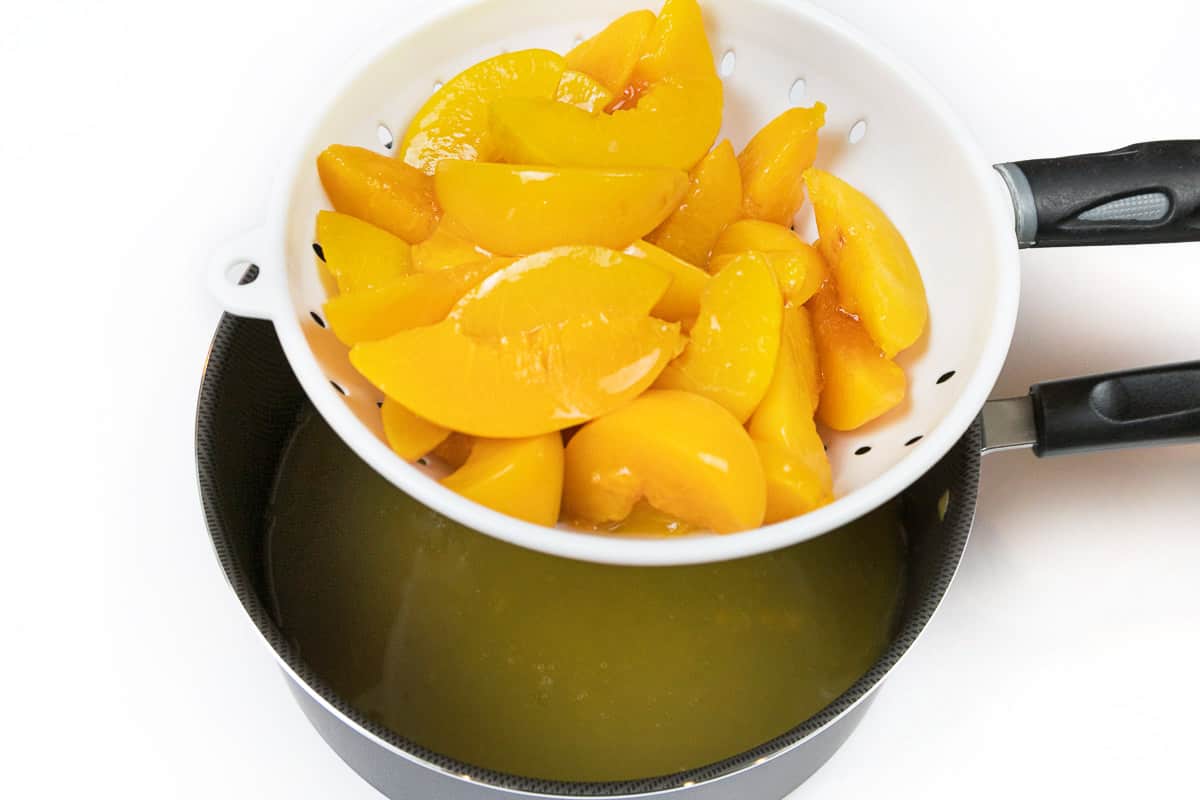
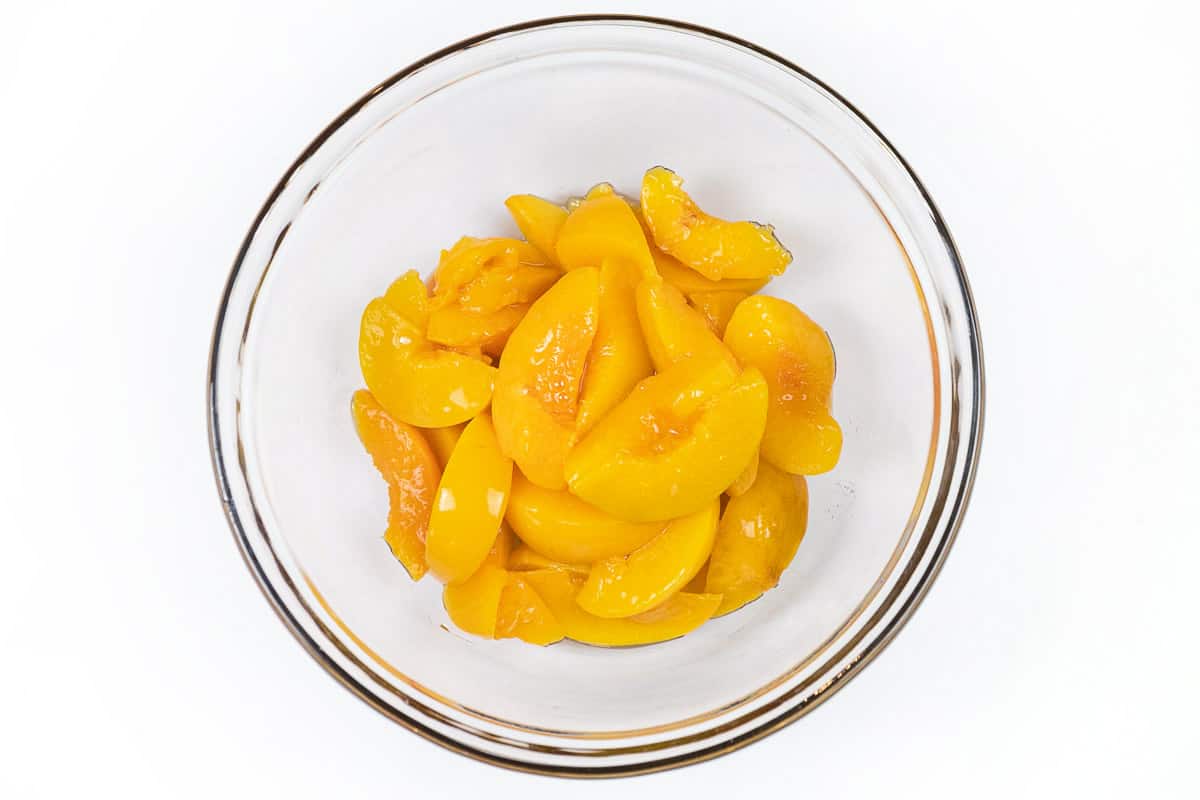
Step 5. Put the Peaches into a Bowl
Pour the peaches into a large mixing bowl and then set the peaches aside for now.
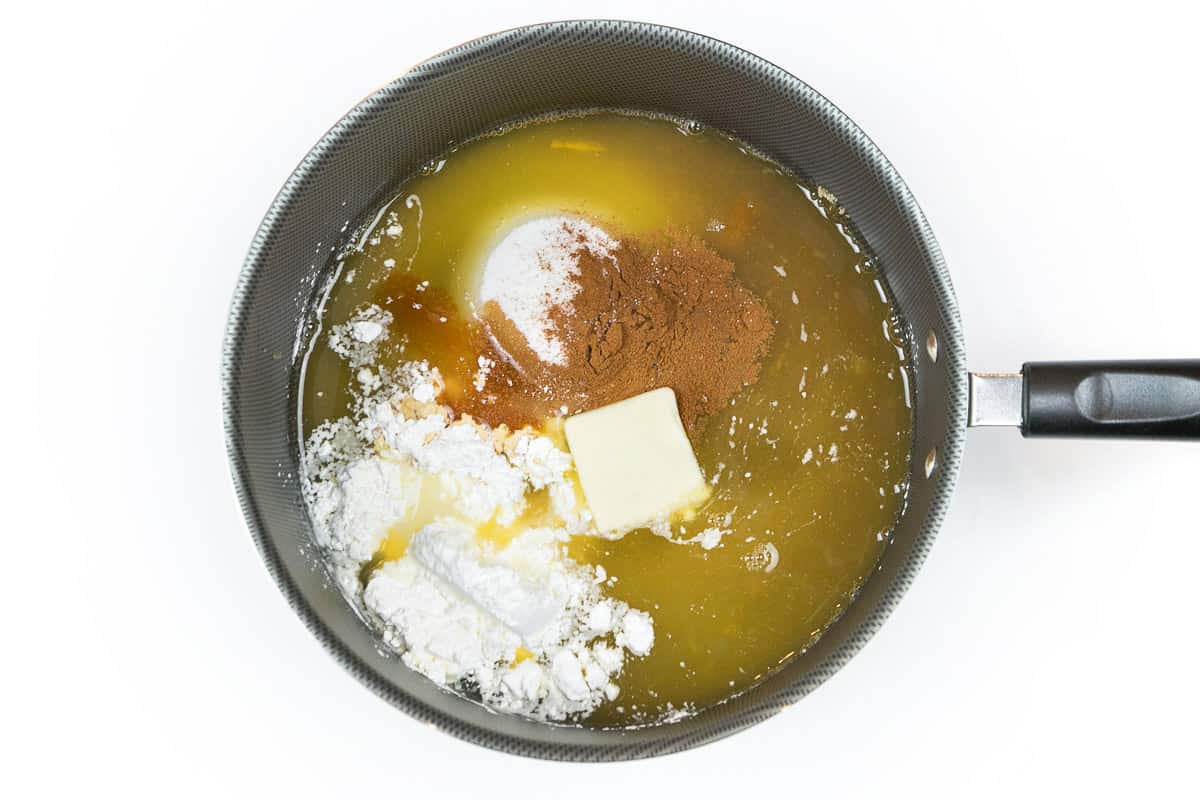
Step 6. Prepare the Pie Filling with the Juice from the Peaches
To prepare the pie filling, first, we need to thicken the juice from the peaches. Add 1/2 cup of granulated sugar, 1/4 cup of brown sugar, 1/3 cup of cornstarch, 1 tablespoon of lemon juice, 1 teaspoon of vanilla extract, 1/8 teaspoon of table salt, 1/2 teaspoon of ground cinnamon, and 1 tablespoon of butter together with the juice from the peaches in the saucepan.
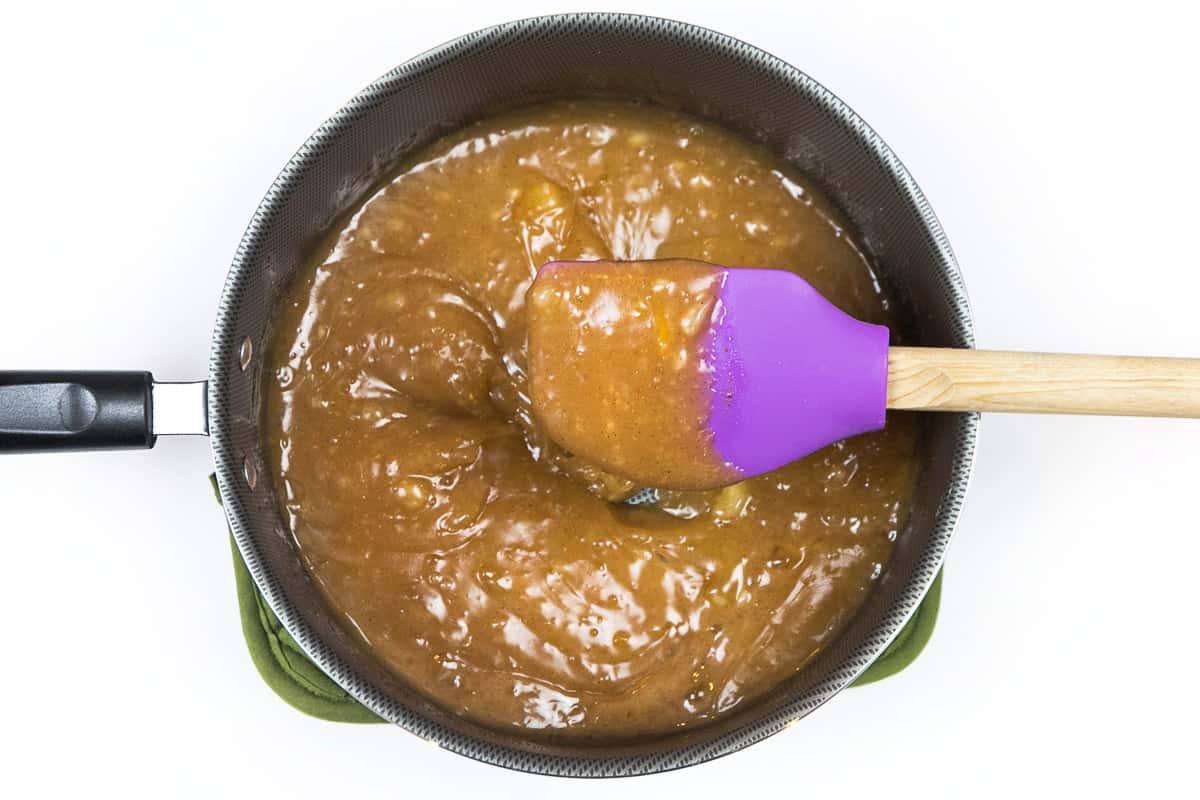
Step 7. Cook the Juice Mixture
Put the saucepan on the stove and turn the heat to medium-high, stirring constantly. The juice mixture will start to bubble. Make sure to keep stirring while the mixture thickens. When the sauce is ready it will cover the spatula and be very thick.
It doesn’t take very long for the mixture to thicken, so keep an eye on it. Only about 5 minutes or so depending on your burner. If your burner produces hotter heat than mine, reduce the heat to medium. You want the juice mixture to bubble, not boil.
Please do not set a timer and walk away from the juice mixture. It needs to be stirred constantly until done, or it will scorch the bottom of the pan. After the juice mixture thickens, remove it from the heat, then turn the burner off.
Step 8. Add the Thicken Juice Mixture to the Peaches
Pour the thickened juice mixture together with the large bowl of peaches we set aside earlier.
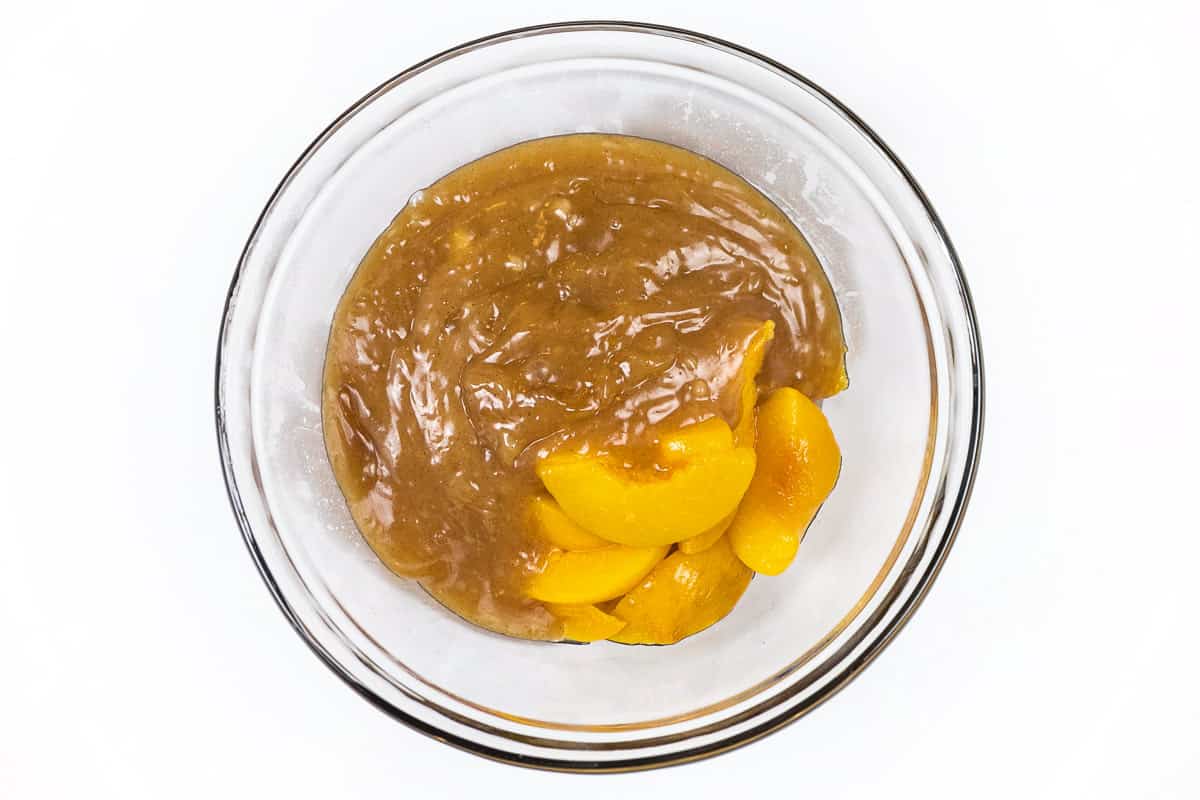
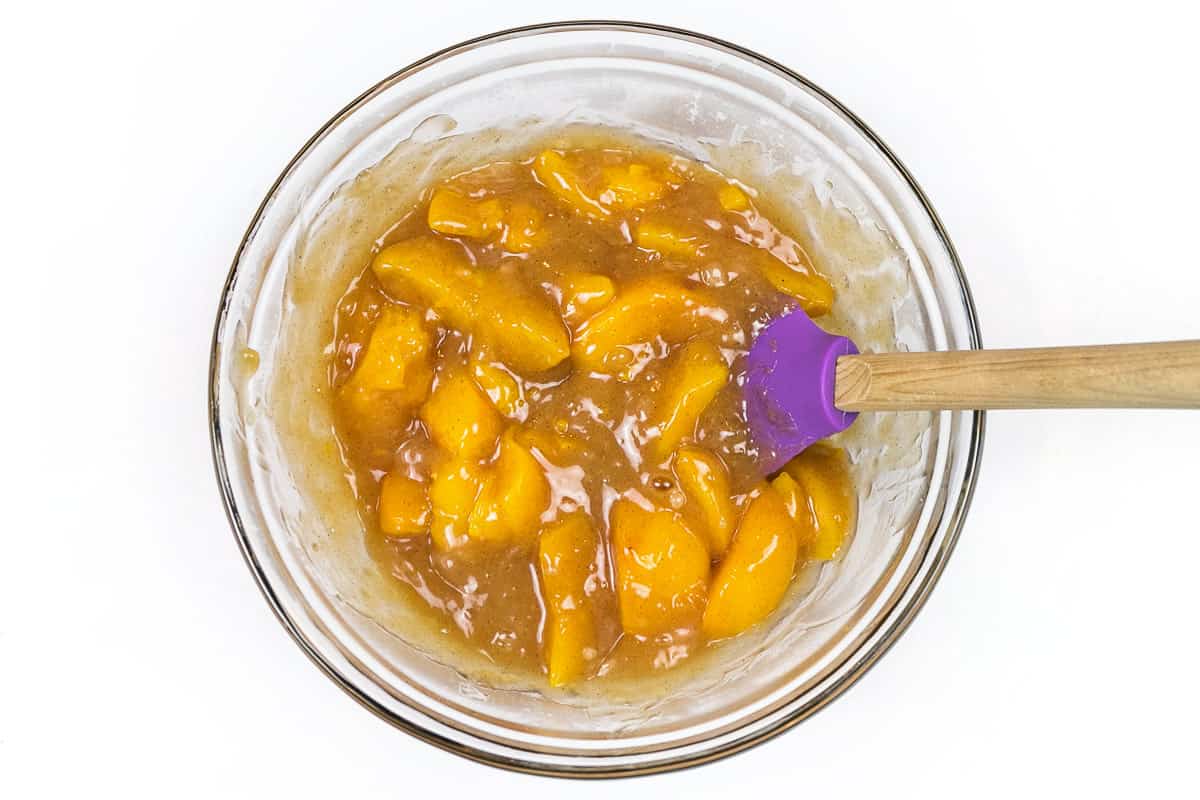
Step 9. Mix the Thickened Juice and Peaches Thoroughly
Using a spatula or a spoon, stir the peaches together with the juice mixture thoroughly. We are now done making the peach mixture (peach filling) for the peach pie.
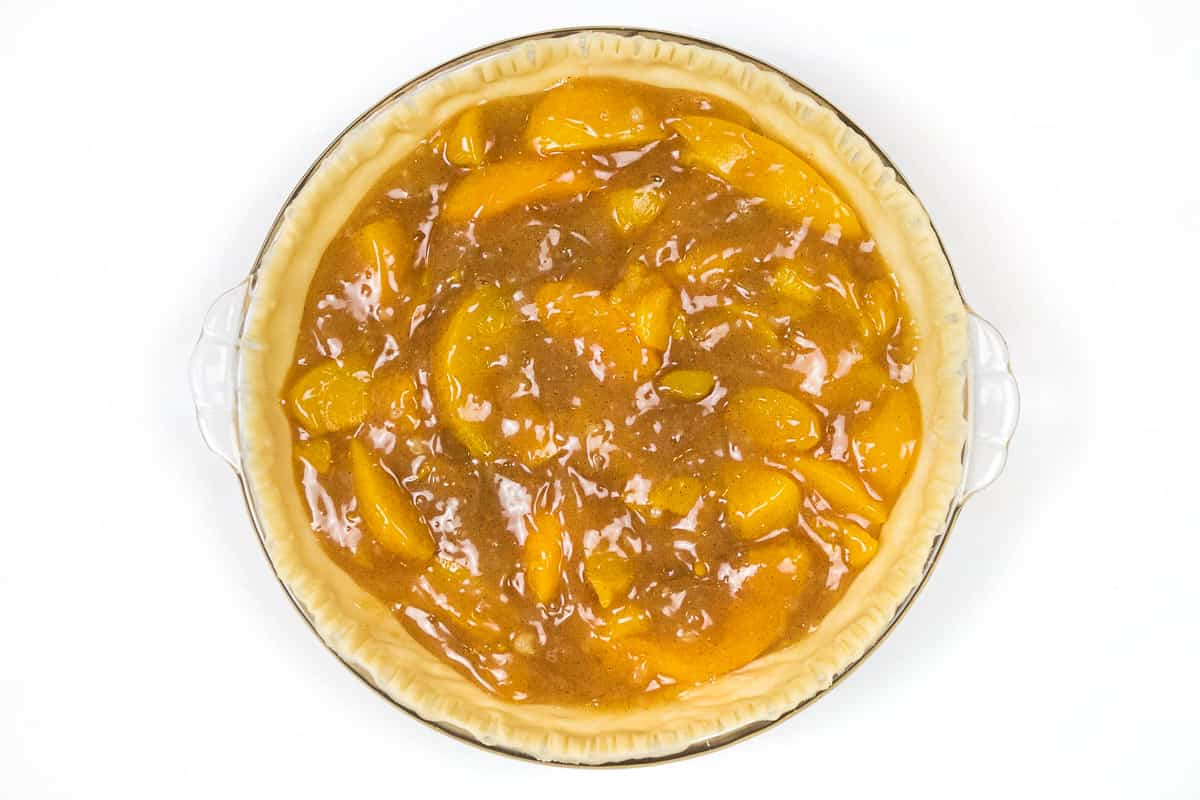
Step 10. Pour the Peach Filling into the Pie Dish
Dump the bowl of peach filling into the pie shell in the pie dish. We now have the bottom pie crust filled with the peach fruit filling. Set aside for now until later.
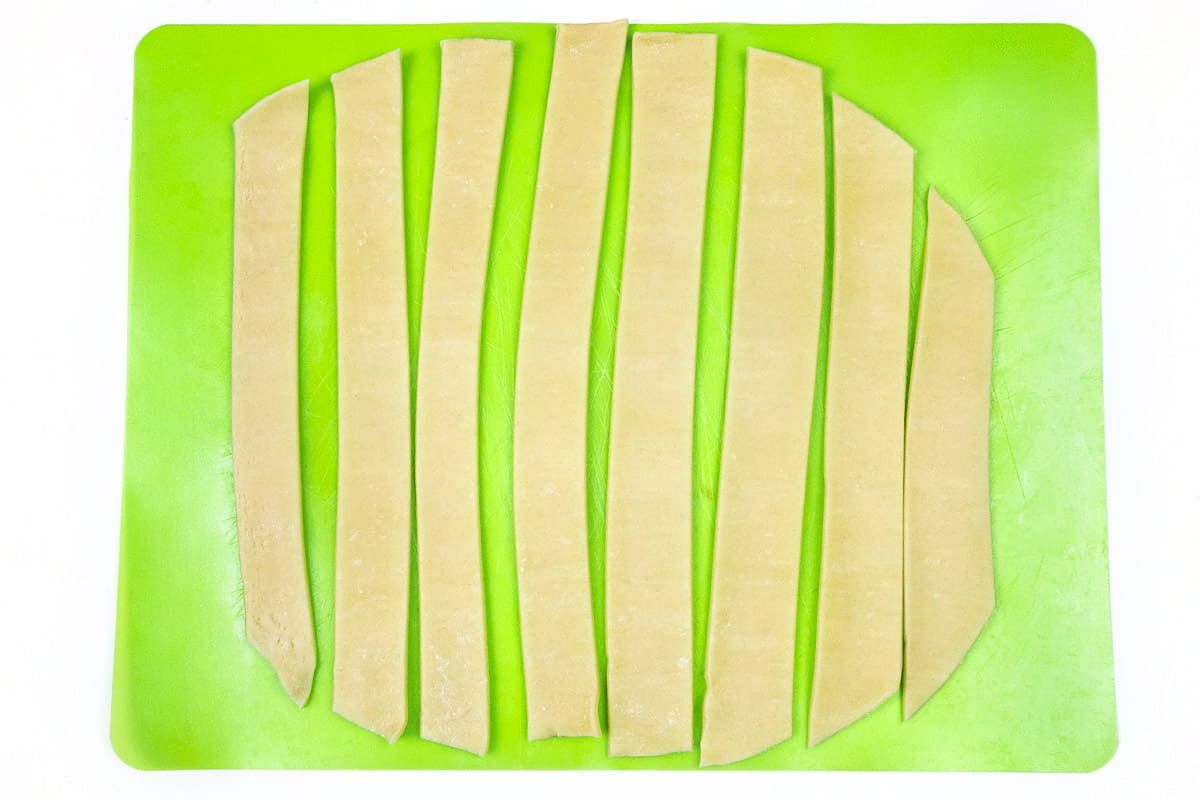
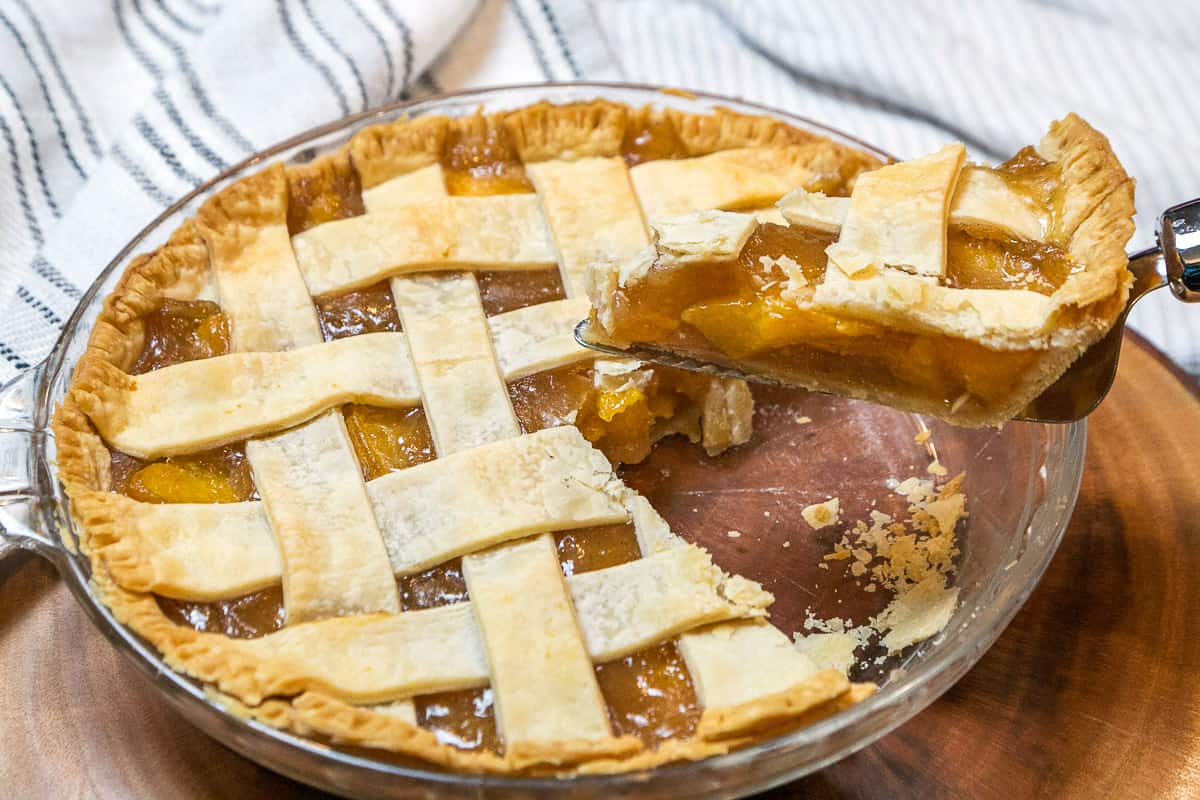
Step 11. Prepare the Lattice Top
We are now ready to use the second pie crust we left out on the countertop. Take the dough out of the package and unroll it on a flat working surface. With a pizza cutter or a knife, cut 8 equal strips as best as you can, but don’t worry if they are not all the same size.
Note: You can cut more than 8 strips of pie dough if you prefer to, but that will involve more work when we start the lattice design.
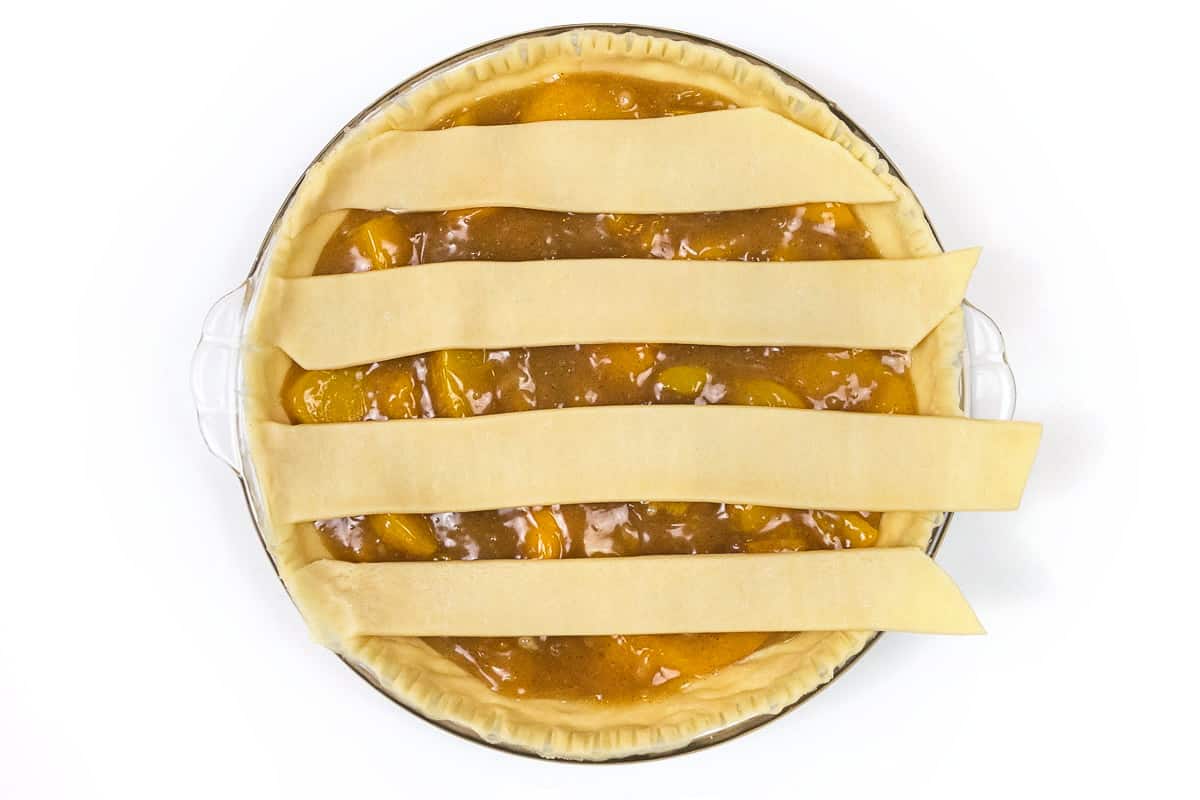
Step 12. Lay the First Four Strips of Pie Dough on the Pie
First, divide the 8 strips of dough into 2 piles. Take 4 of the strips of pie dough from the first pile and lay each one across the top of the pie filling from the left side of the pie to the right side of the pie in a straight, leaving about an inch gap in between each strip.
On the left side of the pie dish, press the 4 edges of each strip of dough into the edge of the bottom pie crust so the dough strips will stay put.
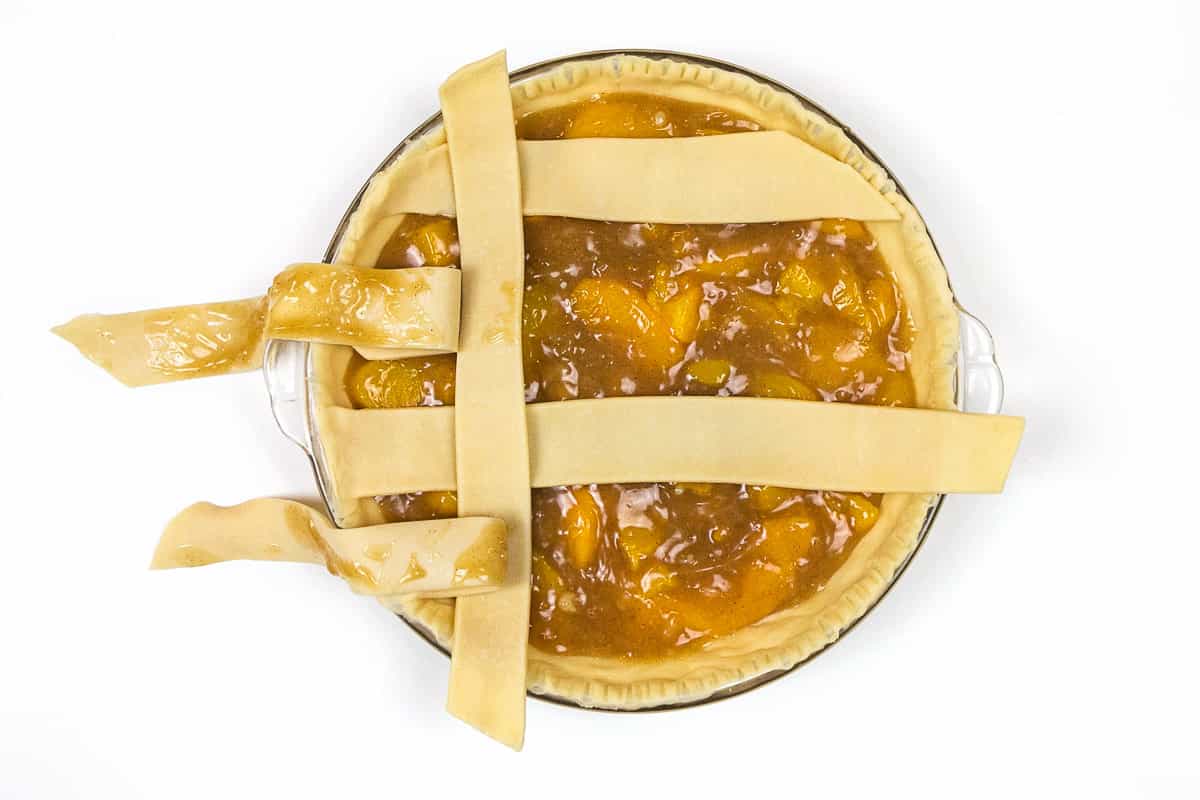
Step 13. Work the Other Four Strips of Pie Dough
This isn’t tricky at all. Start at the top of the pie. Take the 2nd and 4th strips of the pie dough already on the pie and fold them back toward the left side of the pie.
Then lay a new strip of dough from the second pile perpendicular on top of the 1st and 3rd strips of dough already there. Perpendicular is a straight line at a 90-degree angle to a given line. Unfold the 2nd and the 4th strips of dough and put them back to their original position across the pie filling.
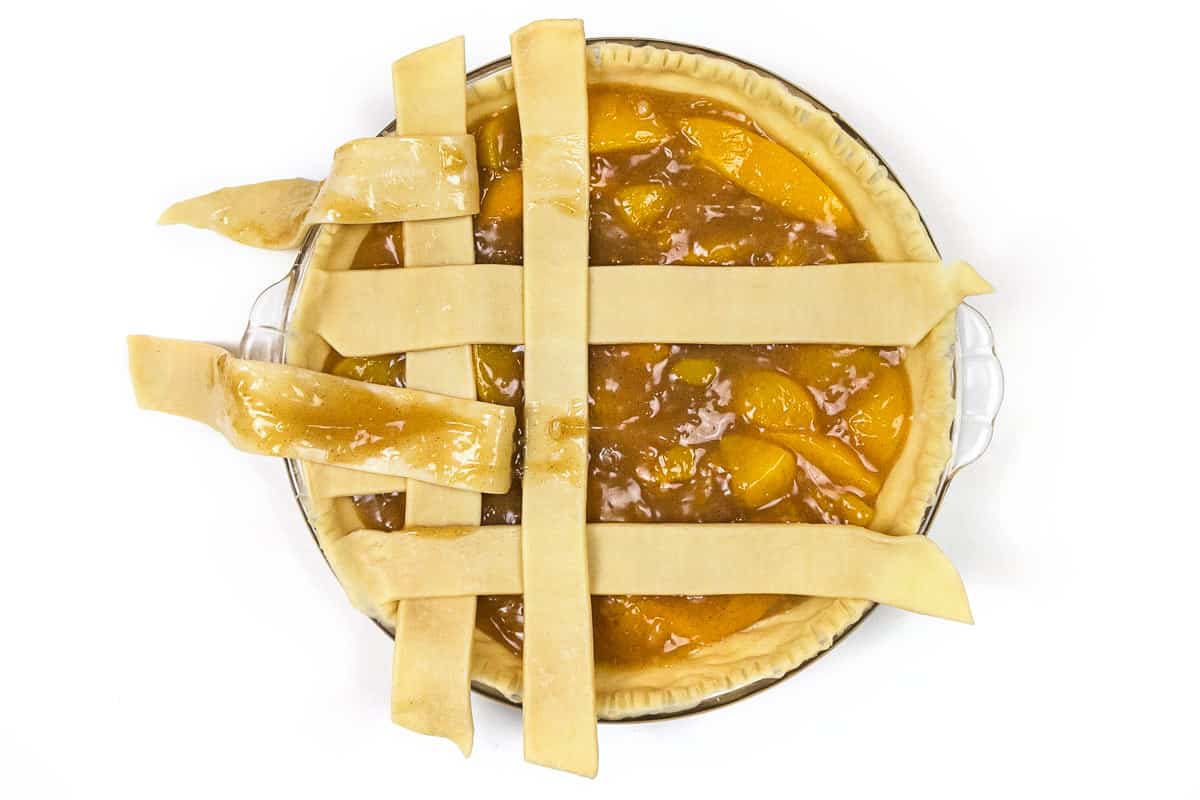
Step 14. Continue the Lattice Design
Then fold back the 1st and 3rd strips of dough toward the left side of the pie.
Lay another strip of dough from the second pile perpendicular across the pie over the top of the 2nd and 4th strips of dough.
Then unfold the 1st and 3rd strips of dough back to their original position across the pie filling.
Continue following the same process as before until all of the strips of dough are used from the second pile.
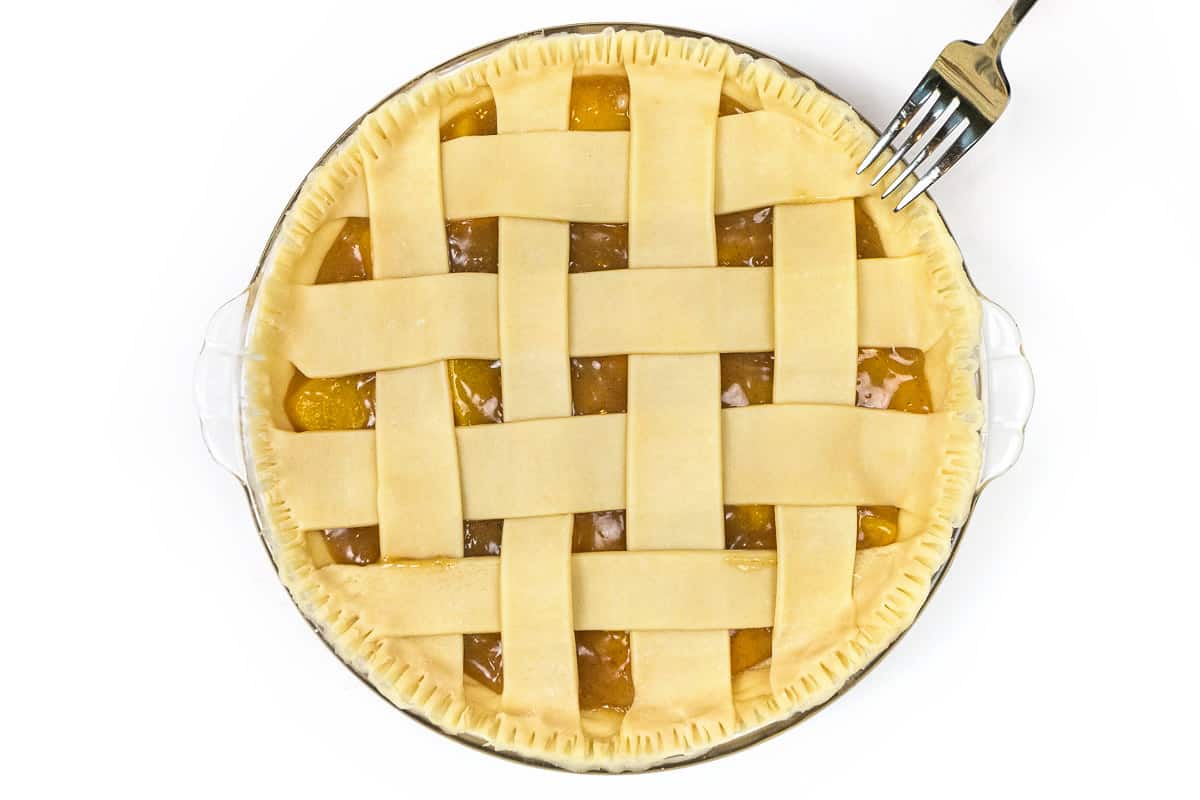
Step 15. Cut off Excess Dough
If there is any excess dough hanging over the edge of the pie, trim that off with kitchen shears or a knife. Then use a fork to crimp the lattice strips of dough to the outer rim of the pie crust.
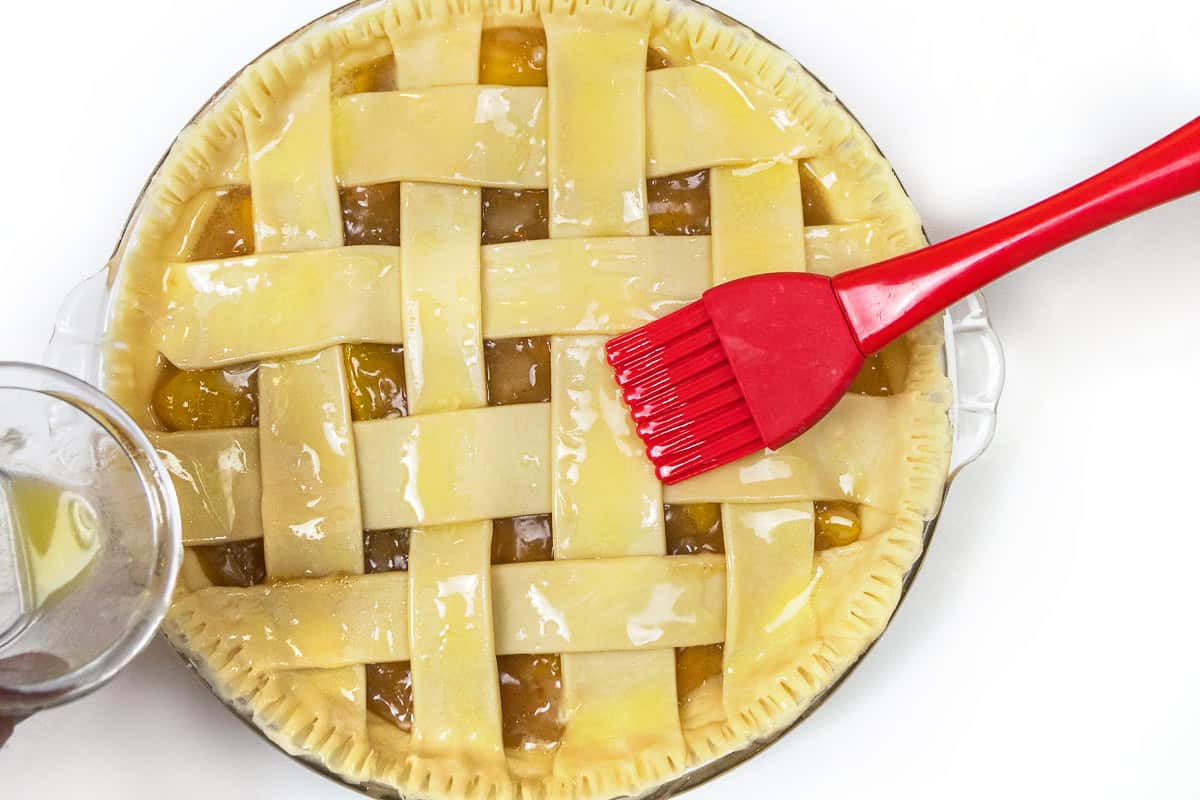
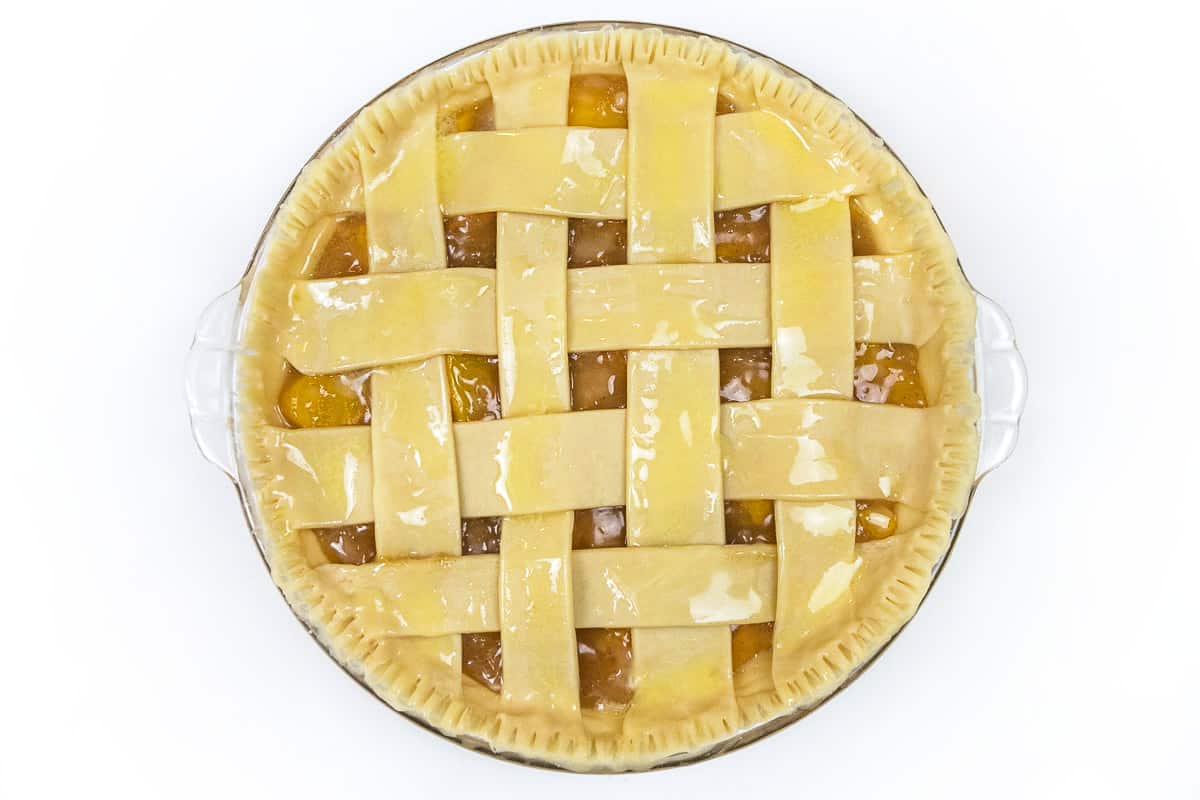
Step 16. Brush Melted Butter on Top of the Lattice
Melt 1 tablespoon of butter in a microwave-safe bowl in the microwave for 20 seconds. Brush the melted butter across the top of the lattice dough with a pastry brush,
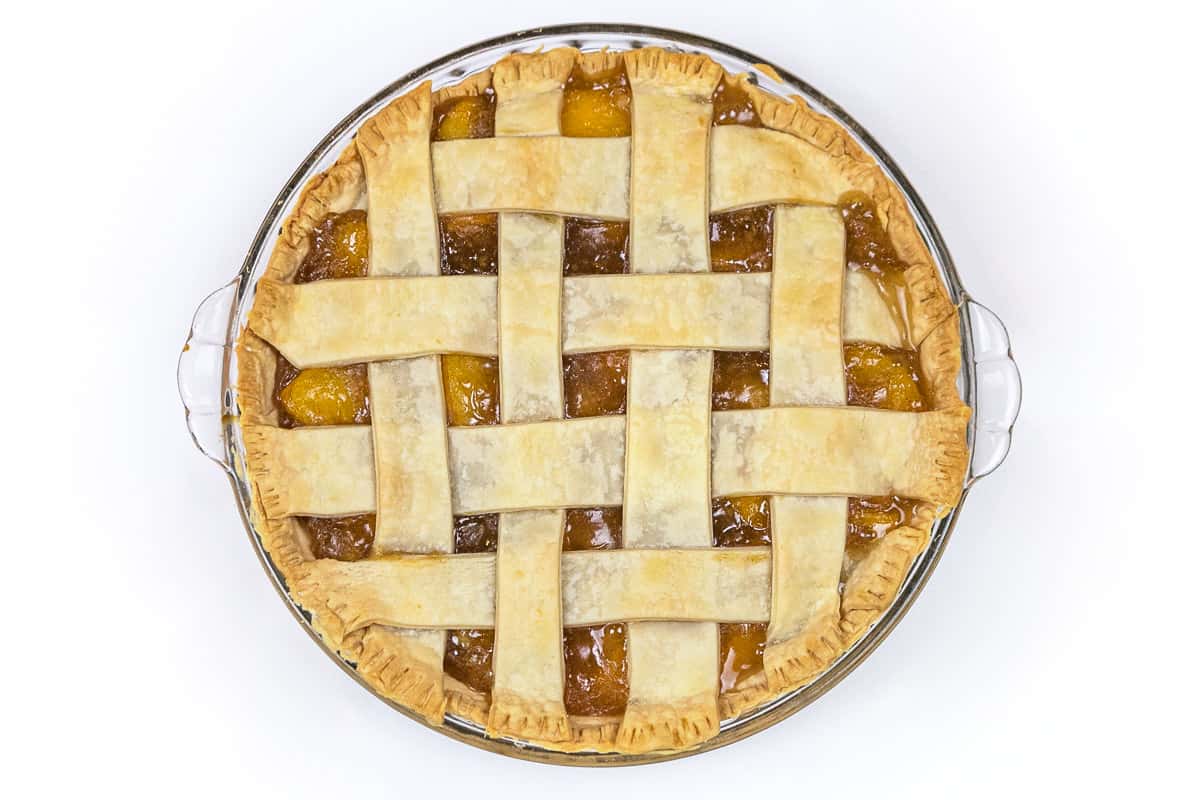
Step 17. Bake the Peach Pie
After the melted butter is applied across the pie crust, put the pie into the oven and bake at 350 degrees Fahrenheit for 40 to 50 minutes, or until the crust is a light golden brown color.
Step 18. Check on the Peach Pie During the Baking
Most ovens probably bake about the same, but that is a big probably! From my experience, a lot of ovens don’t bake the same. So with that said, make sure to check on the peach pie toward the end of the baking time. We don’t want to burn the crust.
Tip: If you notice the edges of the pie crust are getting too brown for your liking, but there is still more baking time needed to finish the pie, you can wrap some strips of aluminum foil around the outer part of the pie dish covering the edges of the pie crust. Or you can use a silicone pie shield that is much easier to use. Just place it over the pie crust and that’s it.
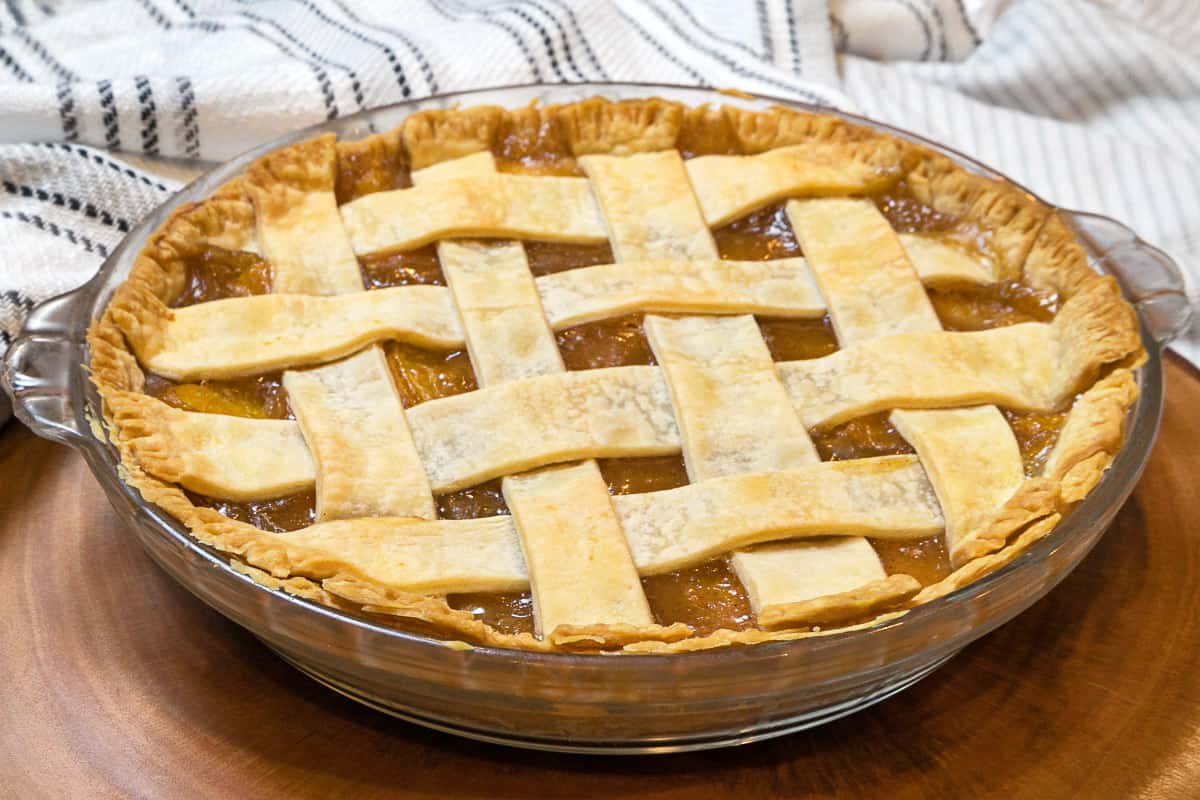
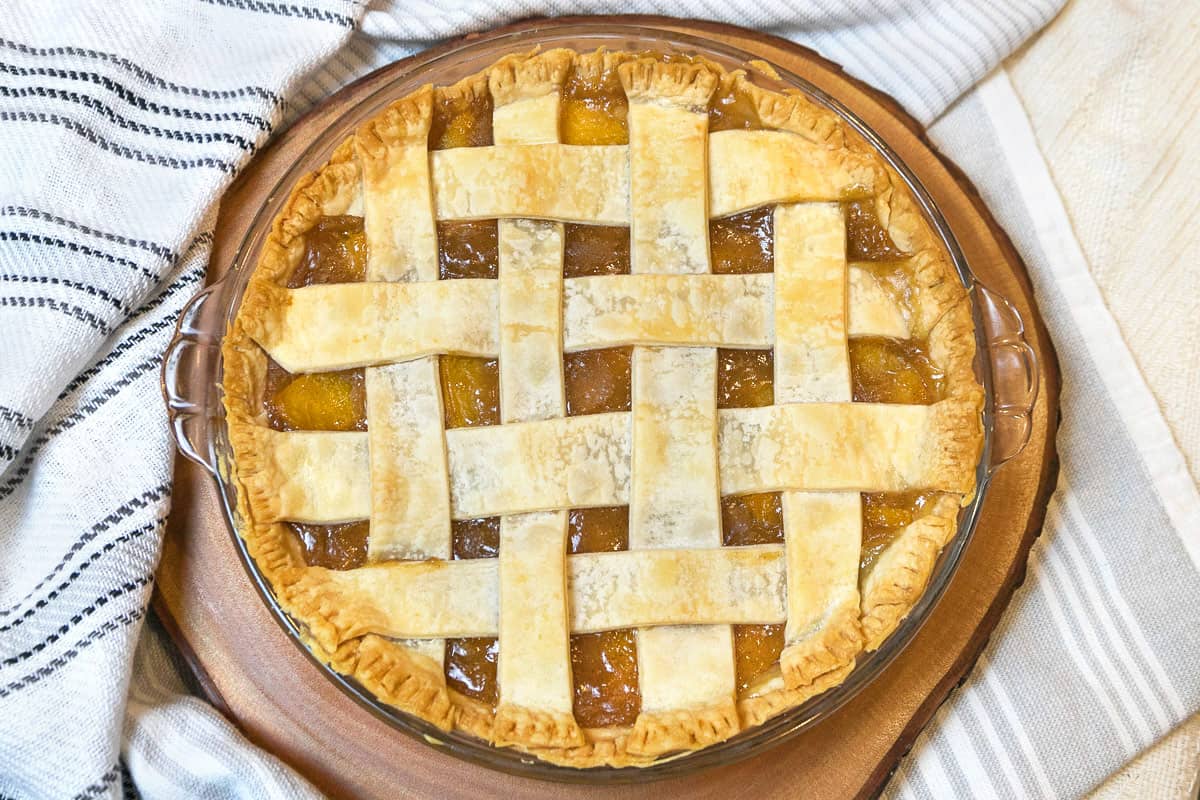
Step 19. Let the Pie Cool Completely
Put the pie in the refrigerator for about an hour so it can cool and the fruit filling can set. If you like hot pie right out of the oven, expect the peach filling to spread around in the dish when you cut the first slice.
Cover the pie with plastic wrap or aluminum foil, and store the peach pie in the refrigerator. The same goes for any leftovers, store the covered pie in the refrigerator.
🔪 Recipe Variations
🔹 Instead of buying store-bought ready-made pie crusts, you can make a homemade pie crust. It is very easy and simple to do. If you always have flour, sugar, salt, milk, and butter in your kitchen, you have everything you need to make a delicious homemade pie crust.
🔸 If you prefer not to use canned peaches, you can buy fresh peaches when they are in season. Just make sure to buy ripe peaches, not hard ones. You would have to add a bit more sugar to the ingredients since canned peaches do have added sugar in them.
🔹 You can put an entire pie crust on top of the pie filling instead of the lattice design. If you do, make sure to cut a few slits in the pie dough before baking it in the oven. This is to allow the steam to escape.
🔸 Instead of the lattice design or an entire crust for the top of the pie, you can do a streusel topping. Mix 1/2 cup of all-purpose flour, 1/2 teaspoon of cinnamon, 1/4 cup of sugar, and 1/2 cup of cold butter. Mix until crumbly, then sprinkle it over the fruit.
🙋 FAQs
A fruit pie can be runny if the liquid part of the fruit filling wasn’t thickened enough during the cooking process. The liquid from the fruit should slowly run off of the spoon when you are cooking it, then it is done.
Another reason a fruit pie can be runny is if you cut a slice of it right after you have taken it out of the oven. The filling is still hot and hasn’t had the chance to set yet. Put the pie into the refrigerator for at least an hour or so to cool.
Yes, any leftover peach pie can be put into the freezer. Place the pie in a freezer-safe airtight container. I like to cut the pie into slices, then put each slice in a ziplock bag or container. That way, when I want a piece of pie, I can take one slice out of the freezer instead of dealing with a whole pie.
💡 Final Thoughts
If you love desserts and love to bake, then you are going to love making this homemade peach pie recipe. It is also a very easy peach pie recipe to make, and one your family will want you to make again and again. Enjoy!

📄 Recipe Card
Peach Pie with Canned Peaches
🫕 Equipment
- Pie plate (9-inch)
- Colander (optional)
- Pastry Brush (optional)
🧂 Ingredients
For Bottom Crust and Lattice Top
- 2 unbaked refrigerated pie crusts (premade from the grocery store or you can make homemade pie crusts)
Pie Filling
- 1 can peaches (29 ounces – sliced plus the juice)
- 1/2 cup granulated sugar
- 1/4 cup light brown sugar
- 1/3 cup cornstarch
- 1 tbsp lemon juice
- 1 tsp vanilla extract
- 1/8 tsp table salt
- 1/2 tsp ground cinnamon
- 1 tbsp unsalted butter
For the Top of the Pie Crust
- 1 tbsp unsalted butter (melted)
👩🍳 Instructions
The Oven
- Preheat the oven to 350 degrees Fahrenheit.
The Bottom Pie Crust
- Set the pie crusts on the countertop to soften for 15 minutes.
- After 15 minutes, lay the bottom pie crust evenly in a 9-inch pie dish.
- To crimp a decorative design, use a fork to press lightly all around the edge of the pie crust. Set the pie shell aside for now or put it in the refrigerator.
The Peach Filling
- Using a colander, drain the juice from the can of peaches into a medium saucepan. Put the peaches in a medium bowl and set aside for now.
- To the juice add the granulated sugar, brown sugar, cornstarch, lemon juice, vanilla extract, table salt, ground cinnamon, and butter.
- Put the saucepan with the juice mixture on the burner. Turn the heat to medium-high stirring constantly while the mixture thickens. Mix the juice mixture thoroughly.
- After the juice mixture thickens, remove it from the heat. Turn the burner off. Add the thickened juice mixture to the bowl of peaches we set aside earlier. Mix the peaches and juice mixture thoroughly.
- Pour the peach mixture into the pie crust we set aside earlier. Set aside for now.
Top of the Pie Crust – the Lattice Design
- To prepare the lattice top, take the second pie crust out of the package and unroll it on a flat working surface. Cut 8 strips of dough with a pizza cutter or knife. Make 2 piles, 4 strips of dough in each pile.
- To begin the lattice design, lay 4 strips of dough from the first pile 1 inch apart over the peach pie filling. Then push each strip into the original pie crust on the edge of the left side so it sticks when we lift up the right side.
- Starting at the top, fold back the 2nd and the 4th strips of dough over toward the left side of the pie.
- From the second pile of strips, lay one strip of dough perpendicular to the strips already there.
- Unfold the 2nd and the 4th strips back to their original position.
- Fold back the 1st and 3rd strips of dough over toward the left side of the pie.
- Again, from the second pile of strips, lay another strip of dough perpendicular to the strips already there.
- Unfold the 1st and the 3rd strips back to their original position.
- Repeat until all of the strips are used.
- Cut off any excess dough around the outer edge of the pie.
- Crimp the strips of dough with a fork around the edge of the pie crust.
- Melt butter in the microwave for 20 seconds. Brush the melted butter across the top of the lattice dough with a pastry brush.
Bake the Peach Pie
- Put the peach pie into the oven and bake at 350 degrees Fahrenheit for 40 to 50 minutes, or until the crust is a light golden brown color.
- Put the pie in the refrigerator for about an hour to cool.
*️⃣ Recipe Notes
- A lot of ovens don’t bake the same. Check on the peach pie toward the end of the baking time to make sure the crust isn’t getting too done.
- If the edges of the pie crust are getting too dark, wrap strips of aluminum foil around the outer part of the pie dish covering the edges. or use a silicone pie shield.
- You can make a homemade pie crust instead of a store-bought pie crust.
- You can use fresh peaches when they are in season.
- You can put a full pie crust over the top of the pie instead of the lattice top design. Cut slits to allow for the steam to escape.
- Store any leftover pie in the refrigerator covered in plastic wrap. You can put any leftover peach pie in the freezer for about 6 months. Cover in an airtight freezer-safe container.
✨ More Pie Recipes You Will Love
- Sugar Cream Pie Recipe (Classic) – A creamy vanilla custard filling (without eggs) and a melted butter and cinnamon sugar topping. It is super easy to make and is so good!
- Easy Mississippi Mud Pie – Made with lots of creamy chocolate, a graham cracker crust, and whipped cream in every delicious bite! A chocolate lovers delight!
- Libby’s® Pumpkin Pie Recipe for 2 Pies – The best pumpkin pie is Libby’s® famous pumpkin pie recipe. So easy to make with just the right number of spices. Pumpkin pie tastes great with a scoop of ice cream on top or whipped cream.
- Bisquick Peach Cobbler Recipe (Canned Peaches) – This peach cobbler is so easy to make, with original Bisquick mix, canned peaches, cinnamon, butter, granulated sugar, and milk.
A wife, a mother to a son and a daughter, and a grandmother to three granddaughters. Flo loves sharing recipes passed down from her own mother, her mother-in-law, and her grandmother as well as new recipes created with her daughter, Tamara Ray.
More by Flo ➜