Updated: April 4th, 2024
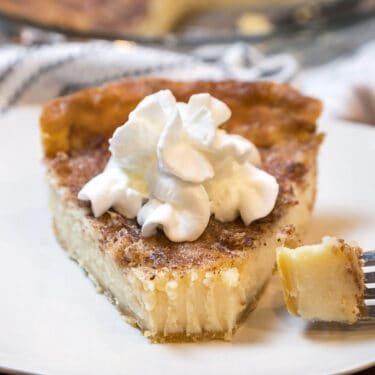
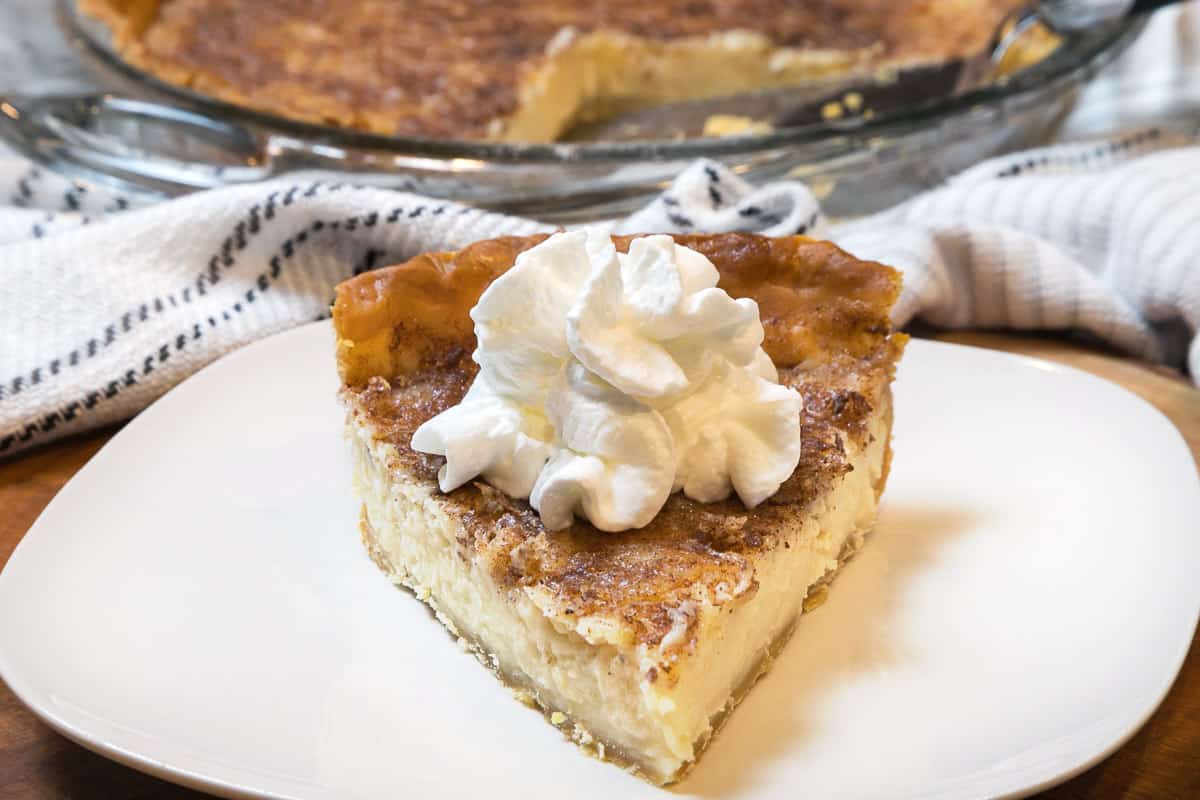
This sugar cream pie recipe is just heavenly! And don’t let the name fool you, there is only 3/4 cup of sugar in it, so that means it doesn’t have any more sugar in it than most other pies.
The melted butter and cinnamon sugar mixture on top of the pie are baked just right over the creamy filling. The cream pie filling in this recipe tastes like vanilla flavor pudding and reminds me of a custard-like pie. It is so good!
👩🍳 Key Ingredients
This old fashioned sugar cream pie recipe uses pantry staples, just simple ingredients you probably already have in your pantry and your refrigerator.
Pie Ingredients
- 1 unbaked refrigerated pre-made pie crust (or a homemade pie crust)
- 4 tablespoons of cornstarch
- 3/4 cup of granulated sugar
- Pinch of table salt
- 2 and 1/4 cups of heavy whipping cream
- 1 tablespoon of vanilla extract
- 3 tablespoons of unsalted butter
Topping Ingredients
- 2 tablespoons of unsalted butter – melted
- 1/4 cup of granulated sugar
- 1 teaspoon of ground cinnamon

🥧 How to Make Sugar Cream Pie
These step-by-step instructions are accompanied by detailed photos for enhanced clarity and guidance.
Step 1. Preheat the Oven
To begin with, set the oven temperature to 375 degrees Fahrenheit.
Step 2. Prepare the Pie Shell
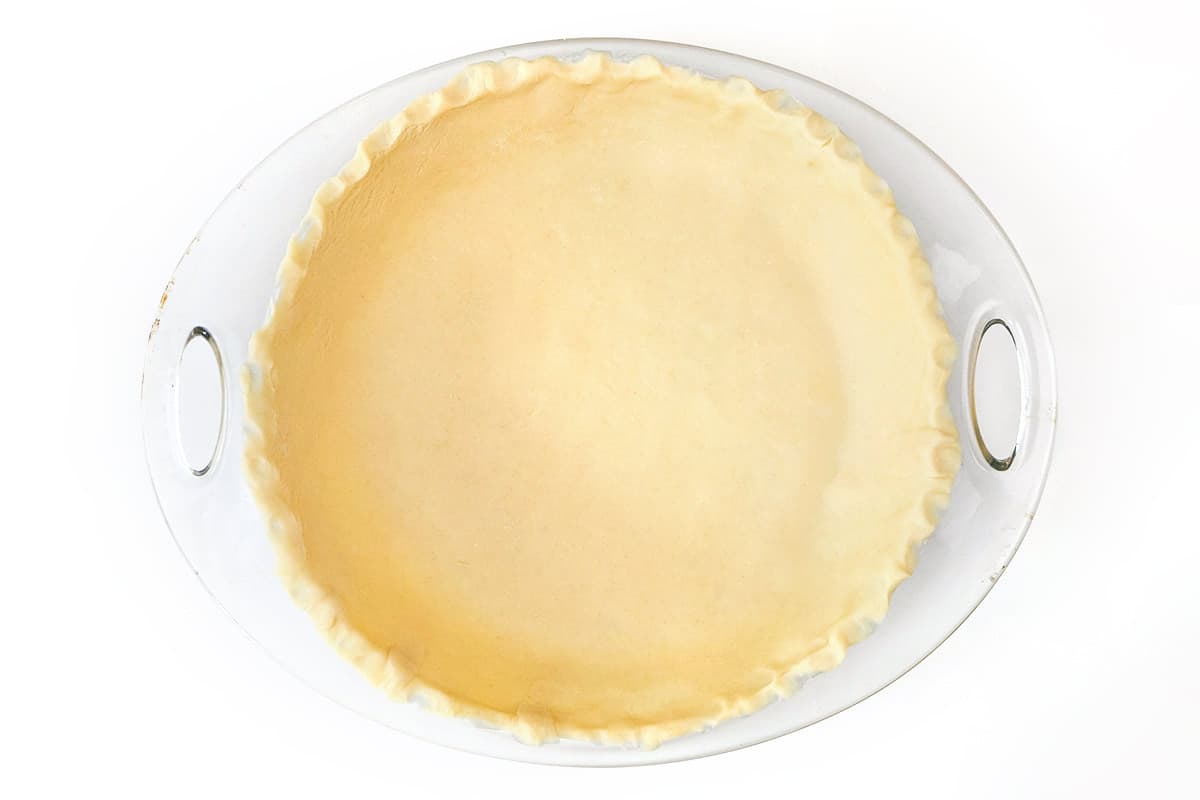
Then, take the refrigerated pie shell out of the refrigerator. After that, let it sit for 15 minutes at room temperature on the countertop to soften it a bit. We made this a simple pie recipe using a store-bought pie crust which is all ready to go into the pie dish. But if you prefer, you can make your own pie crust for this recipe. Different pie crusts can be used, such as a homemade pie crust or a graham cracker crust.
Step 3. Put the Premade Pie Shell into a Pie Plate
Place the premade pie crust into a 9-inch pie plate. You can crimp the edges as we did by using your right thumb and index finger on the inside edge of the pie shell, and then your left index finger on the outer edge of the pie shell (or vice versa) and push the two sides of the pie dough together to form the design.
Tip: You can place the pie plate with the pie shell into the refrigerator for about 30 minutes if you prefer to do so, to prevent shrinkage, although we didn’t do this step and our pie crust baked just fine.
Step 4. Cover the Unbaked Pie Shell
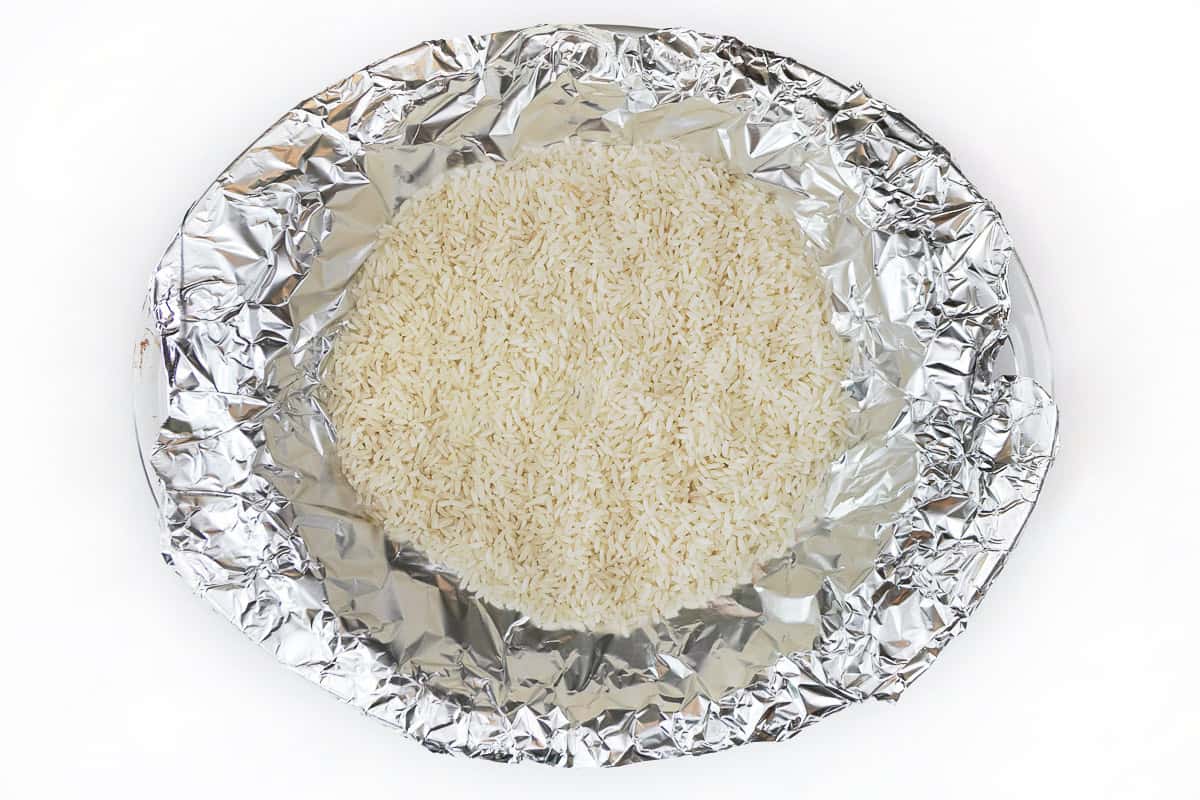
Take a piece of aluminum foil and cover the entire pie shell, starting with the center. You can also use parchment paper instead of aluminum foil if you prefer. Slightly push the center of the aluminum foil down, not too hard, over the top of the pie dough. Then smooth the aluminum foil out to the outer edges of the pie dough including over the rim of the pie dough and the pie plate.
Note: You might wonder why are we doing this. It is because in the next few steps we will partially bake the pie shell before we pour the heavy cream mixture into it. Covering the pie shell helps protect it from getting overcooked and to prevent bubbling in the pie crust.
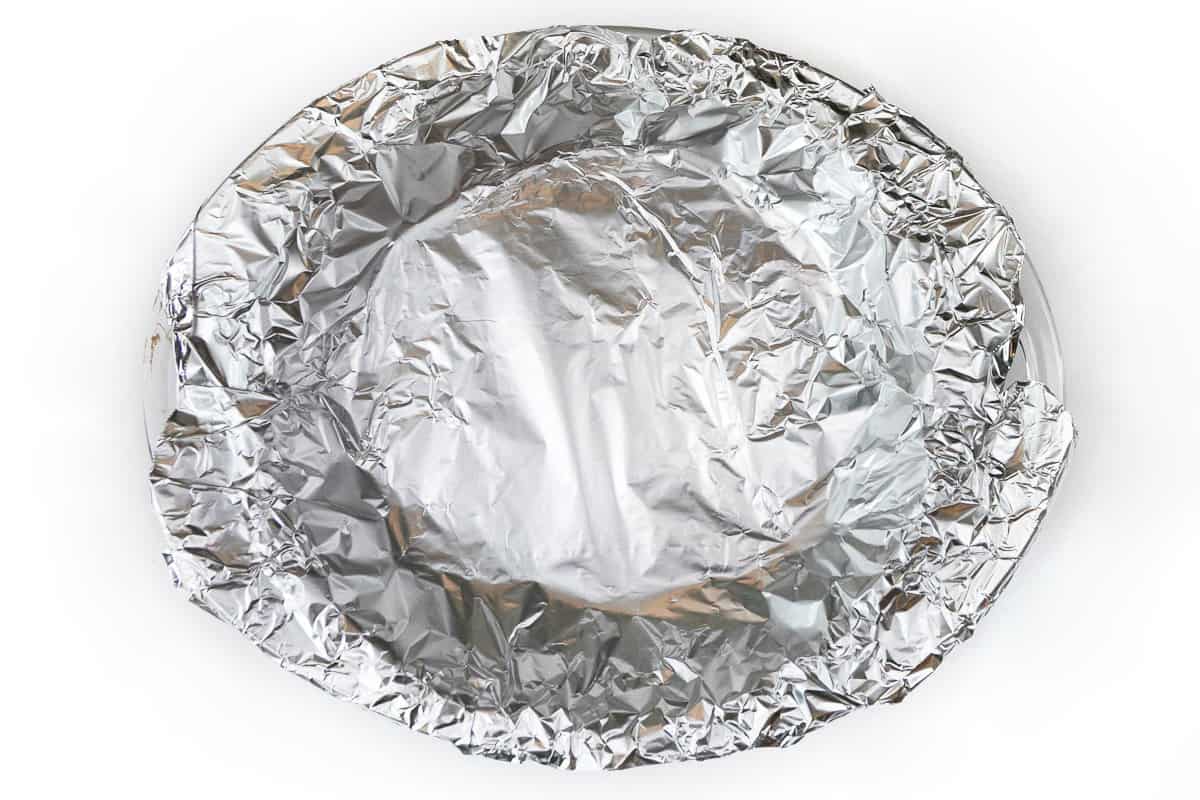
Step 5. Put Some Rice on Top of the Aluminum Foil then Bake
What? Yes, fill the center of the aluminum foil with some rice. We are doing this step to weigh down the center of the pie crust so bubbles won’t form while it is baking. If you don’t have any rice, some other options are using any type of dry beans, sugar, pie weights if you have some, or setting the same size pie pan on top of the pie dough. Note that we did not test these other options.
Place the pie dish with the aluminum foil and rice on a baking sheet and then put it into the preheated 375-degree oven. Partially bake the pie dough for 20 minutes.
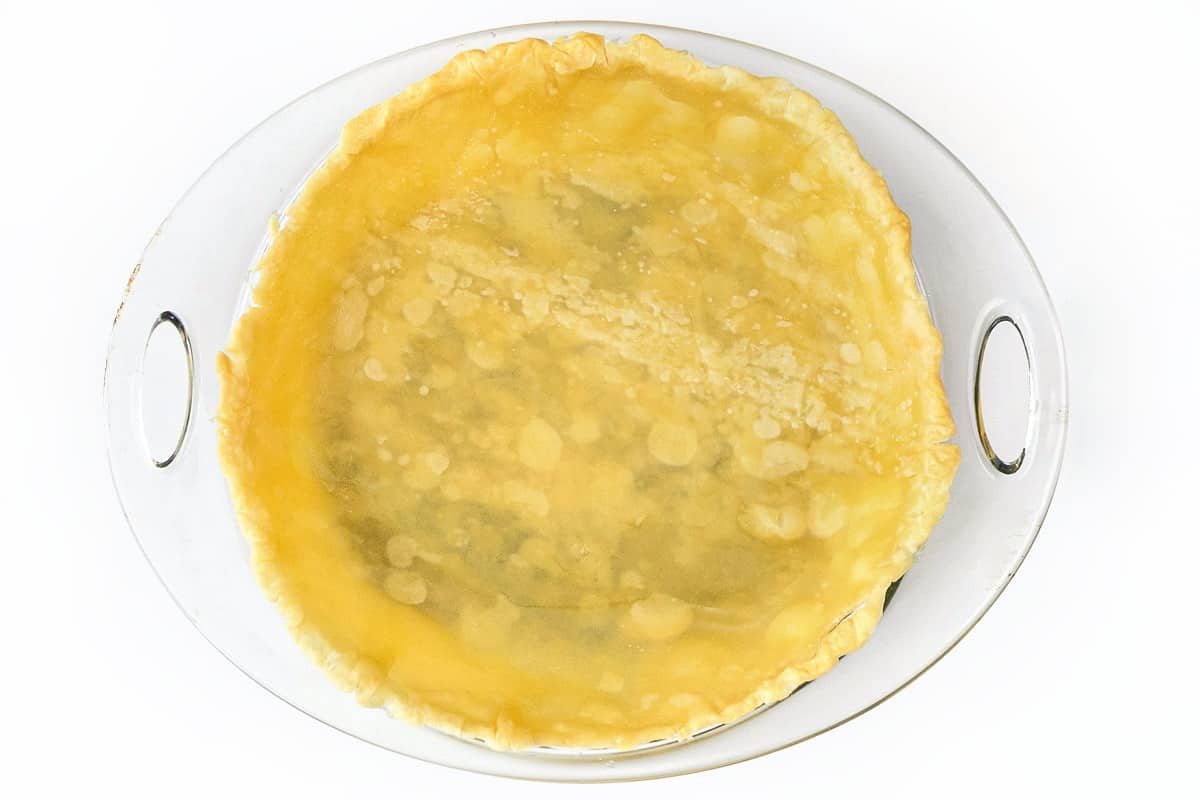
Step 6. Remove Rice and Aluminum Foil & Cool on a Wire Rack
After 20 minutes of baking, take the pie dish out of the oven and discard the rice and the aluminum foil. Then, set the pie on a wire rack (also called a cooling rack) to cool. At this time, turn the oven temperature down to 325 degrees Fahrenheit.
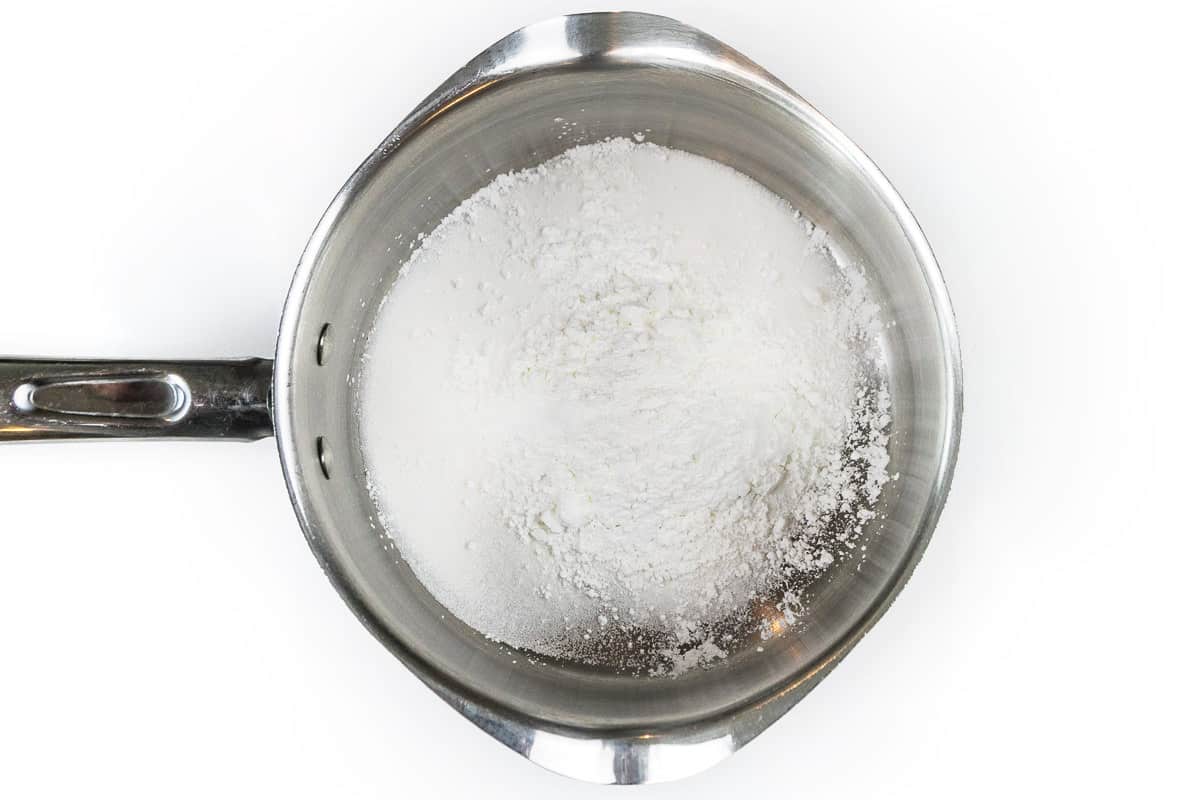
Step 7. Prepare the Cream Filling
Add 4 tablespoons of cornstarch together with 3/4 of a cup of granulated sugar and a pinch of table salt into a medium saucepan. Mix thoroughly.
Tip: What is a pinch of salt? A pinch of salt is whatever salt you can grab with your thumb and index finger. Some folks have big thumbs and fingers and some have small thumbs and fingers. For the bigger thumb and finger people, just grab what you can. For the smaller thumb and finger people, you will probably want to do 2 pinches of salt. After all, a pinch of salt isn’t much, but believe it or not, it does make a difference in the taste of the pie, or for that matter, whatever you are cooking that calls for a pinch of salt.
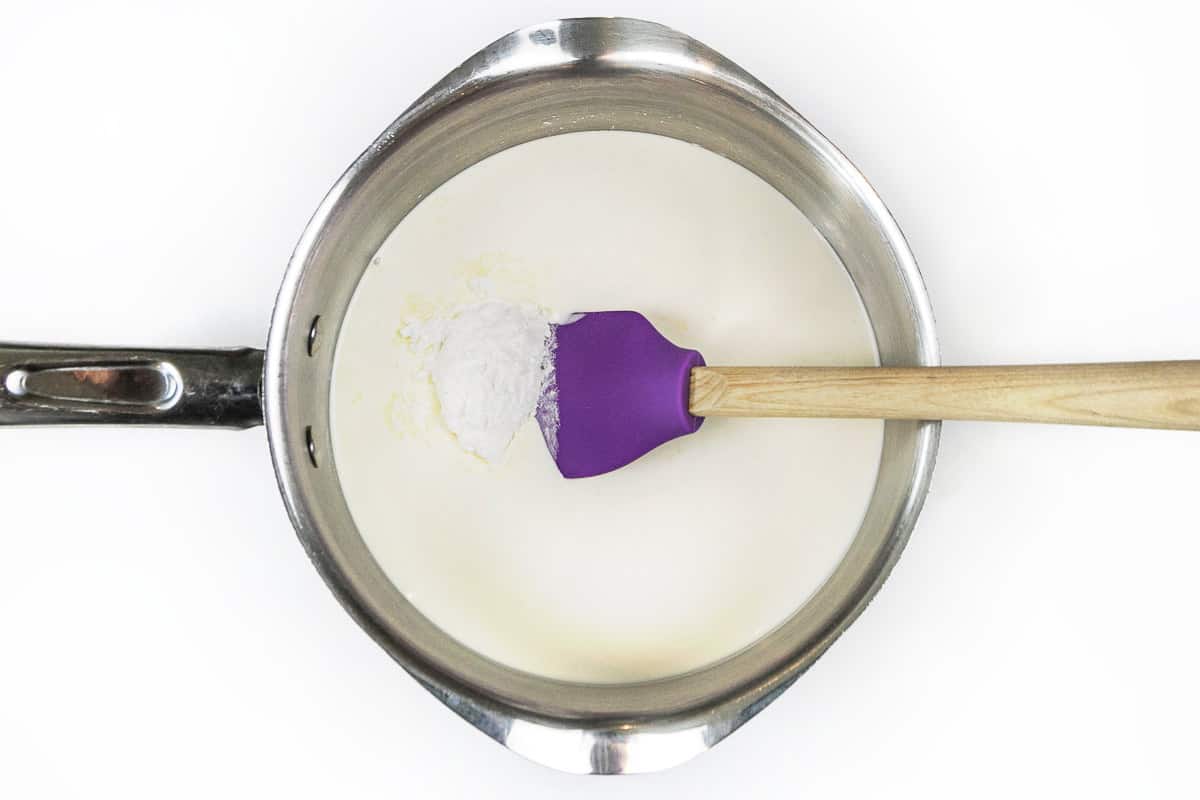
Step 8. Add Heavy Whipping Cream
Add 2 and 1/4 cups of heavy whipping cream together with the cornstarch and sugar mixture. Mix thoroughly.
Step 9. Cook Until Whipping Cream Mixture Thickens
Put the saucepan on the stove and cook over medium heat stirring constantly with a whisk until the cream mixture thickens. If you don’t have a whisk, a spatula or spoon will work just fine. It will take about 10 minutes, give or take, for the mixture to thicken.
Note: If your stove cooks hot, reduce the heat to medium-low. The cream mixture should bubble a bit while cooking and thickening, but not at a constant boil.
Step 10. Add the Unsalted Butter and the Vanilla Extract
After the cream mixture has thickened, turn the heat off and remove the saucepan from the burner. Then add 1 tablespoon of vanilla extract and 3 tablespoons of unsalted butter to the thickened cream mixture.

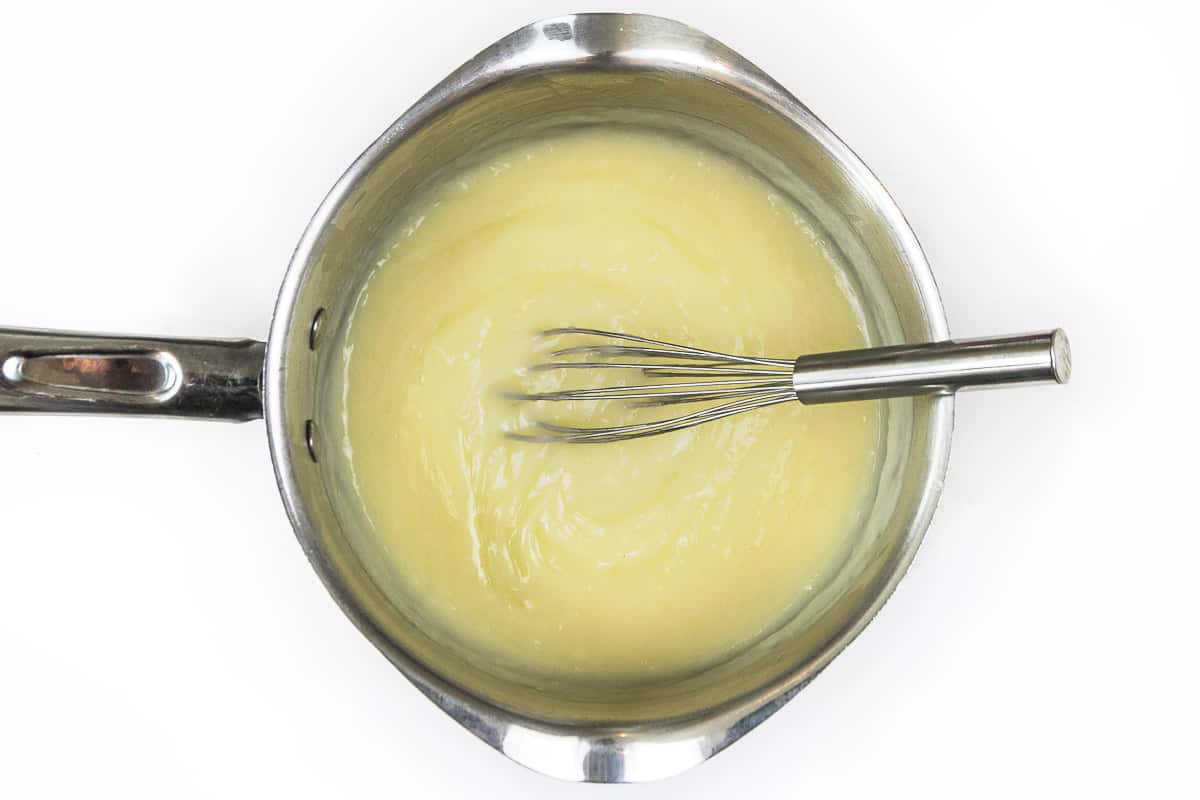
Step 11. Mix the Thickened Cream Mixture Thoroughly
After adding the butter and vanilla together with the thickened cream mixture, give it a good stir with a whisk, spoon, or spatula.

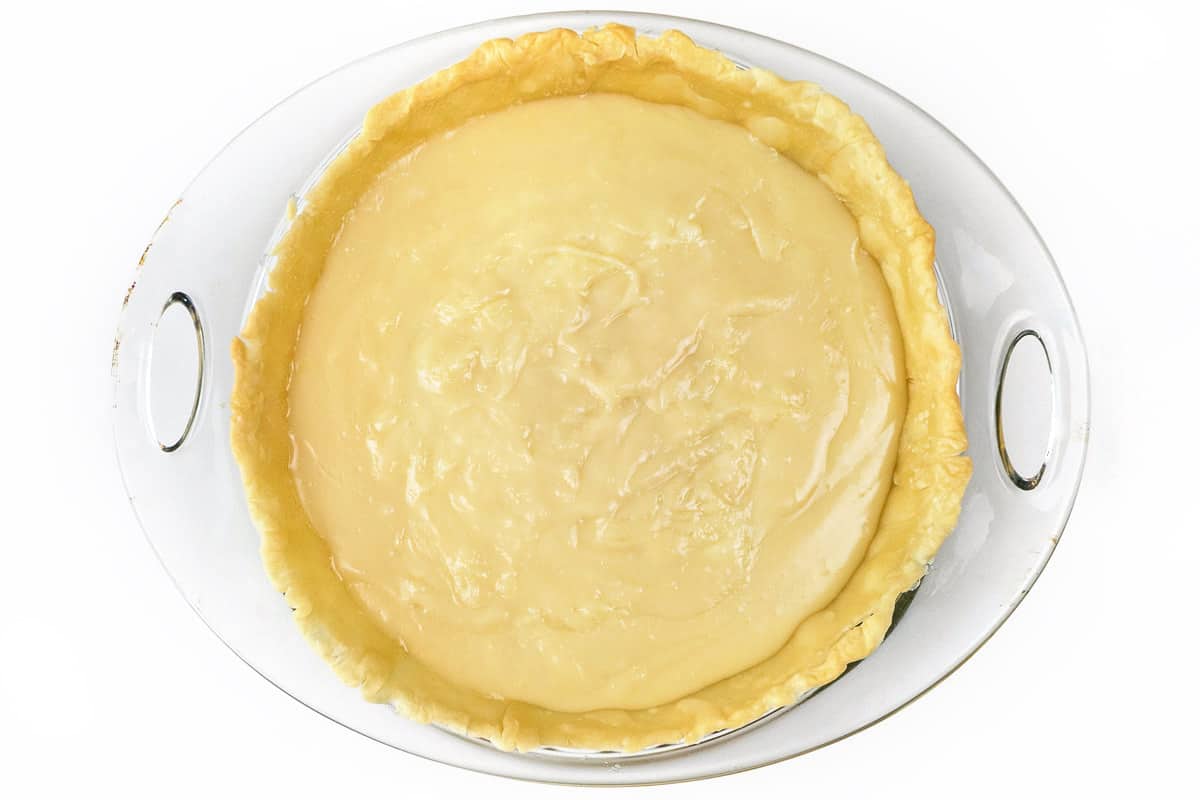
Step 12. Pour the Thickened Cream Mixture into the Pie Crust
Put the cream mixture into the partially baked pie crust making sure to scrape the sides and bottom of the saucepan with a spoon or spatula to get it all out.
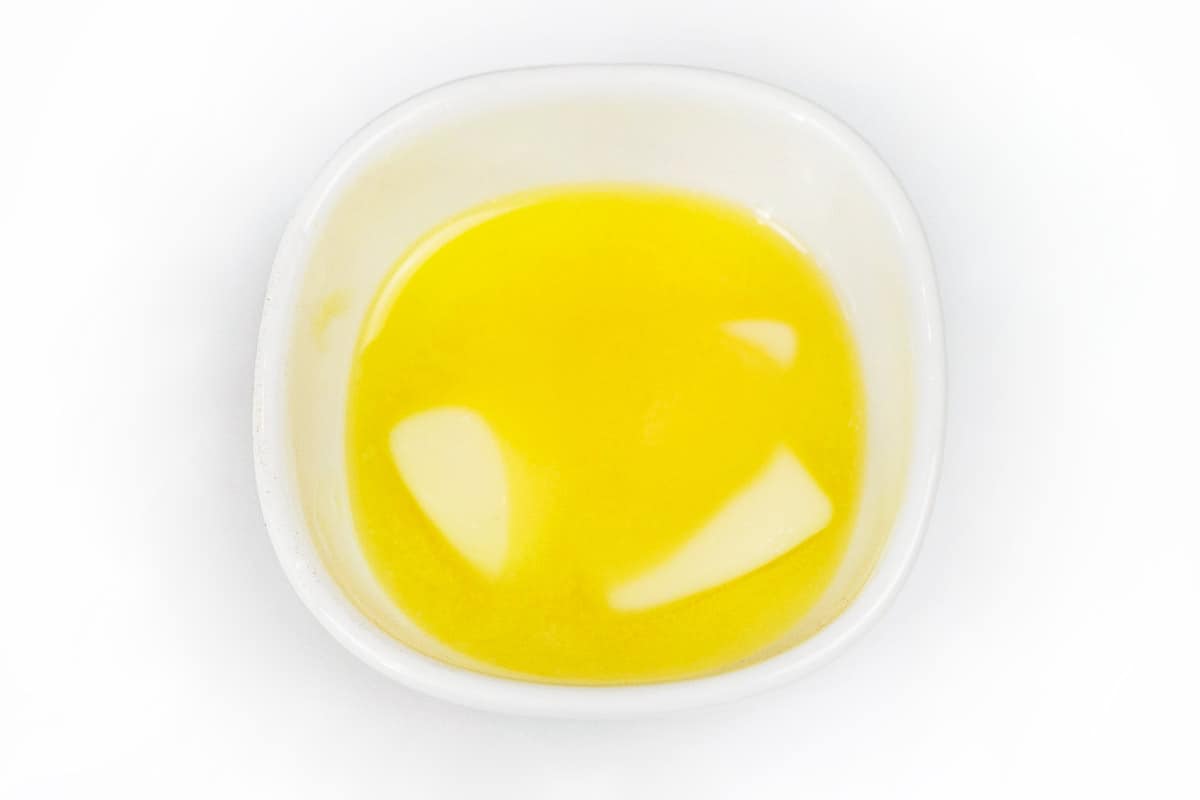
Step 13. Melt the Butter
In a microwave-safe bowl, add 2 tablespoons of unsalted butter. Put it in the microwave for about 30 to 35 seconds. Keep an eye on the butter in case your microwave cooks faster than ours.
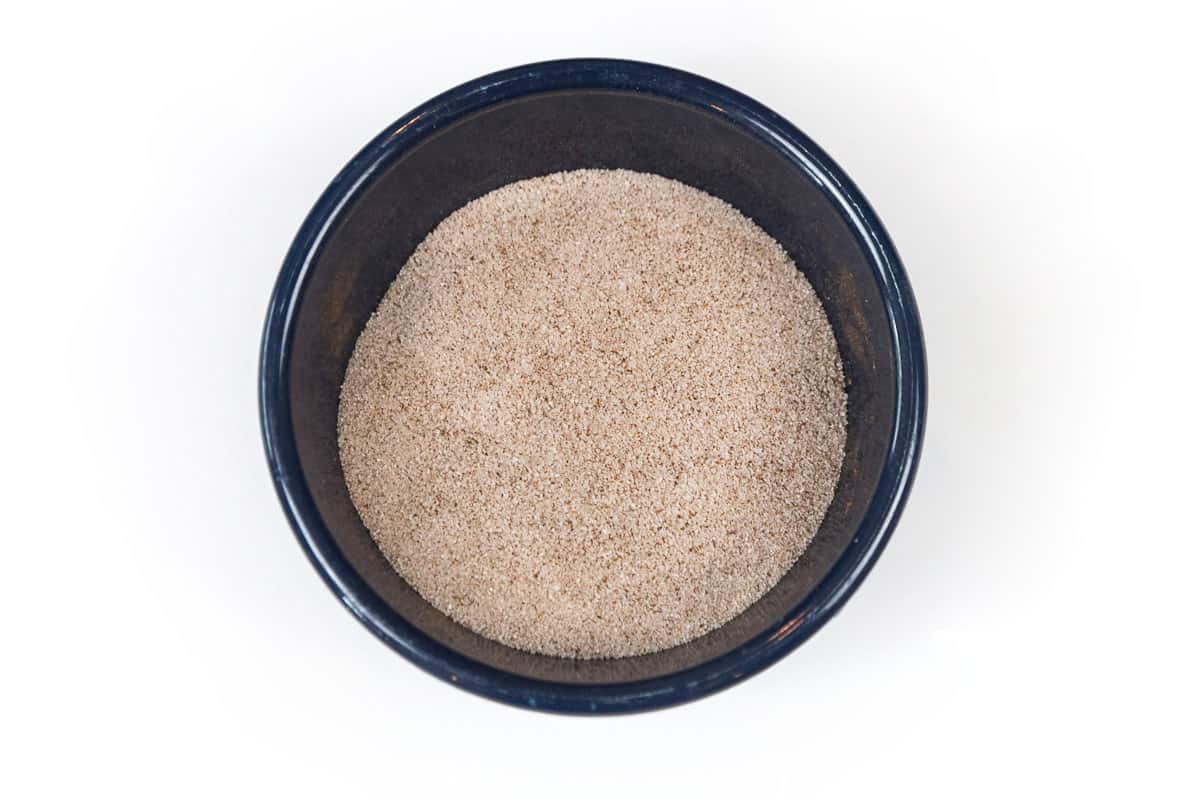
Step 14. Mix the Cinnamon and Sugar Topping Ingredients
In a small bowl, add 1 teaspoon of ground cinnamon together with 1/4 cup of granulated sugar. Mix the cinnamon together with the sugar thoroughly. Set aside for just a minute.
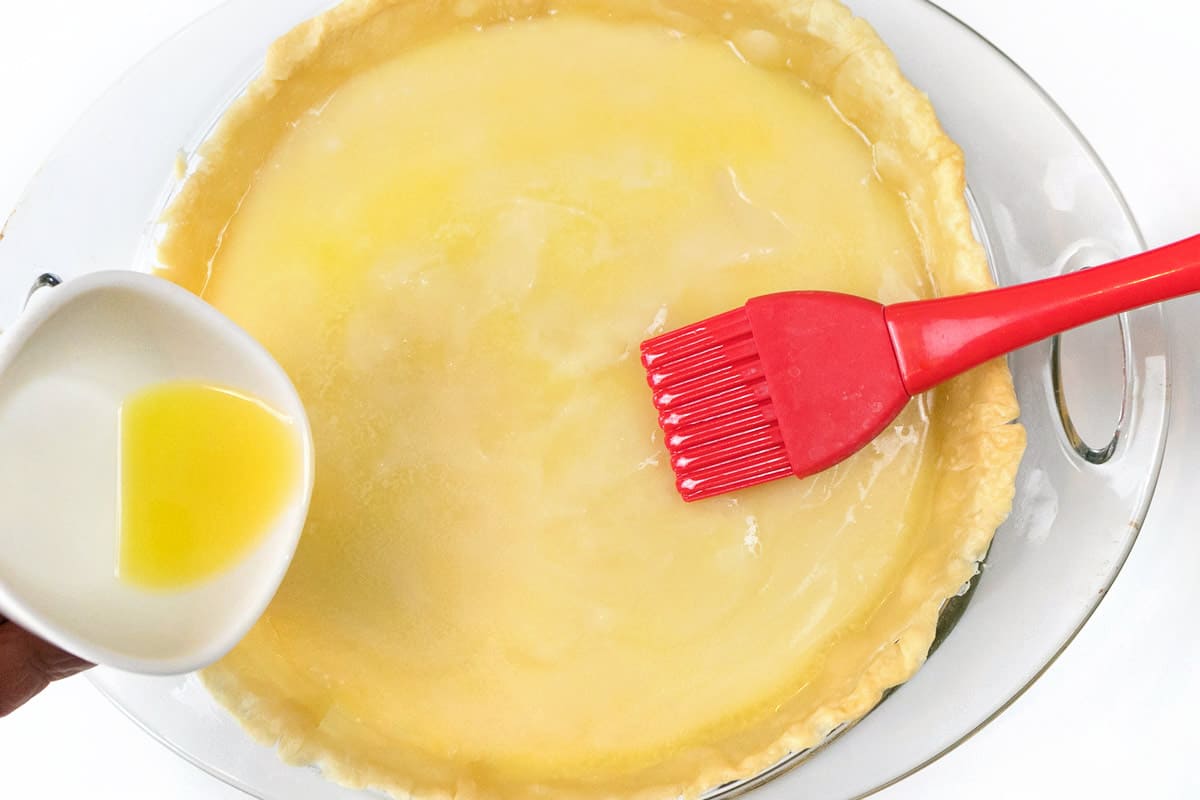
Step 15. Brush the Melted Butter on the Sugar Pie
Evenly brush the melted butter over the top of the thickened cream mixture. It is very easy to do that with a pastry brush.
Step 16. Sprinkle on the Sugar Cinnamon Mixture
Next, sprinkle the sugar pie with the cinnamon sugar mixture we set aside earlier over the top of the melted butter.

Step 17. Bake in the Oven Again – then Broil
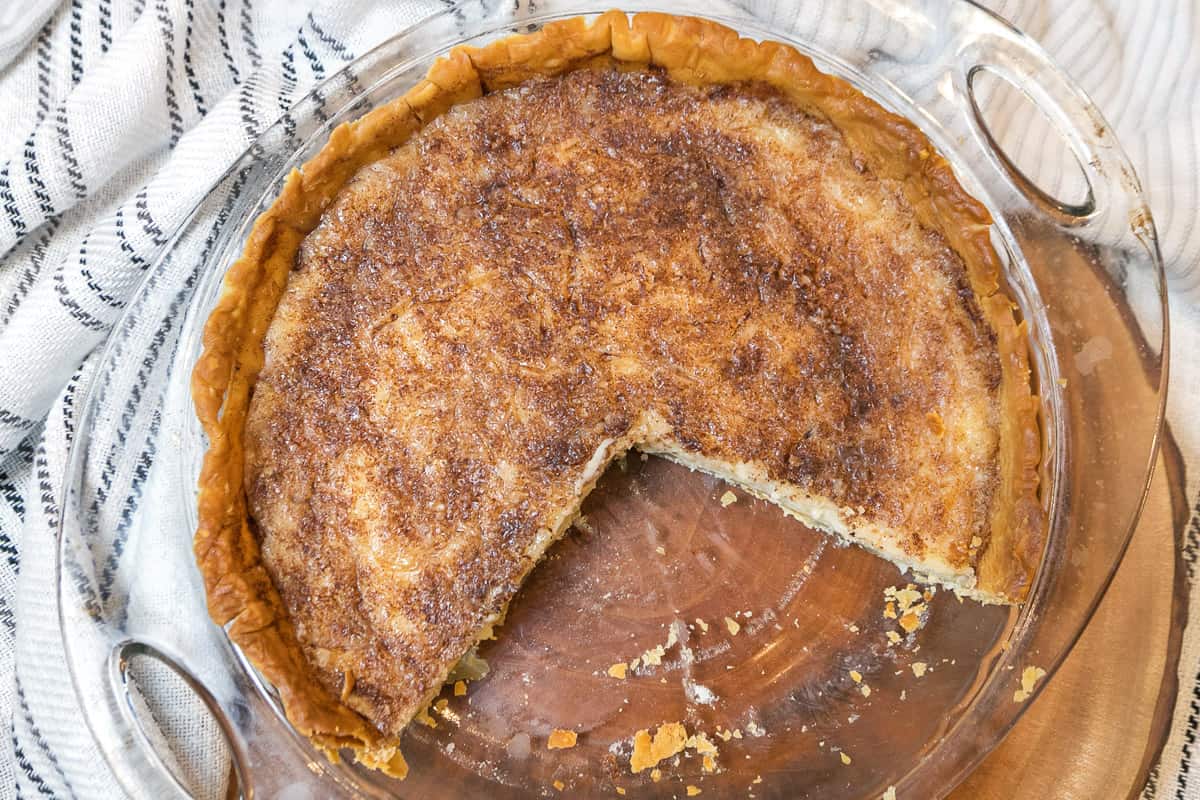
Put the sugar cream pie back into the oven at the reduced temperature of 325 degrees Fahrenheit that we set earlier in step 6. Bake between 20 to 25 minutes, depending on how hot your oven cooks, or until the outer edge of the pie crust is golden brown. We left our sugar cream pie in the oven for 25 minutes.
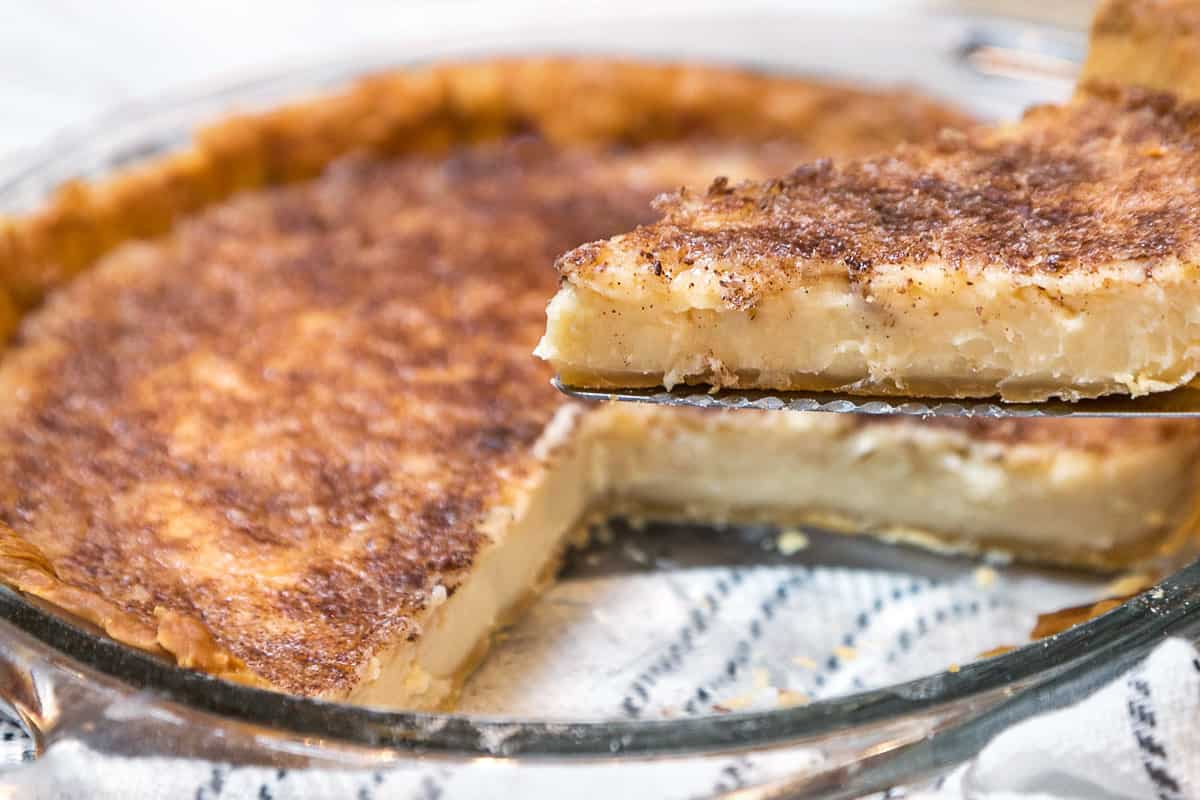
After that, set the oven to broil, and then broil the sugar cream pie for 1 minute. This gives the top of the cream pie a crunchy crackly texture which compliments the creamy filling inside of the pie. So good!
Important: When broiling any food, it is so important to watch it very carefully. The broiler is very hot, and it doesn’t take long to do its job, so keep an eye on your pie during this one minute of broiling.

Step 18. Chill the Pie for 3 Hours
After the pie is done baking there is some bad news. You have to put the sugar cream pie into the refrigerator for at least 3 hours so that the cream filling can set. I know that’s a long time, but you don’t want your cream pie to spread all over the pie dish when you cut the first slice.
🤗 Now for Some Good News
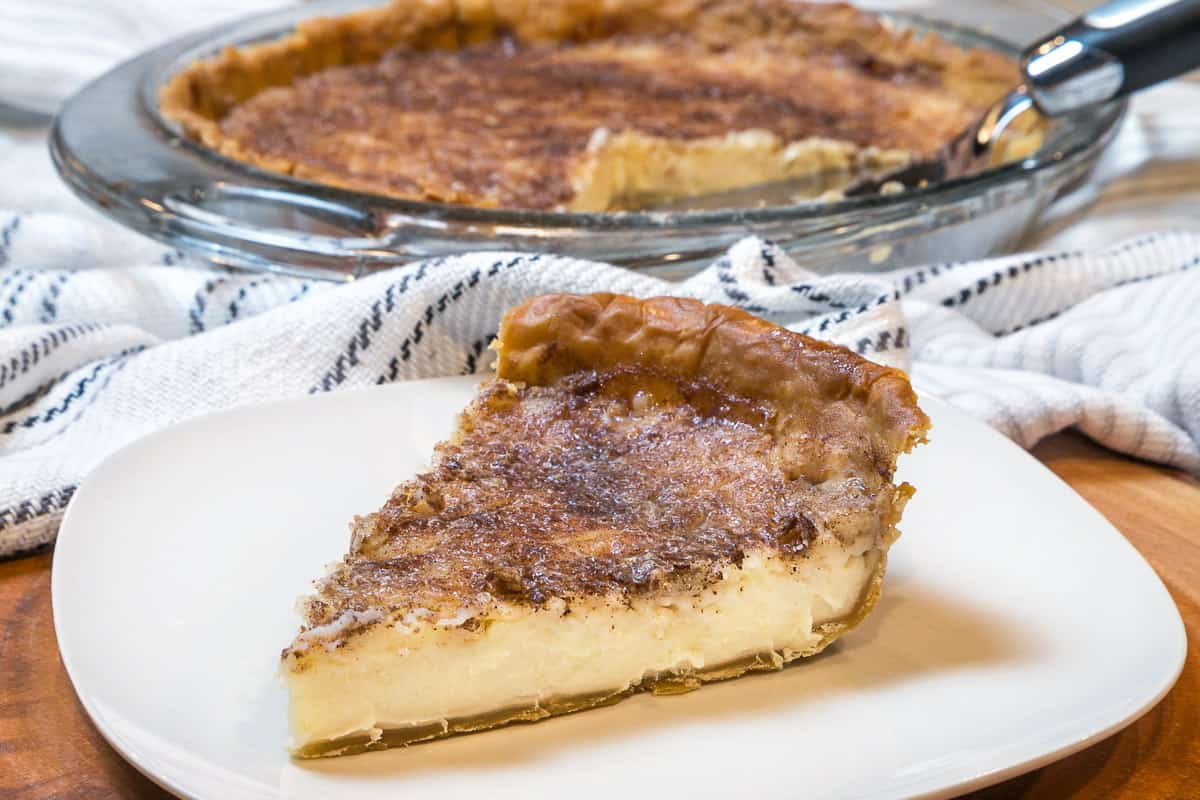
After your pie has been in the refrigerator for 3 hours, it is now ready to eat. Cut the pie into slices and serve this delicious treat to your family and friends. Enjoy!
Cover any leftover sugar cream pie with plastic wrap, aluminum foil, or a lid that fits your pie dish. Then put it in the refrigerator. Do not store this pie on the kitchen countertop. Eat it up by the next day, or for sure within 2 to 3 days. Then, after that, freeze any leftovers in an airtight container in the freezer for about about 3 or 4 months.
🙋 FAQs
Other names that can be associated with sugar cream pie are:
✨ Indiana sugar cream pie – As of 2009, sugar cream pie became the official state pie of Indiana. This pie dates all the way back to the 1800s when it was popular in Indiana Amish communities. It was a way for them to get dessert on the table when fruit wasn’t in season.
🌟 Hoosier pie – Some recipes call it Hoosier sugar cream pie because Indiana’s nickname is called The Hoosier State.
✨ Desperation pie – Got its name back in the days of the depression period when staples were the only ingredients most folks had on hand, such as flour, sugar, salt, butter, milk, etc. and the other ingredients for fancier pies were too expensive to buy or were scarce.
Yes, you can put any leftover sugar cream pie in an air-tight container in the freezer for about 3 to 4 months. You can also individually freeze each piece of pie and then take out only what you need. Reheat a slice in the microwave for a minute or two until it is to your desired preference or reheat the pie in the oven at 325 degrees Fahrenheit, and then keep checking to see if it is warm enough to eat.
Yes, sugar cream pie must be kept in the refrigerator. If you leave it out on the countertop, it can go bad. So gobble it up in about 3 days’ time.
💡 Final Thoughts
You are going to love this pie! It is absolutely incredible tasting, just like a vanilla custard pie! And it tastes even better with some whipped topping on it! It is also a fun pie to make during the holiday season. So make sure to save this sugar pie recipe so you can whip up a great-looking and fantastic-tasting pie to serve to your family and friends during any of your special gatherings.

📋 Recipe Card
Sugar Cream Pie (Classic)
🫕 Equipment
- Pie plate (9-inch round)
- Cooling rack (optional)
🧂 Ingredients
Pie Ingredients
- 1 unbaked refrigerated premade pie crust (or a homemade pie crust)
- 4 tbsp cornstarch
- 3/4 cup granulated sugar
- Pinch table salt
- 2¼ cups heavy whipping cream
- 1 tbsp vanilla extract
- 3 tbsp unsalted butter
Topping Ingredients
- 2 tbsp unsalted butter (melted)
- 1/4 cup granulated sugar
- 1 tsp ground cinnamon
👩🍳 Instructions
The Pie Crust
- Preheat the oven to 375 degrees Fahrenheit.
- Set the premade pie crust on the countertop for 15 minutes to soften.
- Put the pie crust into a 9-inch round pie dish. Crimp the edges of the pie crust if you prefer to do so.
- Cover aluminum foil over the entire pie crust.
- Fill the aluminum foil with rice. This helps hold the pie crust down and prevents bubbling.
- Put the pie dish on a cookie sheet.
- Bake for 20 minutes in the oven at 375 degrees Fahrenheit. Note that we are partially cooking the pie crust.
- After 20 minutes, remove the pie crust from the oven and discard the rice and aluminum foil. Set the pie on a cooling rack to cool. Reduce the oven temperature to 325 degrees Fahrenheit now.
The Cream Filling
- Put the cornstarch, sugar, and a pinch of salt in a medium saucepan. Mix.
- Then add the heavy whipping cream. Mix.
- Cook over medium heat, stirring constantly until the cream mixture thickens, about 10 minutes. Then turn the burner off.
- Remove the saucepan from the heat and add the vanilla and butter. Mix.
- Pour the thickened cream mixture into the partially baked pie shell.
The Topping
- Melt the unsalted butter in the microwave for 30 to 35 seconds.
- Brush the melted butter over the top of the thickened cream on the pie.
- In a small bowl, mix the granulated sugar and ground cinnamon.
- Sprinkle the sugar-cinnamon mixture over the top.
The Pie
- Place the pie back into the oven at 325 degrees Fahrenheit for 20 to 25 minutes.
- After that, broil the pie for 1 minute. Keep an eye on the pie during broiling.
- Chill for 3 hours so the cream mixture can set.
*️⃣ Recipe Notes
- We used a premade store-bought pie crust, but you can make a homemade pie crust if you prefer.
- You can place the pie dish with the pie shell into the refrigerator for about 30 minutes to prevent shrinkage, although we didn’t do this step and our pie crust baked just fine.
- You can use parchment paper if you don’t have aluminum foil.
- You can use dried beans or pie weights if you don’t have rice.
- Store any leftovers in the refrigerator. The pie should be eaten in about 3 days.
- You can put any leftover pie into the freezer for about 3 to 4 months.
🥰 More Creamy Pie Recipes You Will Love
- Lemon Meringue Pie with Condensed Milk – So simple and easy-to-make lemon meringue pie with only 6 ingredients, four lemons, vanilla extract, sweetened condensed milk, eggs, granulated sugar, and a 10-inch graham cracker crust. So delicious!
- Easy Mississippi Mud Pie – This Mississippi mud pie recipe is out-of-this-world delicious! Not only loaded with chocolate, but has a sweet, heavenly, and wonderful taste with a bit of crunch inside! A chocolate lovers delight!
- Libby’s® Pumpkin Pie Recipe for 2 Pies – This pumpkin pie recipe is the original Libby’s recipe. A perfect blend of spices and ingredients makes this the best pumpkin pie ever. So good!
A wife, a mother to a son and a daughter, and a grandmother to three granddaughters. Flo loves sharing recipes passed down from her own mother, her mother-in-law, and her grandmother as well as new recipes created with her daughter, Tamara Ray.
More by Flo ➜