Updated: April 4th, 2024
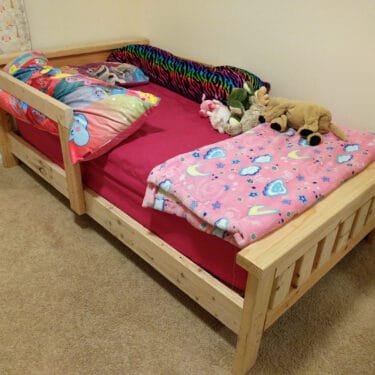
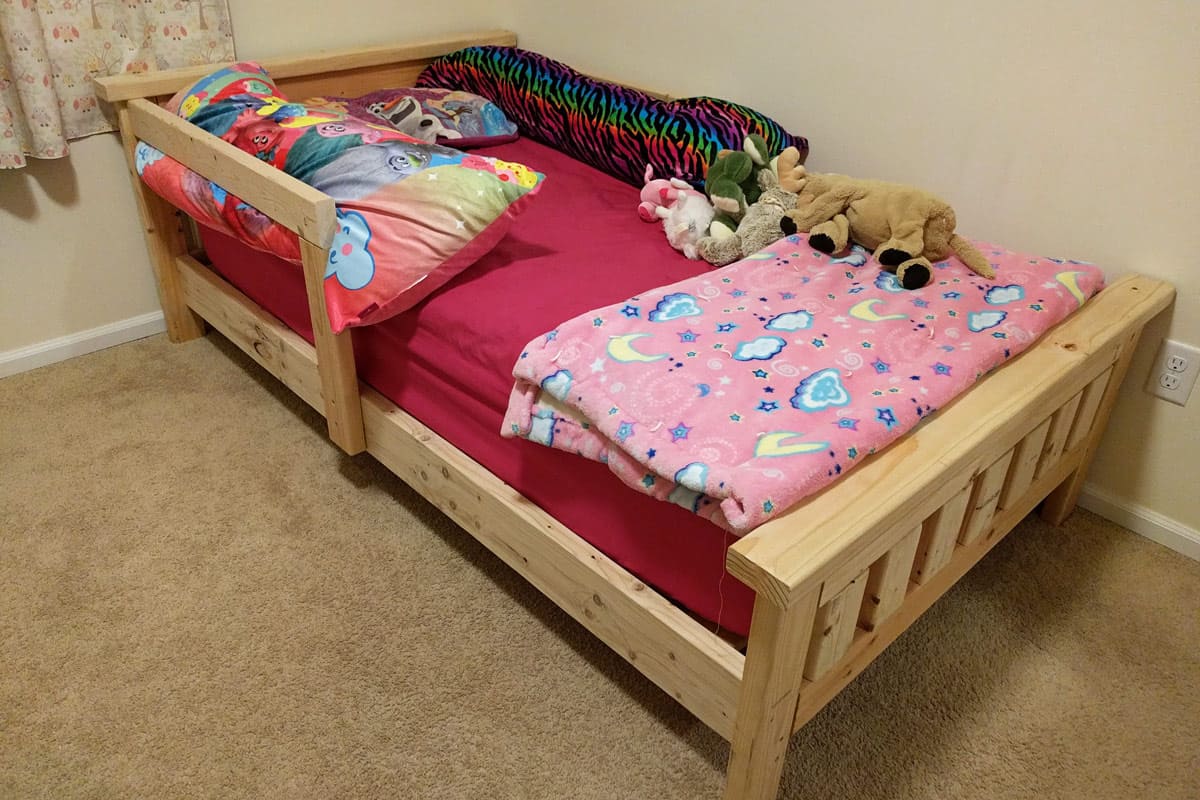
A little while ago, my husband and I decided to build a DIY twin bed frame for our then 4-year-old daughter, made out of all 2x4s and two 2x6s. We used the 2x6s for the side rails on each side of the bed to make it sturdier, but 2x4s would have worked as well. Update: We actually made another one of these beds later on for our youngest daughter and used 2x4s instead of the 2x6s, and it worked just as great!
Making this bed frame was fairly simple to do. It took us about 8 hours or so on a Saturday. I am still planning on staining it with either a white or a black wood stain. This 2×4 twin bed is a really cute DIY furniture idea and easy to do, and my daughter loves it!
🛒 Supplies for a 2×4 DIY Twin Bed Frame
- 6 pieces of 2x4x8 lumber (for most of the bed frame)
- 2 pieces of 2x6x8 lumber (for the side rails that connect the headboard and footboard)
- or 2 more pieces of 2x4x8 lumber instead – if you want to stay with the 2×4 theme
- 2 pieces of 1x4x10 lumber (used for the bed slats on which the mattress will sit on)
- 2 pieces of 1x2x8 lumber (used for the inside ledges of the bed frame)
- Box of 2.5-inch pocket screws
- Wood screws
- Wood glue
- Wood stain (optional)
🛠 Tools
- Drill
- Pocket Hole Jig (We used Kreg)
- Miter saw
- Safety glasses
🛏️ Step by Step 2×4 Twin Bed Frame Instructions
These step-by-step instructions are accompanied by detailed photos for enhanced clarity and guidance.
Step 1. Buy the Wood
To begin with, you need to buy the wood supplies listed above to build a 2×4 twin bed. We bought our lumber from Home Depot, but you can choose your favorite lumber store.
Step 2. Cut the Wood
Next, you need to cut the wood using a miter saw so that you have the following sizes:
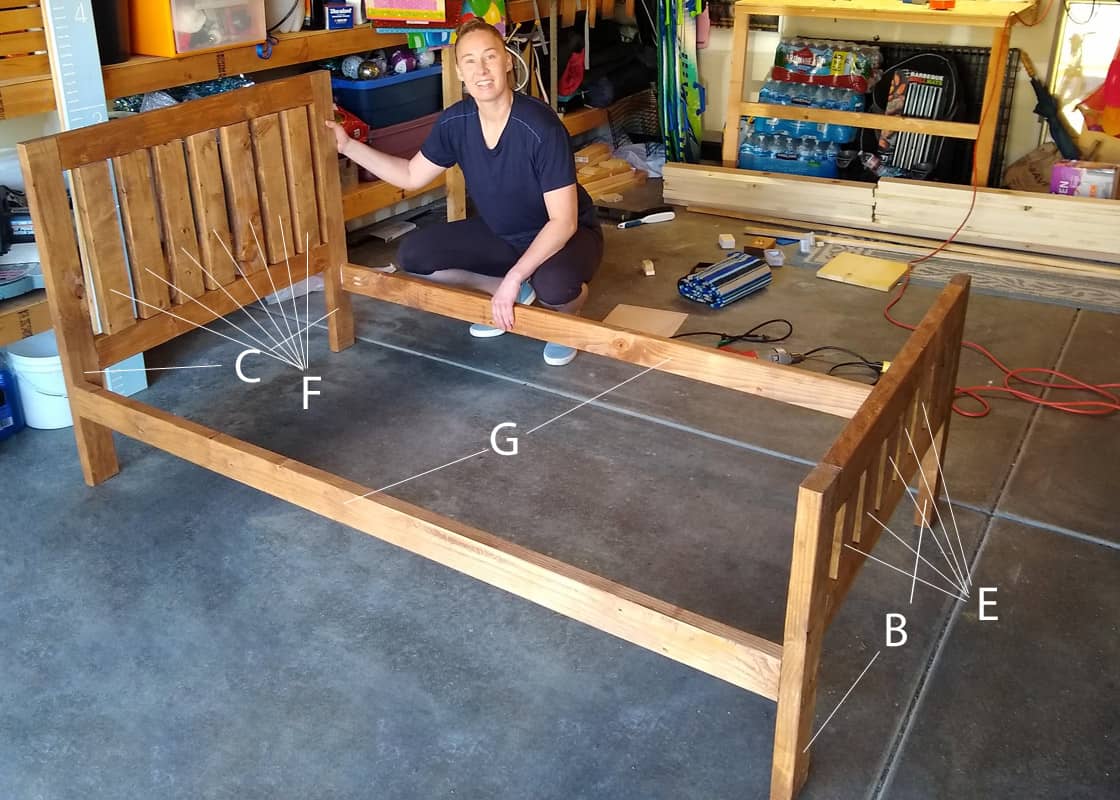
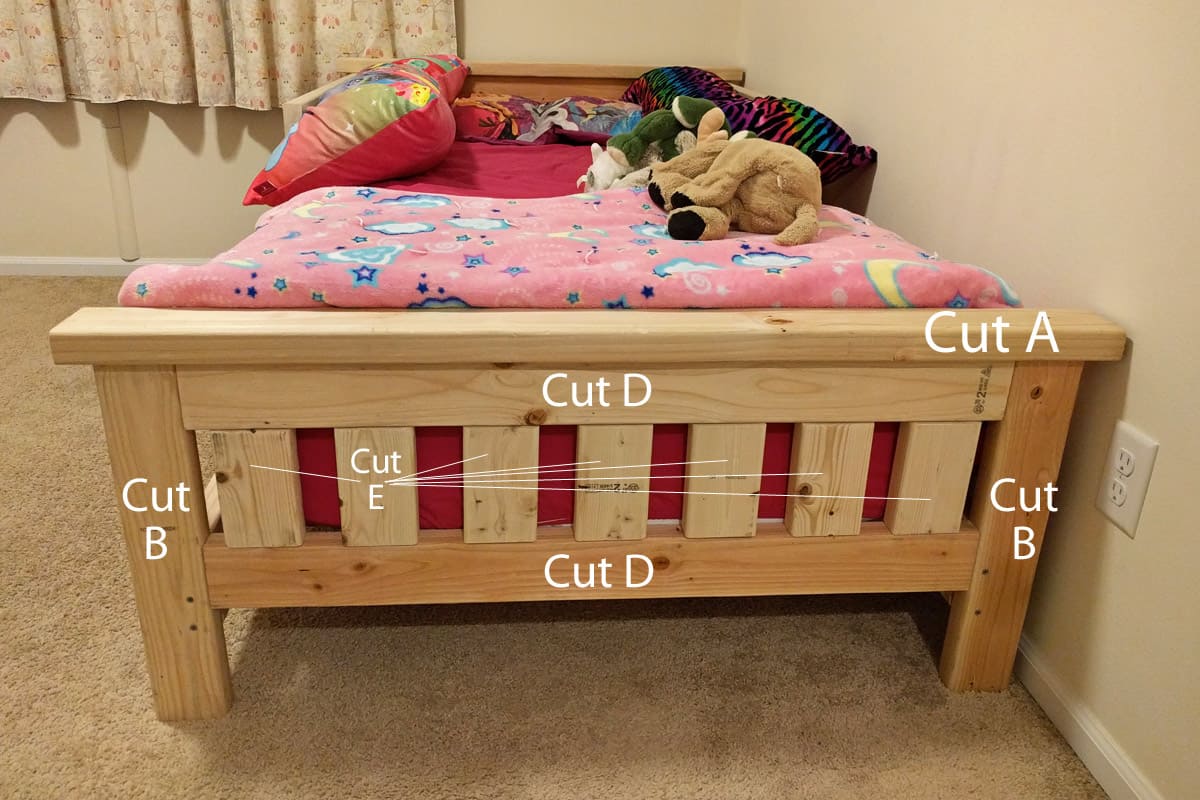
- A – 2 — 47″ 2×4 pieces (tops of headboard and footboard)
- B – 2 — 19.5″ 2×4 pieces (footboard legs)
- C – 2 — 26″ 2×4 pieces (headboard legs)
- D – 4 — 38″ 2×4 pieces (inner headboard and footboard widths)
- E – 7 — 6″ 2×4 pieces (footboard rails)
- F – 7 — 12.25″ 2×4 pieces (headboard rails)
- G – 2 — 75″ 2×6 pieces (side rails that attach to the headboard and footboard to lock it all together)
- In the photo below, this piece is actually a 2×4. We made two beds for each of our daughters… one using a 2×4 here, and the other using a 2×6. They both work perfectly, so it’s your preference on the size of board you want.
- H – 2 — 75″ 1×2 pieces (for the inside ledges that the support slats to lay on)
- I – 10 — 39″ 1×4 pieces (the support slats that the mattress lies on)
Step 3. Make the Pocket Holes
After that, drill the pocket holes on each end of these cuts from the list in step 2 using a pocket hole jig:
- D
- E
- F
- G
Step 4. Assemble the Twin Bed Frame
We started with the front and the back headboards.
Front Headboard
For the front headboard, you will need cuts A (one piece), C (two pieces), D (two pieces), and F (seven pieces) from the list in step 2.
To assemble the headboard, first attach one of the 38″ width 2x4s (D) to the two legs (C). Make sure make the top board is level with the height of the two legs, and use pocket screws and wood glue to attach them together.
Next, evenly spread apart the seven headboard rails (F) and use pocket screws and wood glue to attach them to the top that is connecting the legs.
After that is done, attach the second 38″ 2×4 board (D) to the bottom of all the rails and secure it to the legs using pocket screws and wood glue. Then, attach the seven headboard rails to that bottom board using more pocket screws and wood glue.
Finally, using wood glue, place one piece of cut (A) on top of the headboard as a decorative piece. Make sure to make it centered on both sides.
Back Footboard
Next, is the back footboard, for which you will need cuts A (one piece), B (two pieces), D (two pieces), and E (seven pieces) from the list in step 2.
To assemble the footboard, you will follow the steps exactly like assembling the headboard, except you will replace cuts (C) with (B) and cuts (F) with (E).
Attach Headboard and Footboard to the 75 inch 2×6 Rails
Now, it’s time to attach the headboard and footboard to the 75″ 2×6 (G) rails. We did this after the front headboard and back footboards were completely done, and the wood glue was dry.
We used wood glue, pocket hole screws, and two 3″ wood screws to make it extra secure. Using the pocket holes and wood glue on the end of the board, screw the insides of cuts (G) into the headboard and footboard. We screwed them in about 6 inches off the ground, but anywhere from 5–10 inches is a good height. It’s your preference.
Attach the 75 inch 1×2 Ledges
After the headboard and footboard are secure, it is time to attach the inside ledges that the mattress will go on. On both inner sides of the 2x6s (G), attach the 75″ 1×2 (H) boards using wood glue and screws. Attach these boards where they are flush with the bottom of the 75″ 2×6 (G) rails.
These are used as the ledges that the slats will go across on to hold the mattress.
Step 5. Lay Down the 1×4 Boards Across the Ledges
Lay down the ten 39″ 1×4 (I) slats across the ledges. Make sure to space them out evenly along the bed frame.
The mattress goes down on top of these slats. You can screw these into the bed frame to make it more secure, but we did not, and it has been holding up just fine.
The bed frame is now done!
✋ FAQs
There are some options in the hardware store on or Amazon that can help with this problem. I made a shelf that wasn’t sitting sturdy on the floor, so I bought some leveling feet that worked perfectly! This would work well with this bed frame, as long as you make sure to buy some really heavy-duty ones. All you have to do is drill a pilot hole on the bottom of the four legs and then screw them in.
📝 Final Thoughts
This bed is perfect to make for your little one who is ready for their first toddler bed. You can easily add a railing to the side of the bed to make sure your little boy or girl won’t fall out. This bed may be a little big for them at first, but they will soon grow into it, and then you can remove the side railing and make it a big kid bed. This is one of the easiest DIY projects you can conquer in about one day’s time!
Instructions
DIY Twin Bed Frame (With 2x4s)
Equipment
Materials
- 6 pieces 2x4x8 lumber for bed frame
- 2 pieces 2x6x8 lumber for side rails
- 2 pieces 1x4x10 lumber for bed slats
- 2 pieces 1x2x8 lumber for inside ledges of bed frame
- 1 box 2.5 inch pocket screws
- Wood glue
- Wood stain optional
Instructions
Buy the Wood
- 6 pieces of 2x4x8 lumber
- 2 pieces of 2x6x8 lumber (Or 2 more pieces of 2x4x8 lumber if preferred)
- 2 pieces of 1x4x10 lumber
- 2 pieces of 1x2x8 lumber
Cut the Wood
- Cut (A): 2 — 47" 2×4 pieces
- Cut (B): 2 — 19.5" 2×4 pieces
- Cut (C): 2 — 26" 2×4 pieces
- Cut (D): 4 — 38" 2×4 pieces
- Cut (E): 7 — 6" 2×4 pieces
- Cut (F): 7 — 12.25" 2×4 pieces
- Cut (G): 2 — 75" 2×6 pieces
- Cut (H): 2 — 75" 1×2 pieces
- Cut (I): 10 — 39" 1×4 pieces
Make the Pocket Holes
- Drill pocket holes on the end of cuts D, E, F, and G
Assemble the Headboard
- Attach one of the 38″ width 2x4s (D) to the two legs (C). Make sure make the top board is level with height of the two legs and use pocket screws and wood glue to attach them together.
- Evenly spread apart the seven headboard rails (F) and use pocket screws and wood glue to attach them to the top that is connecting the legs.
- Attach the second 38″ 2×4 board (D) to the bottom of all of the rails and secure it to the legs using pocket screws and wood glue.
- Using wood glue, place one piece of cut (A) on top of the headboard as a decorative piece. Make sure to make it centered on both sides.
Assemble the Footboard
- Do the same as the headboard steps except replace cuts (C) with (B) and cuts (F) with (E).
Attach Headboard and Footboard to the 75-inch 2×6 Rails
- Using the pocket holes and wood glue on the end of the board, screw the insides of cuts (G) into the headboard and footboard about 6 inches off of the ground. You can choose your height anywhere from about 5-10 inches.
Attach the 75-inch 1×2 Ledges
- On both inner sides of the 2x6s (G), attach the 75″ 1×2 (H) boards using wood glue and screws. Attach these boards where they are flush with the bottom of the 75″ 2×6 (G) rails.
Lay Down the 1×4 Boards Across the Ledges
- Lay down the ten 39″ 1×4 (I) slats across the ledges. Make sure to space them out evenly along the bed frame.
🪛 More DIY Furniture Ideas
Want something else to build?
- Try adding these sturdy and easy-to-build garage storage shelves to your garage.
- Make a DIY floating desk with storage!
Former Division I basketball player turned food blogger with a passion for creating easy, delicious recipes the whole family can enjoy. What started as cooking for her daughters quickly grew into a love for developing homemade meals, sharing step-by-step recipes, and photographing every detail along the way. When she’s not in the kitchen, she enjoys staying active, working on DIY projects, spending time with family, and all things photography. More by Tammy ➜