Updated: April 3rd, 2024
Garage Storage Shelving – DIY Project with Simple Steps to Follow
I used to have a bunch of those Home Depot type shelves in the garage that I used for garage storage shelving, but I wanted something better. Those shelves sit on the ground and I wanted to keep my things in the garage up off of the ground.
Bugs!
Evidently, spiders and other bugs like to find homes under those shelves, and I am not a big fan of spiders (or bugs)! When the shelves are built off of the ground, it makes it easy to see (and clean) underneath them. It also makes the garage look more organized and tidier, not to mention creates a bunch more room to store your stuff. I couldn’t find anything I wanted to buy in the stores, so I decided it was time to build our own.
Supplies
For this project, you will need the following list of supplies. The amount of each item depends on the size of your garage and the space you have available to build the shelves:
- 2×4’s
- plywood
- 3″ screws
- 2×4 fence brackets
Tools
The following tools are needed:
- miter saw
- table saw
- drill
- level
- ladder
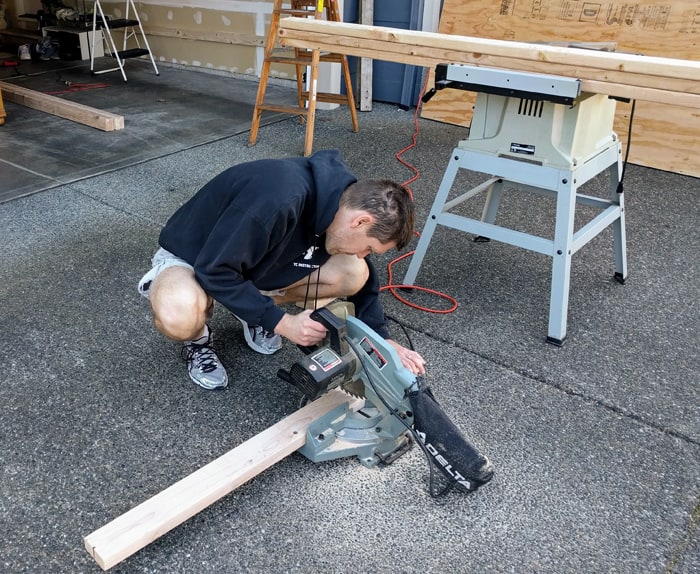
The miter saw is needed to cut the 2×4’s to the correct length, which is dependent upon the size of your garage. Also, a table saw is needed to cut the plywood to the correct size.
Steps for Garage Storage Shelving
Step 1: Measure the Space in the Garage
Firstly, start by measuring the space in your garage that you want to build the shelves. Measure the distance from one end to the other. This will be the length of your shelves.
Step 2: Cut the 2×4’s to the Length of the Garage
Secondly, cut eight 2×4’s to the measurement size from step 1.
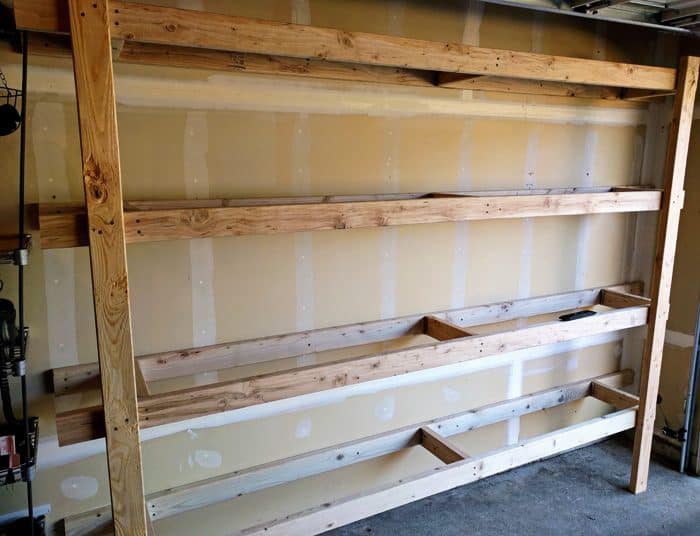
Step 3: Attach the Long 2×4’s to Garage Wall
Afterward, screw four of the long 2×4’s directly into the wall where the stud is. Usually, the white strips going vertical on the wall shows where the studs are in most garages. If your garage does not have the white strips, use a stud finder.
The other four 2×4’s we cut from step 2 will be the outer side of the shelves, running parallel to the first four.
Step 4: Cut the 12-inch 2×4’s
Meanwhile, you need to cut many 12-inch 2×4’s that will be used to connect the outer and inner 2×4’s together to form the base of the shelves in which the plywood will sit on top of. We did three on each row. One on each end and one in the middle.

Step 5: Attach the 12-inch 2×4’s
Then, attach the 12-ich 2×4’s on the wall using the fence brackets as shown in the picture below.
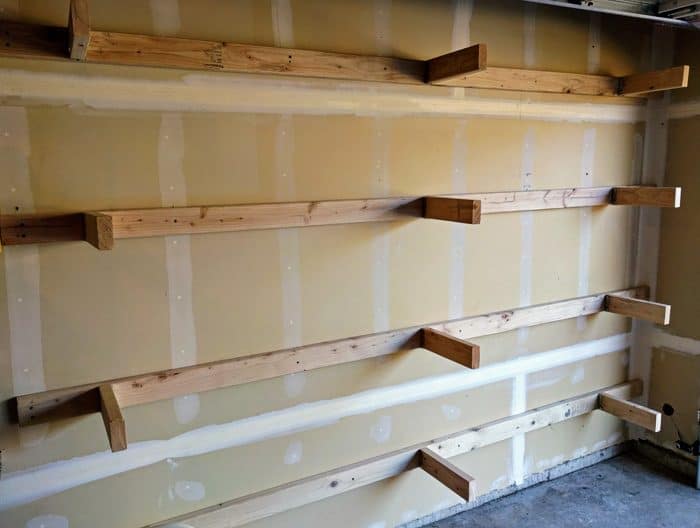
Step 6: Attach the Outer 2×4’s
Attach the other four long 2×4’s on the outside of the frame by screwing them into the 12-inch 2×4’s with 3-inch screws. Make sure to get them level.
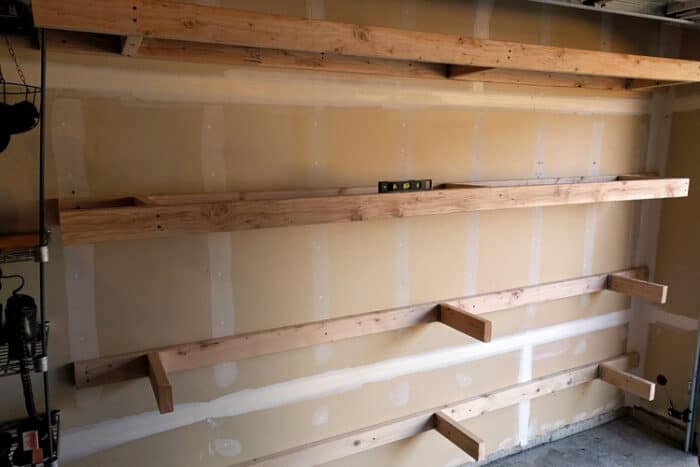
Step 7: Add Support 2×4’s
Measure the height of your top shelf to determine how tall to make the support 2×4’s. We made three for the length of our shelves on this side of the garage. Screw these support 2×4’s directly into the 2×4’s on each row of the shelf using 3-inch screws.
These 2×4’s run perpendicular to the shelves and are needed to make the shelves stable. One goes on each end and one in the middle.
We build duplicate shelves on the other side of the garage, and they were much longer, so we needed one more support beam in the middle, making it a total of four beams. You can figure out the height needed for these after you get the framework for the shelves put together. This way, you will be able to measure the correct length.
Step 8: Measure the Plywood
Measure the length and width of the shelves for the plywood to fit the area between on each row of the shelf that it will lay flat on.
Step 9: Cut the Plywood
Next, using a table saw, cut the plywood according to the measurements in step 8. These sit on top of the 2×4 frames we have made.
Step 10: Attach the Plywood
After the cutting is done, it’s time to attach the plywood to the shelves. We just screwed them down into the 2×4’s that run parallel along the wall of the garage.

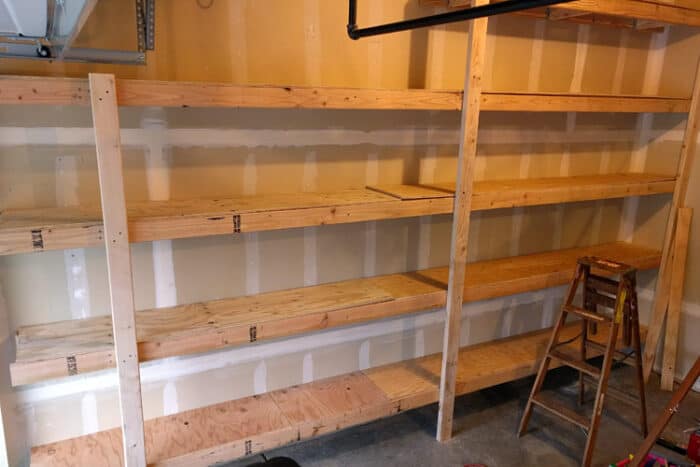
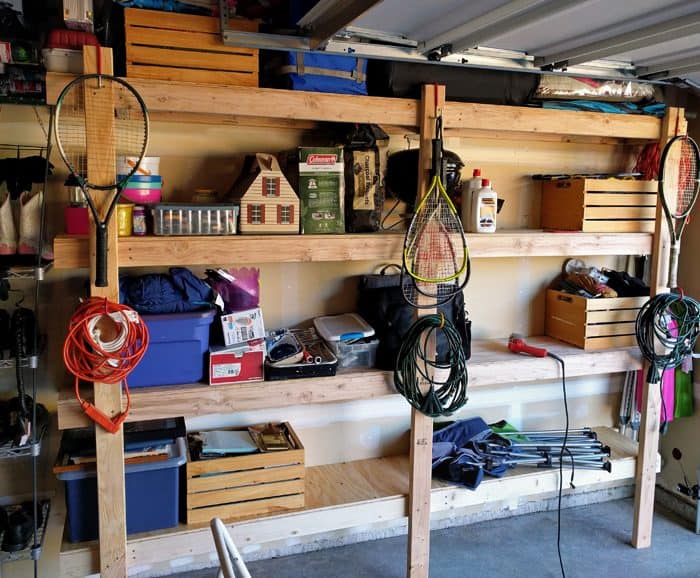
Garage Storage Shelving is Done!
Finally, that’s it! Now you have awesome shelves for your garage! Without doubt, now it’s time to start loading up the shelves with all of your garage clutter :).
In addition, click this link to find more DIY projects.
Former Division I basketball player turned food blogger with a passion for creating easy, delicious recipes the whole family can enjoy. What started as cooking for her daughters quickly grew into a love for developing homemade meals, sharing step-by-step recipes, and photographing every detail along the way. When she’s not in the kitchen, she enjoys staying active, working on DIY projects, spending time with family, and all things photography. More by Tammy ➜
Brian F
30 Sep 2022Great job!
tamararay
30 Sep 2022Hey! Thanks so much!