Christmas tree silhouette photos are one of my most favorite things. Do you want a gorgeous picture taken of your Christmas tree with your kids silhouetted in front of it this season? Pictures taken of your Christmas tree can stand out as one of the most beautiful sights during the winter season. Taking a picture of your children looking at your Christmas tree can turn out to be an even dreamier picture if you do it right. In this post, I will give you the easy steps for you to take your own DIY silhouetted photos.
In order to get the effect to look right, you have to set your camera to the correct exposure of the Christmas tree, not the children standing in front of it. This will make the Christmas tree light up bright while having the children’s black silhouettes in front.
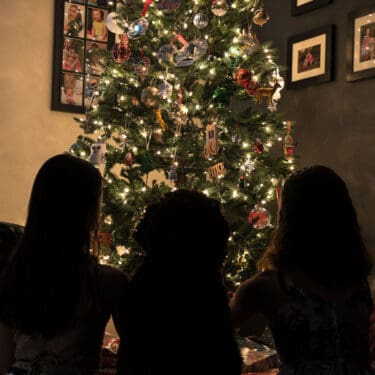
In the photo above, the settings are 1/13 seconds, f/3.5, and an ISO of 500. We set up this photo in the living room, where the Christmas tree was located. In my opinion, it is much better to take a Christmas tree silhouette picture surrounded by home decor and personal items, rather than in front of a white background. This makes the photo feel more homey to you and like all the other Christmas tree silhouette stock photos.
📷 Equipment / Supplies Needed
- Camera – In these photos, I used a Canon 6D Mark II DSLR camera. This camera allows you to adjust the shutter speed, aperture, and ISO as well as allowing you to shoot in RAW mode. There are many less expensive cameras on the market that can get the job done. Just do a search on Amazon for cameras with adjustable settings.
- Tripod – Any tripod will do as long as it is sturdy and doesn’t move around. Amazon also has a large selection of tripods.
- Christmas Tree – Any Christmas tree will do as long as it has Christmas lights on it. It doesn’t matter if it is an artificial tree or a real tree from a tree farm.
- Kids and pets (subject) – This technically isn’t a piece of equipment, but you will need a subject to put in front of the tree to create the silhouette out of.
⚙️ Christmas Tree Silhouette Photography Steps and Camera Settings
The steps to photograph an image of a glowing Christmas tree with the kids silhouetted in front are described below. These settings are primarily for use of a camera in which you can adjust the shutter speed, aperture, and ISO.
Step 1. Set Your Camera to Manual Mode
To get the best results, you will want to create a silhouette image using the manual mode on your camera.
Step 2. Set the Exposure
Point your camera at the Christmas tree and set the exposure. Setting the exposure simply means choosing a balanced shutter speed, aperture, and ISO combination to get the light meter as close to the center as possible to have the most balanced exposure.
Note: You want to choose an ISO, shutter speed, and aperture combination where the shutter speed doesn’t have to be any slower than 1/10 seconds, but ideally around 1/50 seconds. You can move your ISO up or down according to how you set your shutter speed and aperture.
Step 3. Set the ISO
Set your ISO somewhere between 500 and 1250.
Note: The lower the ISO number is, more light will be needed to properly expose the image. Contrary, the higher the ISO number is, less light will be needed. A downfall to higher ISO numbers, however, is that the image starts to get grainier as the number goes up.
Step 4. Get Out Your Tripod
Put your camera on a tripod. It is best if you put your camera on a tripod to minimize any shaking and blurriness.
Step 5. Put Subject in Front of Christmas Tree
Put your kids (or subject of your choice) in front of the Christmas tree and have them look at it as if they are in awe. Or have them gently put on an ornament and hold the position.
Step 6. DO NOT Change the Exposure
Do not change the settings on your camera, even with your subject now in front of the tree.
Step 7. Focus
Focus on your children, while leaving the aperture and shutter speeds unchanged.
Note: When you focus on your subject in front of the tree, the camera will see they are too dark and want to brighten up the photo. Do not pay attention to the light meter reading at this point.
Step 8. Take the Photo!
Snap the photo! Remember to use a tripod and use the exposure setting from the Christmas tree in step three! Feel free to take quite a few photos. Sometimes blurry ones will sneak in there even with a tripod, so the more you take, the better your chances will be to create one you will love and cherish forever.
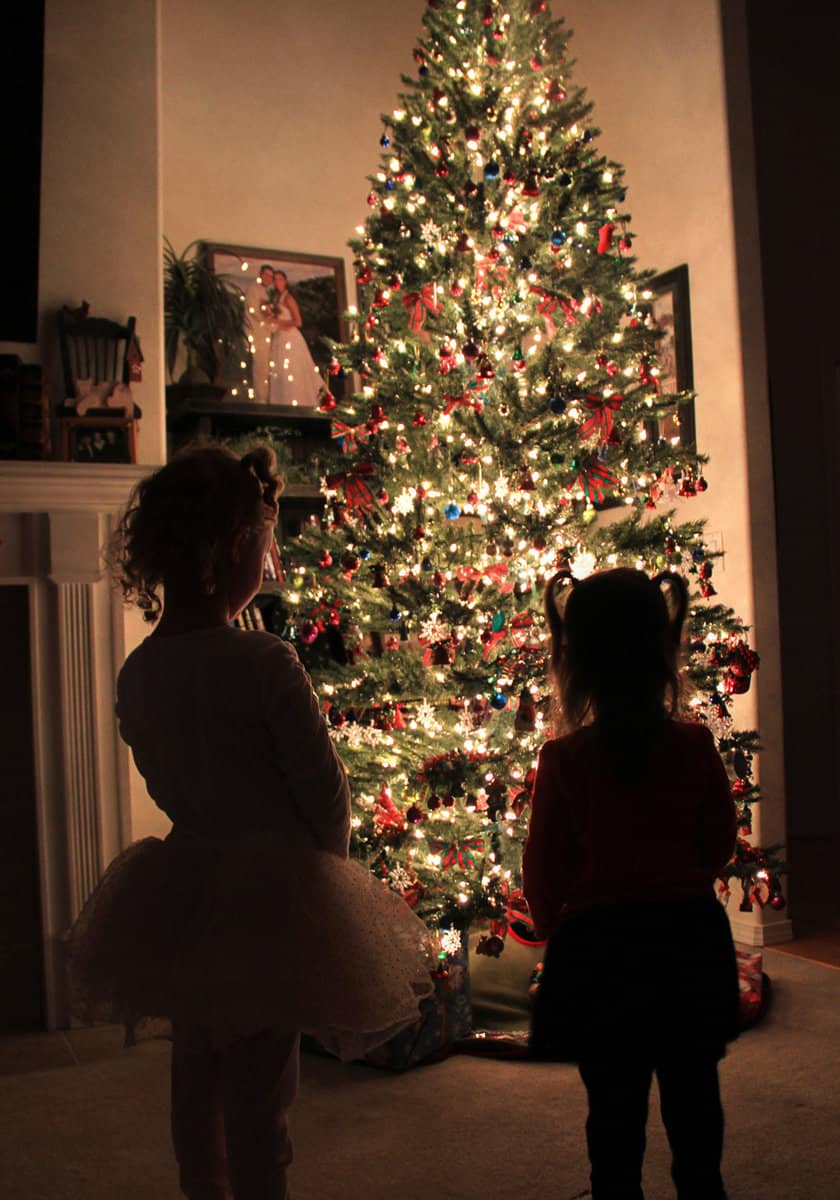
The photo above is another example of Christmas tree lights glowing in the back while the subjects are silhouetted. In this picture, the camera settings were at 1/6 seconds, f/5.6, and an ISO at 1250. I used a Canon EOS 6D Mark II camera to take these pictures.
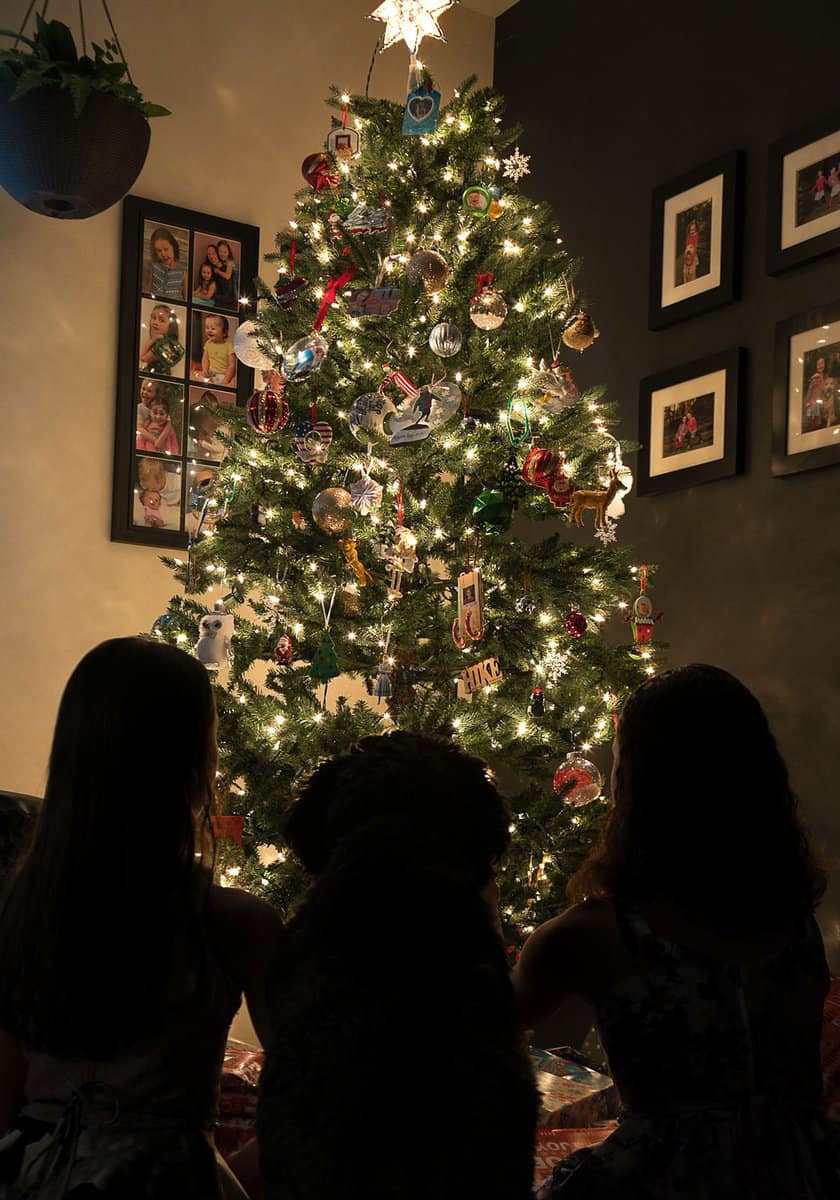
Here is one last example photo of Christmas tree lights glowing while the subjects are silhouetted (below). This one has our dog Koko in the middle of my daughters. Koko is a black Goldendoodle and loves to be wherever my daughters are.
❓ FAQs
ISO (International Organization for Standardization) is the camera’s sensitivity to light as it pertains to the digital sensor. A lower ISO (e.g., ISO 100) number means less sensitivity to light, which is ideal for bright conditions. A higher ISO (e.g., ISO 800, 1000, 1250, or higher) number means more sensitivity to light, which is used in low-light situations.
The aperture is the size of the opening in the camera’s lens that allows light to enter. Aperture is also often referred to as the f-stop and is typically denoted as f/1.4, f/2.8, f/5.6 etc., with lower numbers representing larger openings and allowing more light to come in. A wide aperture (e.g., f/1.4) lets in more light and results in a shallow depth of field. A narrow aperture (e.g., f/16) allows less light and results in deep depth of field, keeping more of the background in focus.
The shutter speed determines the amount of time the camera’s sensor is exposed to light. It is measured in seconds or fractions of a second, such as 1/1000s, 1/250s, 1/30s, etc. Fast shutter speeds (e.g., 1/1000 or more) freezes fast-moving subjects and reduces motion blur, while a slow shutter speed (e.g., 1/30 or less) allows more light and can capture motion blur.

🎄 Christmas Tree Silhouette Final Tips and Thoughts
There is nothing better during the holiday season than to make some memorable memories! What better way to do that than to capture an isolated black silhouette photograph of your family in front of a glowing Christmas tree this season. It is so wonderful to do during the Christmas celebration season! I hope you all have a Merry Christmas and a happy new year!
Remember these useful tips when you try and capture a beautiful Christmas tree photo:
- Turn off other lights in the room
- Do not use a flash. Using a flash will take away from the glowing lights on the Christmas tree.
- Adjust your camera settings. To get a sharp photo, you need to have a faster shutter speed. In order to do that with low light, you will need a wide aperture and a higher ISO. Generally, you will want a shutter speed of 1/10 to 1/50 seconds, an aperture of f/2.0 to f/3.5, and an ISO no greater than 1250. If you use an ISO greater than 1250, the picture will start to look too grainy. It is best to use a shutter speed closer to 1/50, but if you do go as low as 1/10 seconds, it would be best to use a self-timer or remote shutter release as well as a tripod. This will greatly help keep your photograph as sharp as possible.
- Use a tripod. Using a tripod will also help to keep your photo sharp.
- If you are using an SLR or DSLR camera, shoot in RAW. Shooting in RAW will dramatically help you post-process the image while retaining as much detail as possible.
Christmas Tree Silhouette Photos
Materials
- Christmas tree with lights
Instructions
- Set the camera to manual mode.
- Point the camera at the Christmas tree and set exposure (shutter speed and aperture).
- Set the camera's ISO between 500 and 1250 depending on the shutter speed and aperture settings in step two.
- Put your camera on a tripod.
- Put your subject (kids) in front of the Christmas tree.
- Do not change any settings, even with the subject in front of the tree.
- Focus on the subject, while leaving the aperture and shutter speeds unchanged.
- Snap the photo!
Notes
- Remember to keep the lights off and do not use a flash.
- Using a tripod is key to make sure your photos stay sharp.
- If you have the option on your camera, shooting in RAW mode will greatly help you post-process your images while keeping as much detail as possible.
❄️ Did you take a Christmas Tree Silhouette Photo?
If so, I would love to see your results! Please post your photos in the comment section below! Also, share if you used any different techniques to get your results. I find that shooting in RAW mode allows post editing to be much more efficient, but please comment if you find any other file formats more effective.
Former Division I basketball player turned food blogger with a passion for creating easy, delicious recipes the whole family can enjoy. What started as cooking for her daughters quickly grew into a love for developing homemade meals, sharing step-by-step recipes, and photographing every detail along the way. When she’s not in the kitchen, she enjoys staying active, working on DIY projects, spending time with family, and all things photography. More by Tammy ➜