Recipe updated: October 16th, 2024
This is an old recipe from way back when. It is a vintage recipe I remember from 50 years ago. It’s the fantasy fudge original recipe that used to be on the back of the Kraft marshmallow creme jar. If you have never made this classic recipe you must try it today. It’s super simple to make in a matter of minutes.
You don’t need a candy thermometer to make this delicious fantasy fudge recipe or our easy dark chocolate fudge recipe. Both of these fudge recipes are the easiest and best fudge you can make.
🔪 Key Ingredients
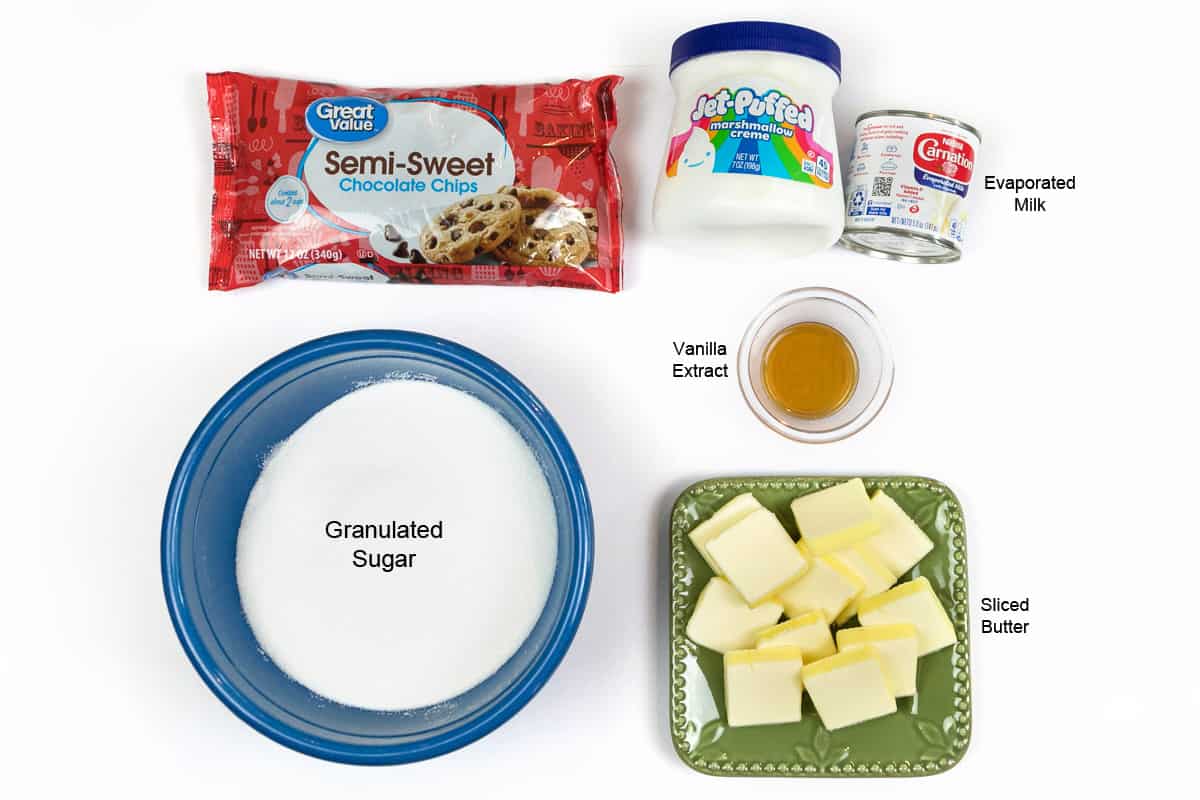
- 3/4 cup of unsalted butter (softened)
- 2/3 cup of evaporated milk
- 3 cups granulated sugar
- 2 cups of semi-sweet chocolate chips
- 1 jar of marshmallow creme (7 ounces)
- 1 teaspoon of vanilla extract
- 1 cup of chopped walnuts or chopped pecans (optional)
👩🍳 How to Make this Fantasy Fudge Recipe
These step-by-step instructions are accompanied by detailed photos for enhanced clarity and guidance.
Step 1. Soften the Butter
Take 3/4 cup of unsalted butter out of the refrigerator and set it on the countertop at room temperature for about 15 minutes so it can soften up a bit. If it is sticks of butter, cut it into slices.
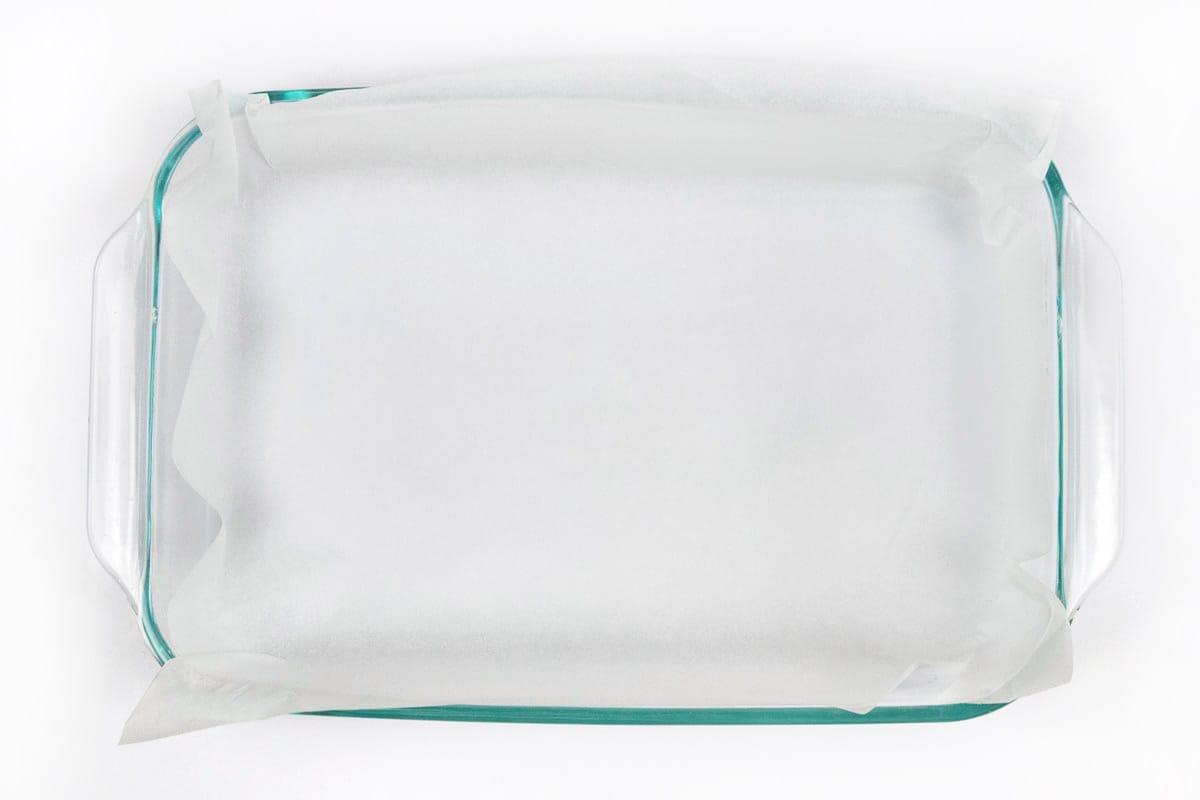
Step 2. Prepare the Baking Pan
Overlap (over the edges) a 13 by 9-inch pan with parchment paper. Set the pan aside for now.
Note: If you have made this fantasy fudge recipe from the original instructions, then you know it says to grease the pan. But you can use parchment paper instead.
The reason for lining the pan with parchment paper is that the fudge won’t stick to the parchment paper, so there is no need to grease the pan like the original recipe says to do. But just in case you don’t have parchment paper on hand, use non-stick cooking spray to grease the pan.
Another reason to line the pan with parchment paper is that you can pick up the parchment paper and lift the fudge out of the pan all at once.
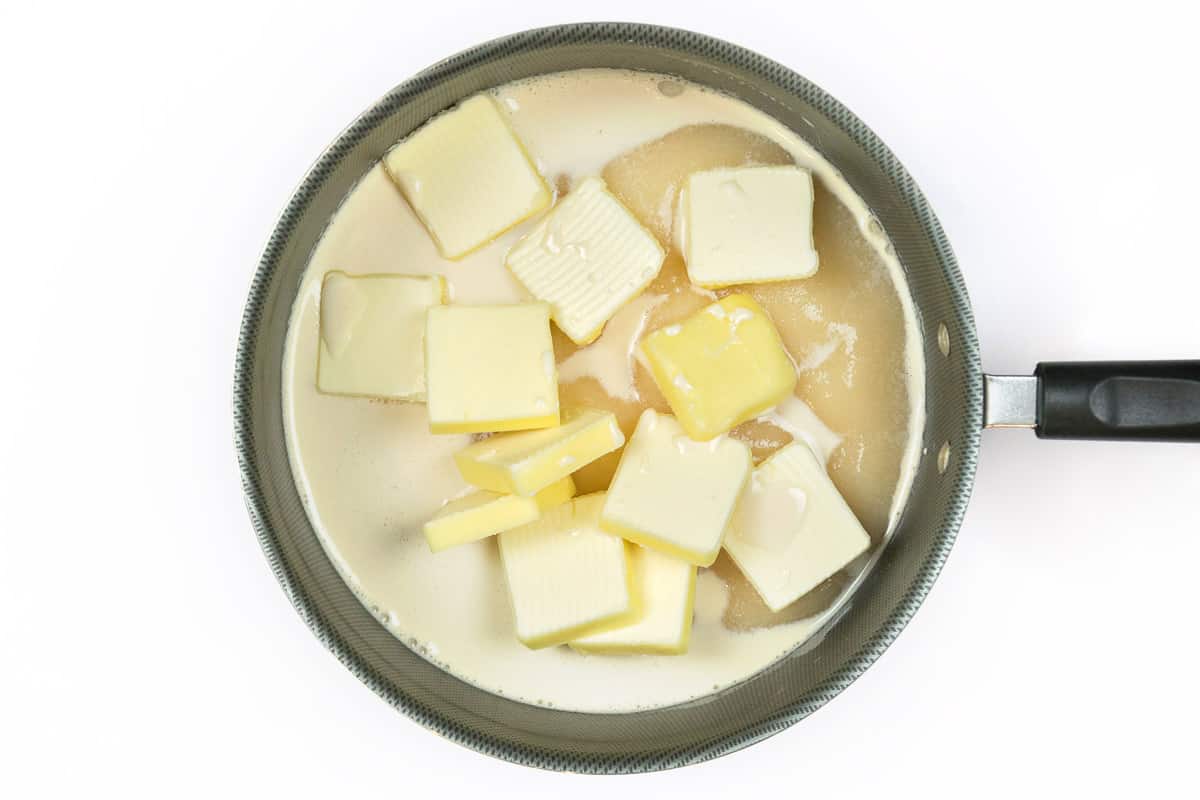
Step 3. Add the Butter, Evaporated Milk. and Sugar to a Saucepan
Put the 3/4 cup of sliced softened unsalted butter into a 3-quart saucepan together with 3 cups of granulated sugar and 2/3 cup of evaporated milk. Turn the burner to medium heat stirring the mixture constantly with a whisk while the butter melts and the sugar dissolves into the evaporated milk.
Important: It is very important to keep stirring the butter, evaporated milk, and sugar mixture constantly so it will not burn on the bottom of the saucepan.
Step 4. Continue to Stir
While the butter melts and the sugar and evaporated milk start to blend as one, turn the heat to medium-high. Use a whisk and continue stirring the butter, evaporated milk, and sugar mixture making sure to include the bottom of the pan.
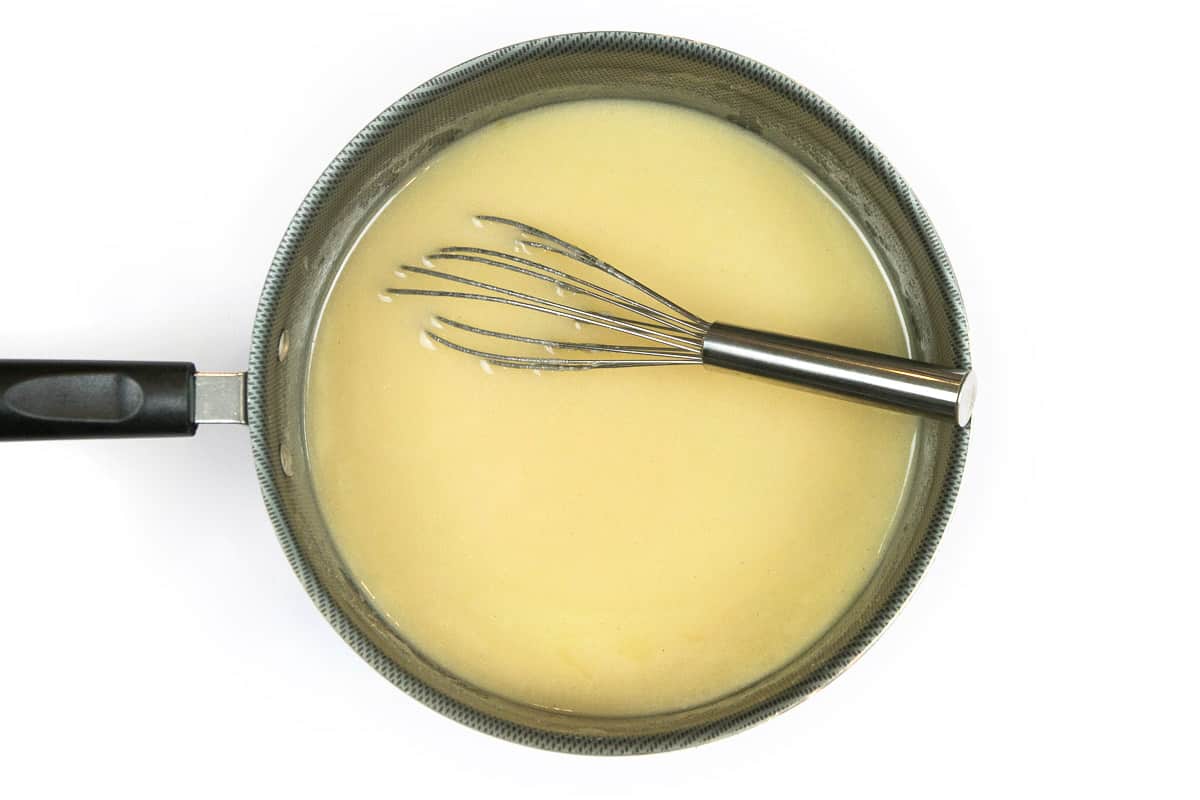
Step 5. Bring to a Boil
With the heat turned up to medium-high, the butter, evaporated milk, and sugar mixture will start to boil. Our goal is to bring the mixture to a full boil, so as soon as you see the mixture start to boil, set a kitchen timer for 5 minutes. Within minutes, the mixture will then be to a full rolling boil, so you have to keep stirring constantly the whole time.
After the 5 minutes is up, turn off the heat and remove the saucepan with the butter, evaporated milk, and sugar mixture in it from the burner.
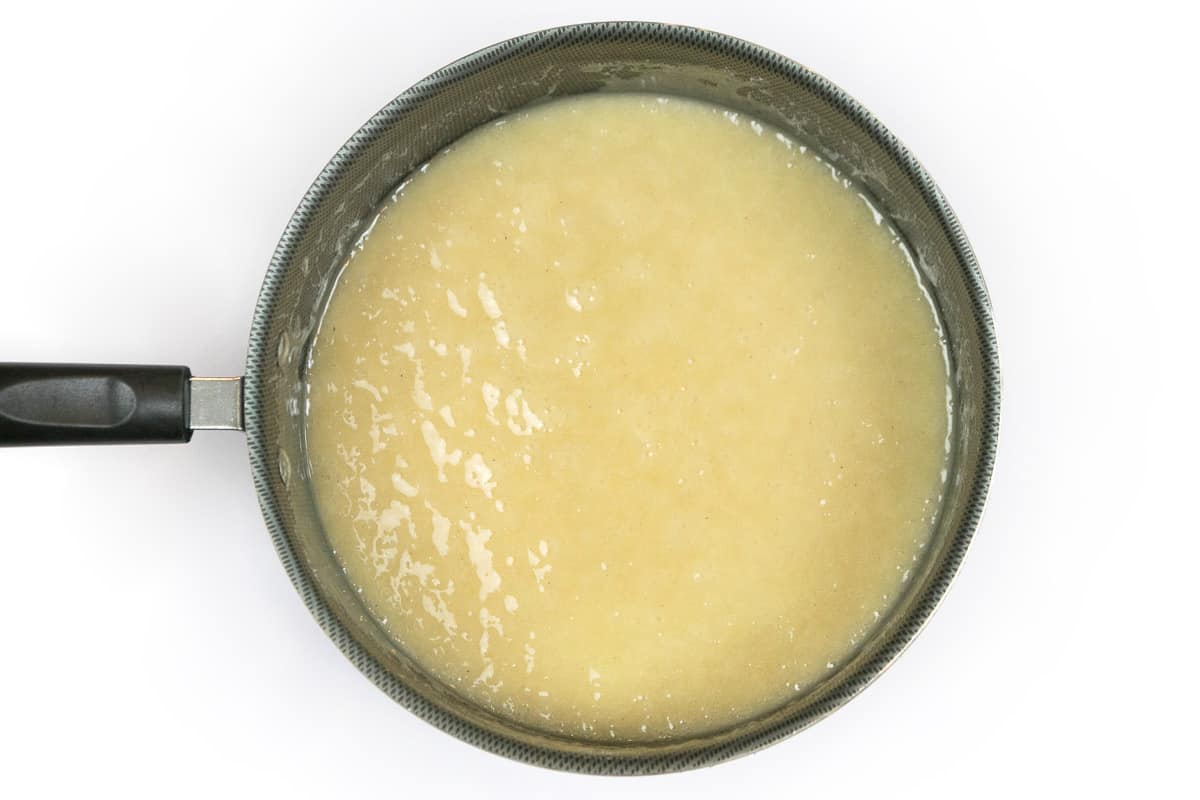
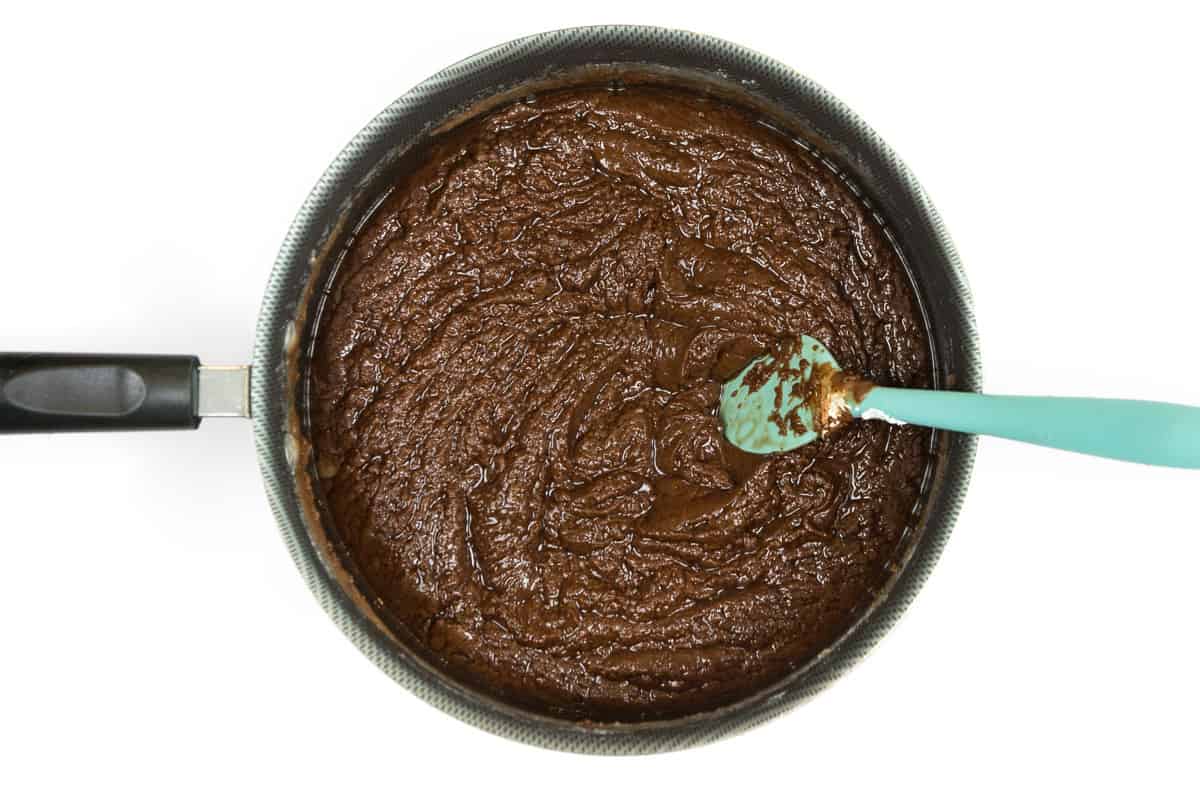
Step 6. Remove from Heat and Add the Chocolate Chips
Add 2 cups of semi-sweet chocolate chips together with the butter, evaporated milk, and sugar mixture immediately after removing it from the burner.
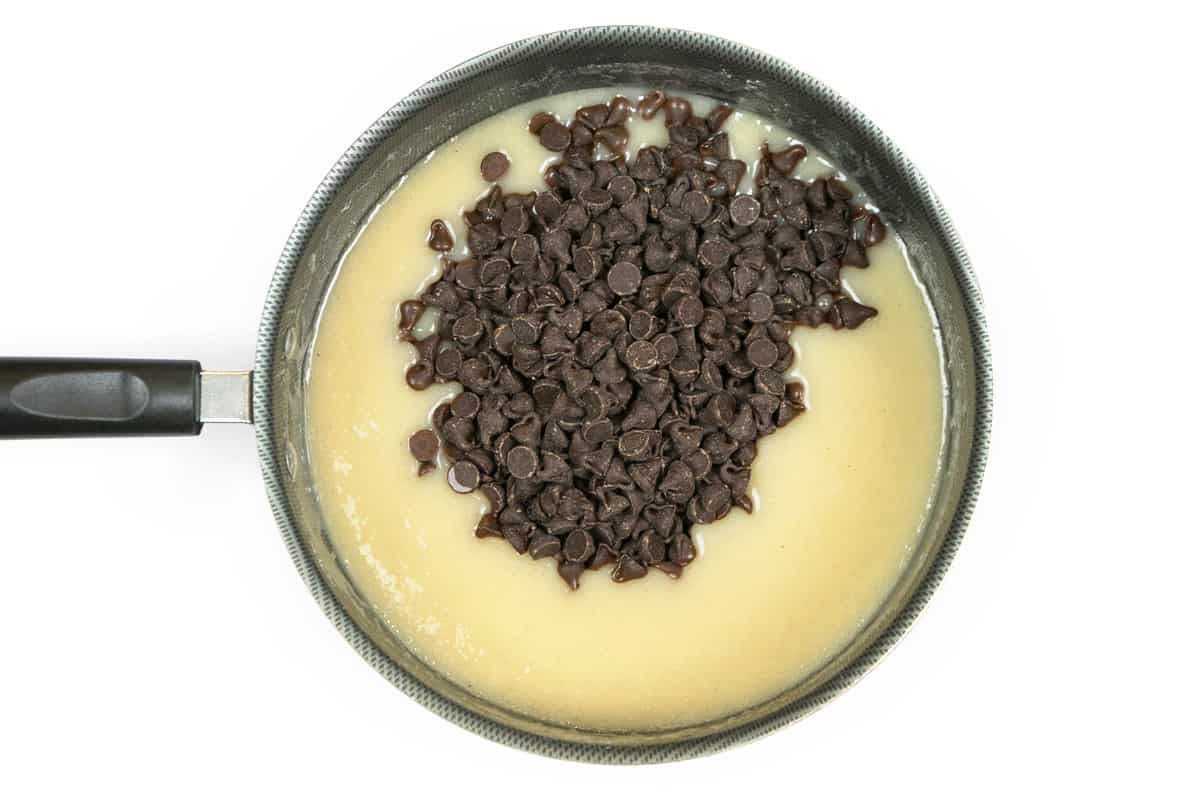
Step 7. Fold in the Chocolate Chips Until Blended Thoroughly
Keep stirring the mixture until the chocolate chips are melted and blended thoroughly with the butter-sugar milk mixture.
Step 8. Add the Marshmallow Creme and Vanilla Extract
After that, fold in one jar of marshmallow creme (7 ounces) and one teaspoon of vanilla extract to the hot mixture.
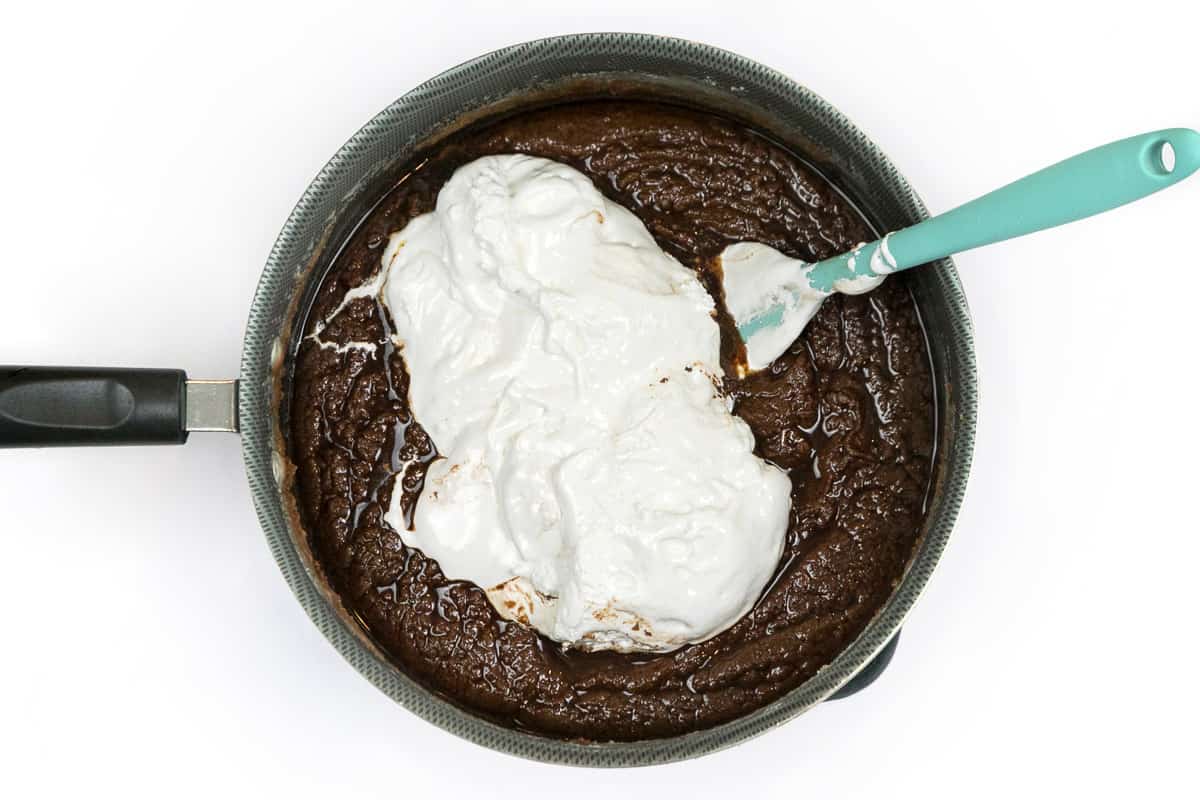
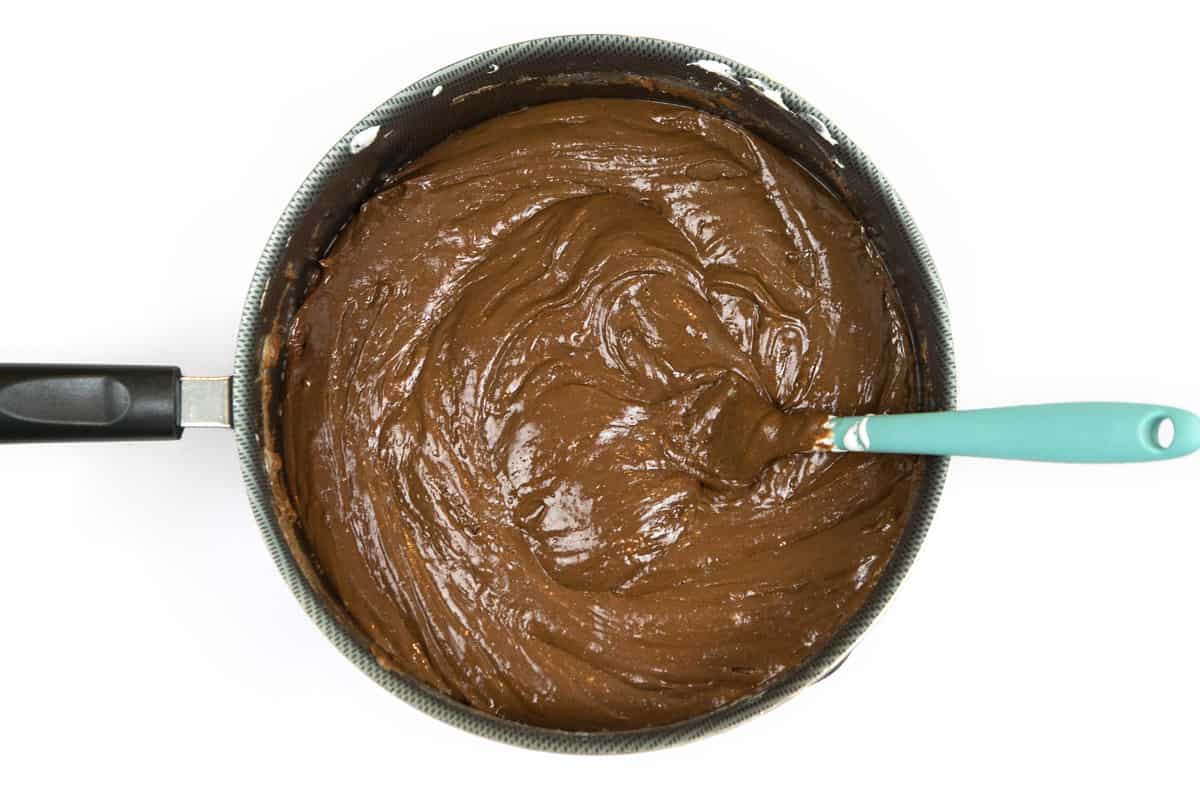
Step 9. Combine the Marshmallow Creme with the Chocolate
Stir the fudge until the entire mixture is thoroughly blended.
Note: We didn’t add nuts to our fudge, but if you like nuts in your fudge, go ahead and add them now. One cup of chopped walnuts or chopped pecans should be plenty enough to add. You can add any other favorite goodies at this time too.
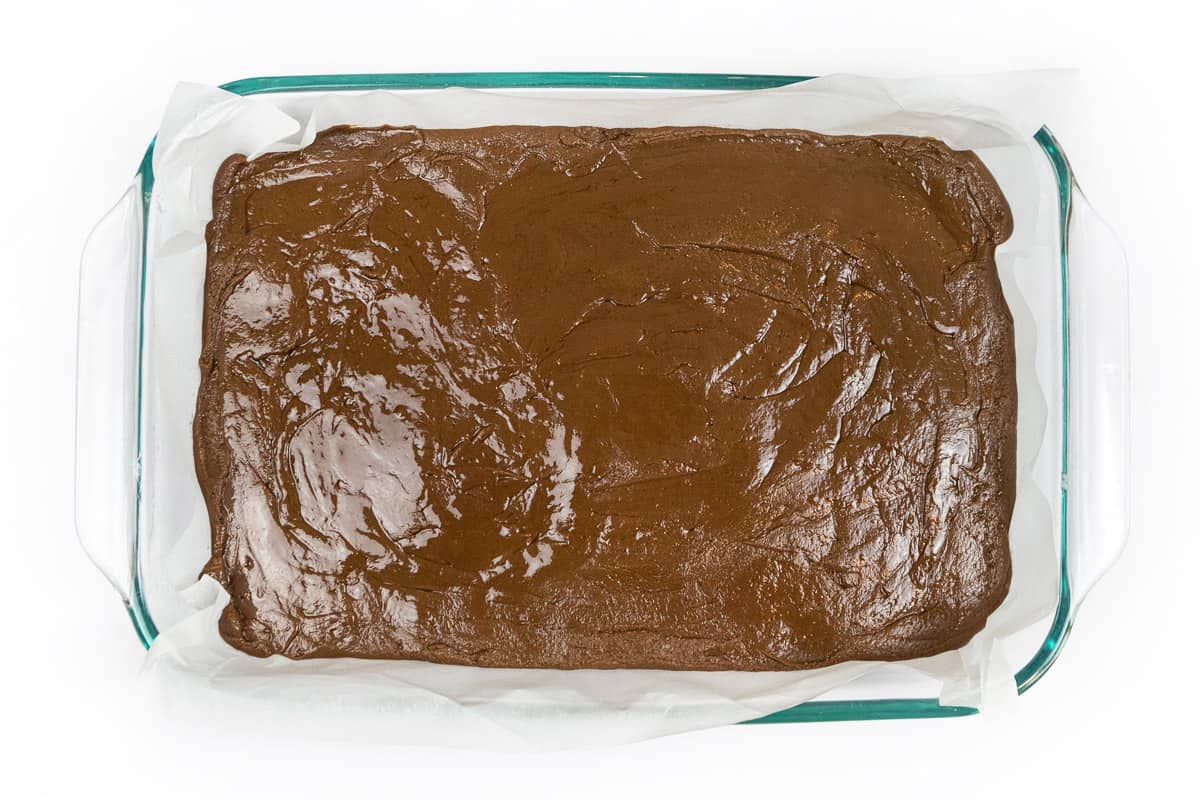
Step 10. Pour Fudge into the Pan and let it Cool
Pour the melted chocolate fudge mixture out of the large saucepan and into the prepared pan with the parchment paper. Spread the fudge evenly in the pan with a spatula. Leave the fudge on the countertop in the pan so it can cool and set properly.
Step 11. Remove the Fudge from the Pan
After the fudge has cooled, take hold of the parchment paper that overlaps the sides of the pan and lift it up and out. The fudge should come out of the pan very nicely. Set it on a working surface.
Note: You can leave it in the pan if you prefer.

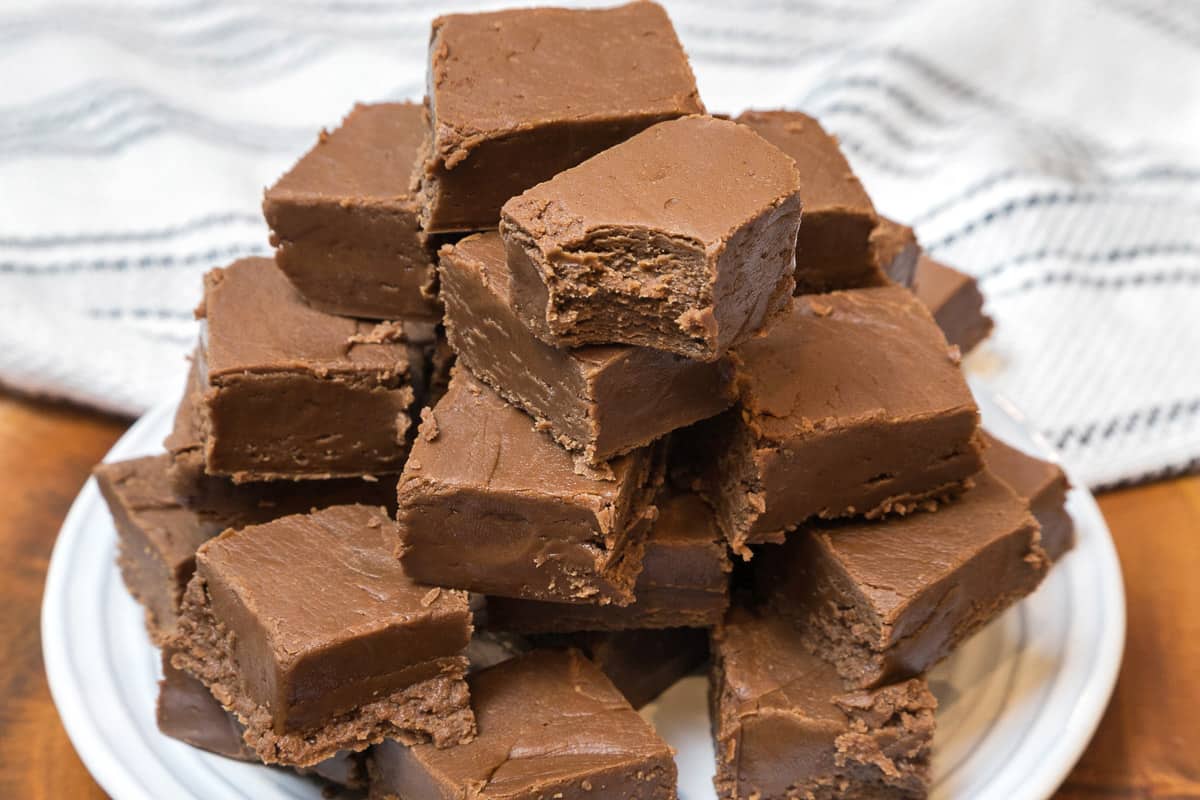
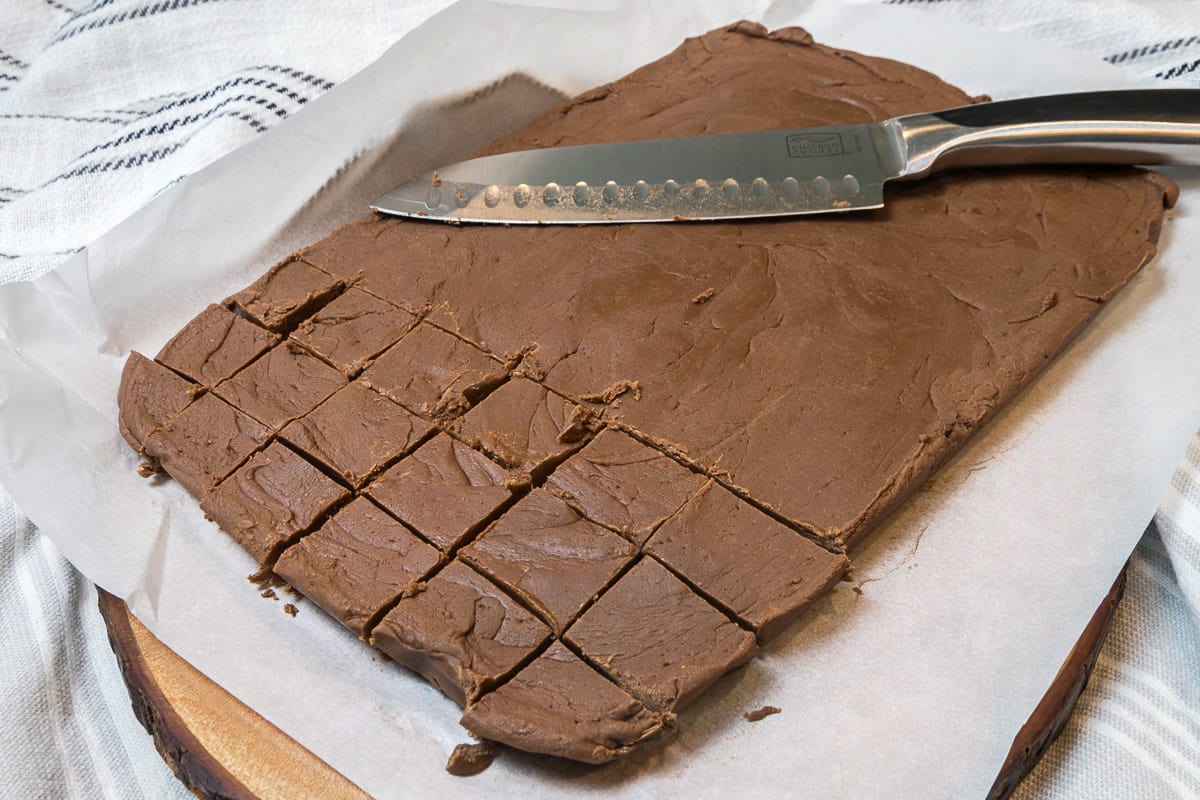
Step 12. Cut the Fantasy Fudge into Squares
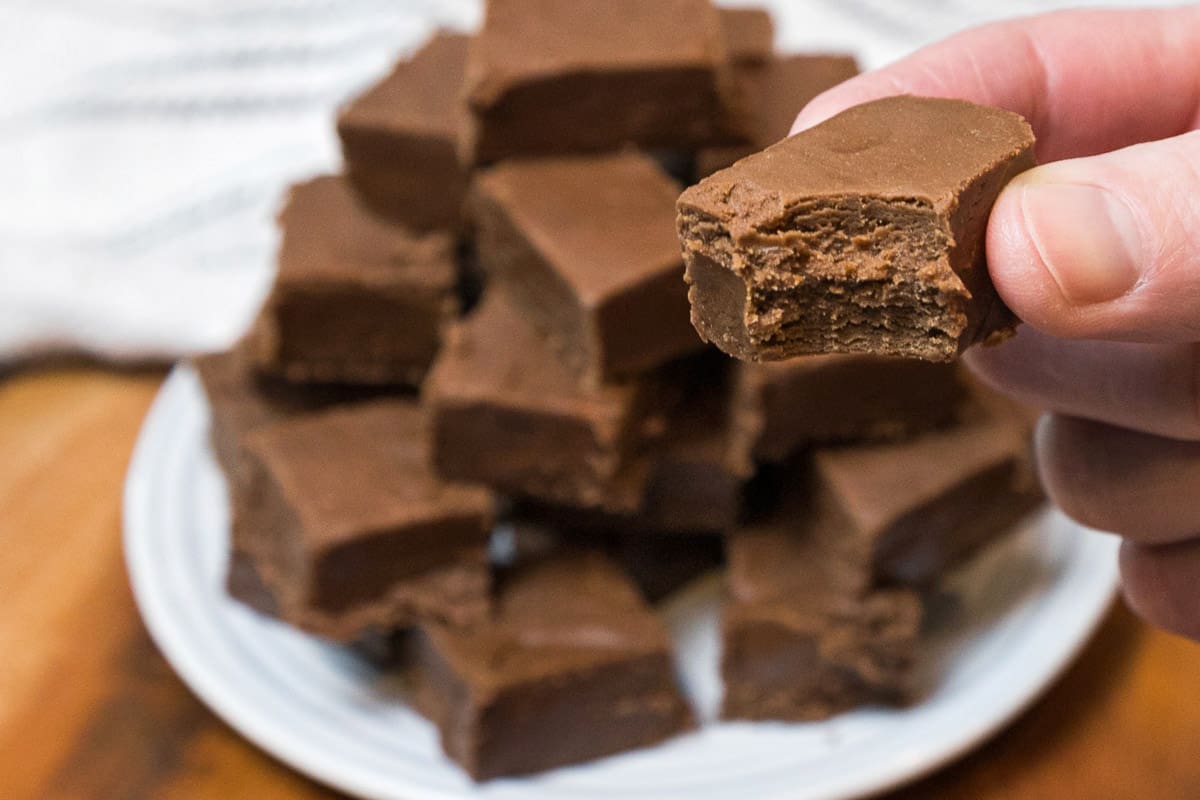
If you take the fudge out of the pan, use a knife to cut the fudge and make small squares while it is still on the parchment paper. You can make any size squares you prefer, but a one-inch square is about the right size. This is a very sweet treat, so it doesn’t take much to satisfy your craving for something sweet and something chocolate. A small portion of this amazing creamy fudge gets the job done.
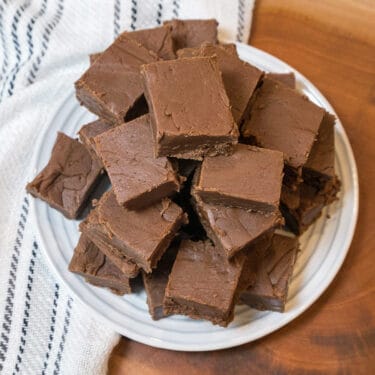
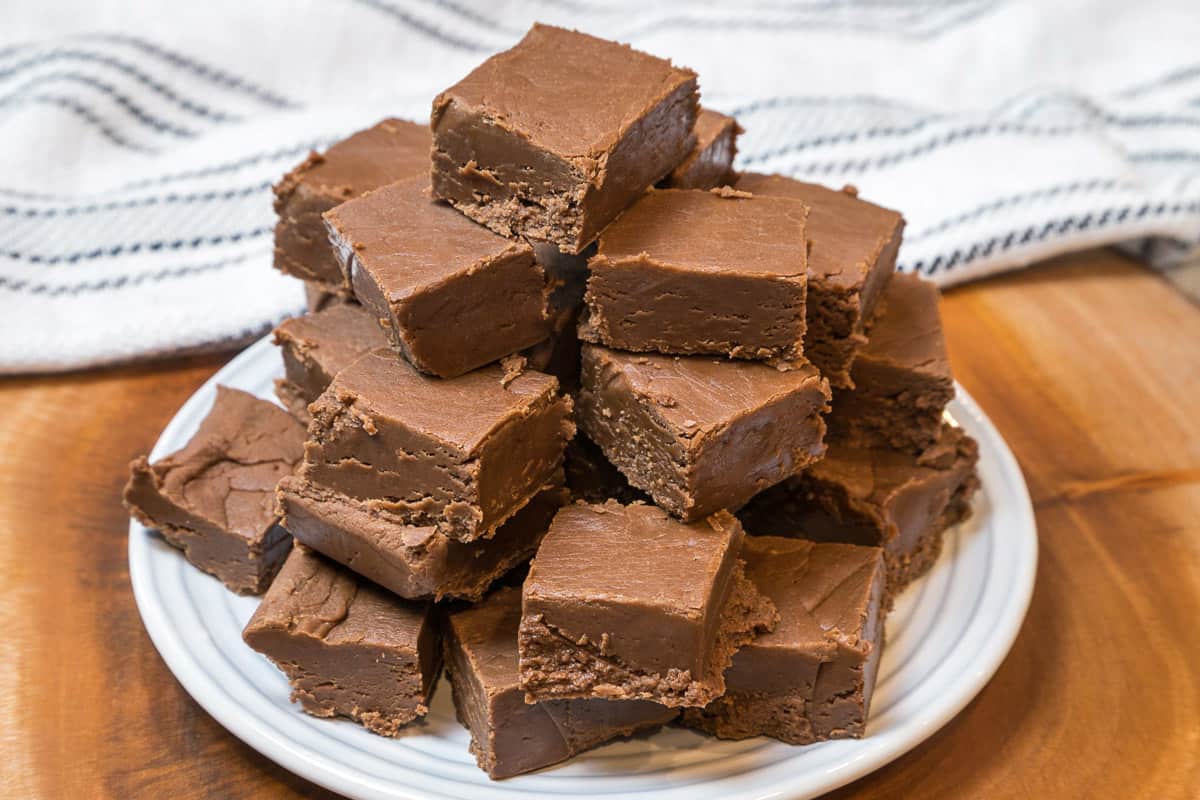
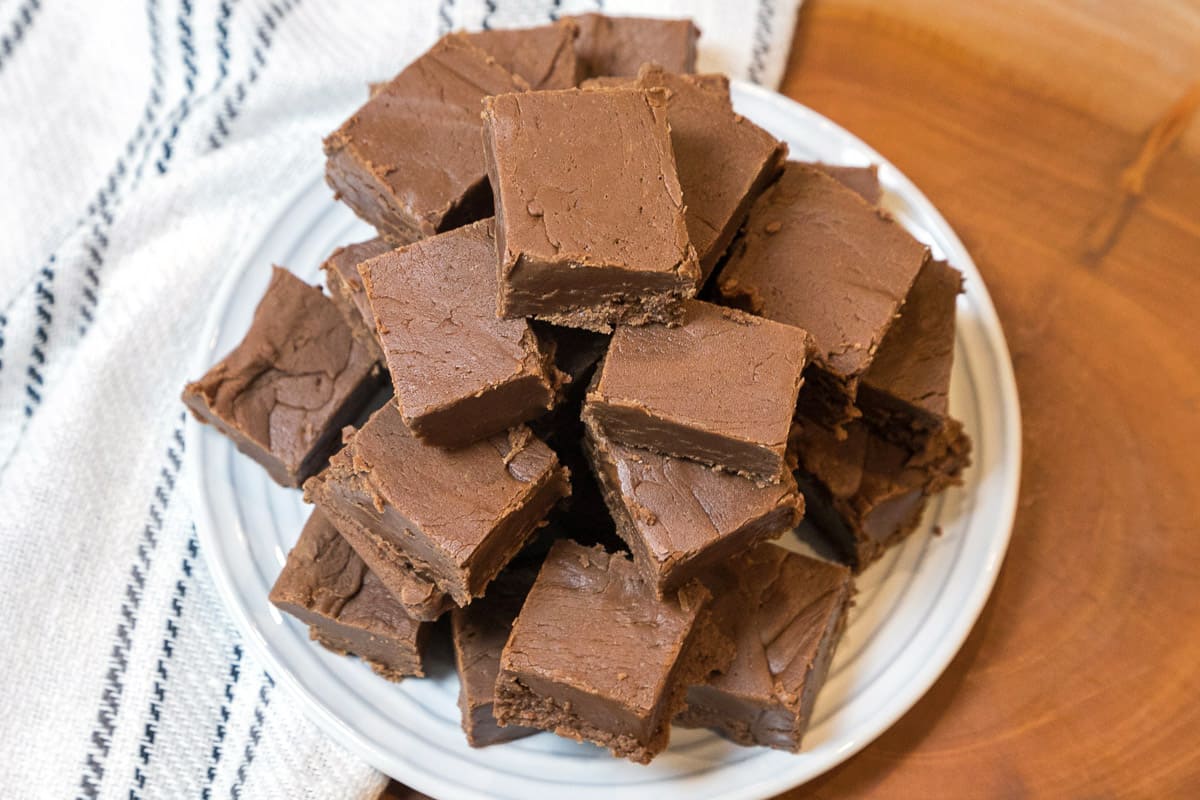
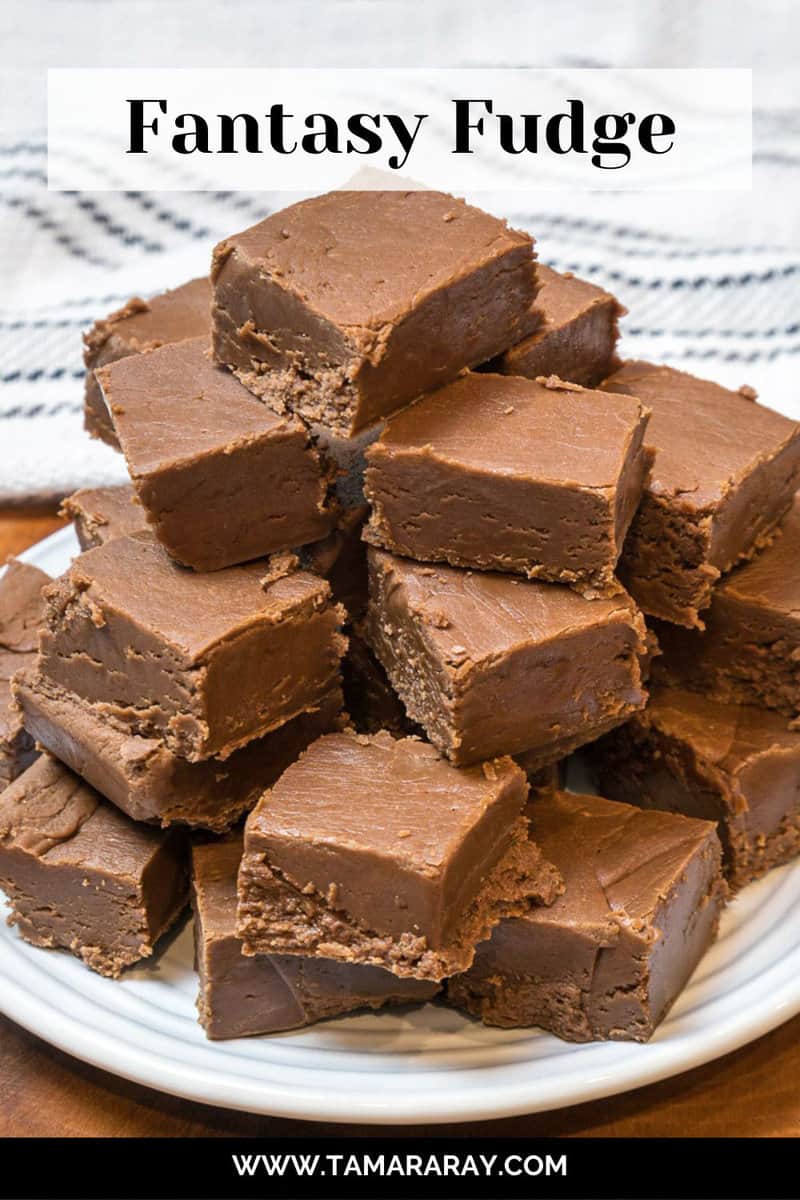
Step 13. Serve this Fantasy Fudge in Style
Stacking the pieces of fudge high up on a plate looks divine. So whether you are serving this fudge just for your family, or taking it out to an outing or special occasion, this chocolate marshmallow fudge will be gone before you know it. It’s a creamy melt-in-your-mouth fudge that’s irresistible to the taker. Enjoy!
⭐️ Recipe Variations
We made this as a plain fudge recipe, but you can add some of the following suggestions if you like.
- For some added crunch and protein, stir in 1 cup of chopped walnuts or chopped pecans to the fudge while it is still in the saucepan right before putting it in the 9×13-inch pan.
- Put 1 cup of peanut butter chips or white chocolate chips in the saucepan right before pouring it into the pan.
- You can also add any of your favorite things to the top of this delicious chocolate fudge recipe right after pouring it into the pan and before it sets. For example, colorful sprinkles, dried fruit, crushed-up peppermint sticks, frosting, sea salt, crushed Oreos, shredded coconut, and caramel sauce are all excellent ideas.
❓ FAQs
If you have any remaining fudge leftover, it can be kept in an airtight container on the countertop for about a week or so. You can also put any leftover fudge in a square pan and cover it with aluminum foil or plastic wrap. Do not store this fudge in the refrigerator to avoid it becoming dry and hard.
Yes, you can freeze fantasy fudge. Put it in a freezer storage bag. It will last in the freezer for about 3 or 4 months. You can take a piece of it out of the freezer, pop it in your mouth frozen, and it melts within seconds and tastes fantastic.
💭 Final Thoughts
This original fantasy fudge recipe with its creamy texture makes the perfect gift for any special occasion or during the holiday season. Scrunch up some parchment paper, then wrap the fudge ever so softly in it. After that, put it in a tin container, (such as a cookie tin), or a pretty gift box. Write “Homemade fantasy fudge made especially for you!” on the gift tag.
This marshmallow fudge recipe would make a wonderful gift for Mom on Mother’s Day or your sweetheart on Valentine’s Day! The best thing about this recipe is that it is extremely customizable to make it your own fantasy fudge.
🗂️ Recipe Card
Fantasy Fudge Recipe (Jet Puffed)
🫕 Equipment
- Parchment paper (or non-stick cooking spray)
- Baking dish (9×13-inch)
🧂 Ingredients
- 3/4 cup unsalted butter (softened)
- 2/3 cup evaporated milk
- 3 cups granulated sugar
- 2 cups semi-sweet chocolate chips
- 1 jar marshmallow creme (7 ounces)
- 1 tsp vanilla extract
- 1 cup chopped walnuts (or chopped pecans – optional)
👩🍳 Instructions
- Set the butter on the countertop so it can soften. Then cut it into slices.
- Overlap a 13 by 9-inch baking dish with parchment paper or grease the pan with non-stick cooking spray.
- Add the sliced softened butter, sugar, and evaporated milk to the saucepan.
- Turn the burner to medium heat. Stir the mixture constantly with a whisk until the butter is melted and the sugar dissolves into the evaporated milk. Keep stirring constantly so the mixture will not stick to the bottom of the saucepan.
- After the butter and sugar are combined with the evaporated milk, turn the heat to medium-high. As soon as the mixture starts to boil, set the timer for 5 minutes. The mixture will go into a full rolling boil. It is so important to continue stirring.
- After 5 minutes, turn the burner off and remove the saucepan from the heat.
- Add the semi-sweet chocolate chips to the melted butter mixture immediately while the mixture is still hot. Mix thoroughly.
- Next, fold in the marshmallow creme and vanilla extract. Mix thoroughly.
- Optional – if you want nuts in your fudge, now is the time to add the chopped walnuts or chopped pecans to the fudge mixture. Mix thoroughly.
- Pour the fudge into the prepared pan. Spread the fudge evenly in the pan with a spatula.
- Let the fudge sit on the countertop until it is cool and has time to set properly.
- When the fudge is cool and set, lift up the parchment paper and remove the fudge from the pan.
- Cut the fudge with a knife into 1-inch squares.
*️⃣ Recipe Notes
- You can add 1 cup of chopped walnuts or chopped pecans to the fudge after it is removed from the heat.
- You can add sprinkles or any of your favorite things to the top of the fudge right after you pour it into the pan and before it sets.
💑 More Chocolate Recipes You Will Love
- Cookie Pizza (Loaded Chocolate Chip) – A giant chocolate chip cookie that is overloaded with melted chocolate chips, M&M candies, mini marshmallows, chunks of Kit Kat candy, and melted white chocolate chips. So good!
- Chocolate Pie Recipe – You are going to love this chocolate pie recipe! Why? Because it’s a homemade chocolate pie filling with whipped cream and mini chocolate chips on top. Who could ask for more?
- Dark Chocolate Cookies – This incredible cookie recipe includes lots of chocolate such as dark cocoa powder, unsweetened cocoa powder, and chunks of dark chocolate chips.
A wife, a mother to a son and a daughter, and a grandmother to three granddaughters. Flo loves sharing recipes passed down from her own mother, her mother-in-law, and her grandmother as well as new recipes created with her daughter, Tamara Ray.
More by Flo ➜
Debra Smith
28 Dec 2024It turned out great & I added 1 cup of chopped pecans YUMMY 😋
Anne Sowers
14 Dec 2024I want to use marshmallows instead of the fluff. What would the equivalent of marshmallows be to the jar of fluff
Tamara Ray
17 Dec 2024Hi! One jar of marshmallow creme is approximately equivalent to 1.5 cups of mini marshmallows, or about 12-15 regular-sized marshmallows. I hope this helps!