Recipe updated: April 3rd, 2024
DIY Floating Desk with Simple Steps to Follow
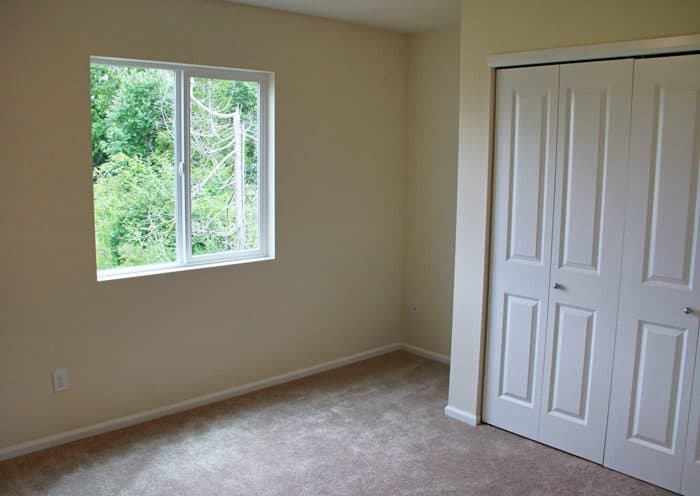
In my oldest daughter’s room, there is the perfect nook area to build a floating wall desk. She used to have a small Ikea desk on wheels that would get super cluttered, and it would move all around. There was also nowhere to store her stuff. She needed something different, like a floating wall desk. So, I decided that I wanted to build her a permanent desk in that nook area that took up the whole space. I also wanted the desk to be able to open up so she could put away stuff she was working on. That way it would not look so messy and cluttered. The end result turned out amazing.
Building a Floating Wall Desk with Storage
Supplies
The following supplies are needed for the DIY floating desk project:
- 2×4’s
- 1×12 pinewood common boards
- decorative hinges
- wood filler
- screws
- wood stain
Tools
The following tools are needed:
- drill
- pocket hole jig
- miter saw
- sander
- level
Steps for Building the DIY Floating Desk with Photos
Step 1: Measure the Area
The first thing you are going to want to do is to measure the area for the floating wall desk.
Step 2: Cut 2×4’s to Fit the Floating Desk Space
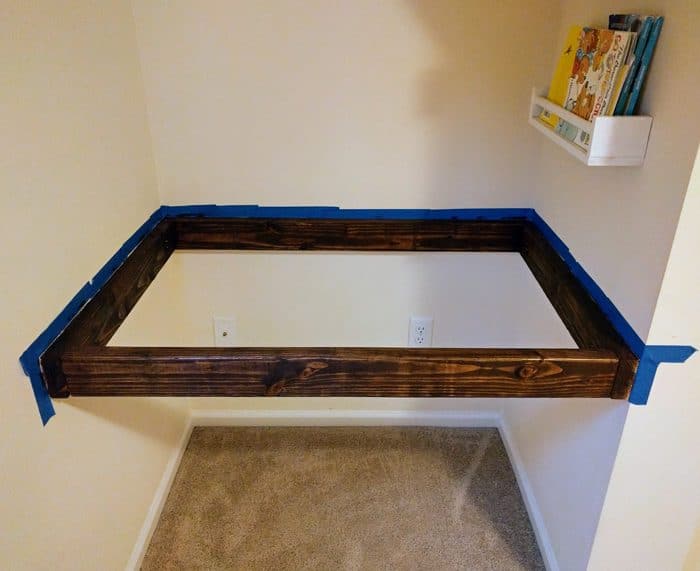
Next, cut the 2×4’s to fit in the nook area as a frame.
Step 3: Screw 2×4’s into the Wall
Screw the 2×4’s directly into the studs on each wall. In order to this, it is best to use a stud finder to mark where the studs are first. For the 2×4 in front, I used a pocket hole jig to be able to screw it into the left and right side 2×4’s already attached to the wall.
I went ahead and stained this part of the desk now, since it will be harder to do once the top of the desk is attached.
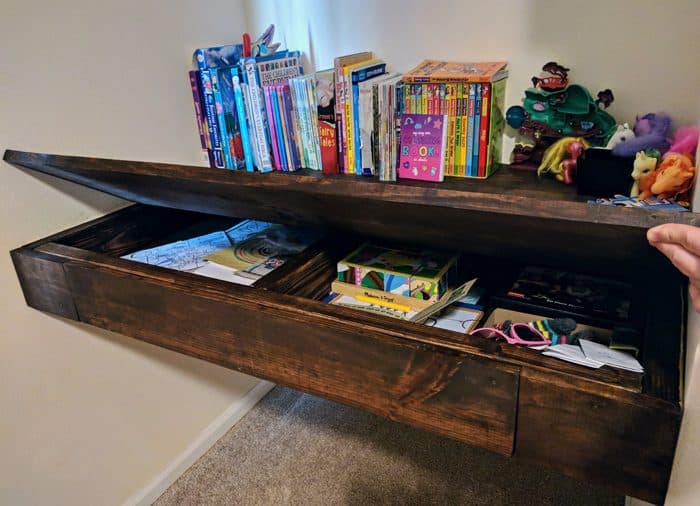
Not seen in the picture below is one more 2×4 that I added in the middle of the desk, going from the front to the back. This gave the desk a little more support, and it allowed the inside of the desk to have a separation. It gave it two separated spaces inside to store stuff.
Step 4: Measure Pinewood Common Boards for the Floating Desk
Next, measure the space between the walls where the common board will lay on top of the 2×4’s and fit in the space.
Step 5: Cut the Pinewood Common Boards
The next step is to cut your common boards based on the measurements in step 4.
I stained the common boards prior to attaching them to the desk because it was easier to do this in the garage.
Step 6: Screw Down the Pinewood Common Boards
After the stain dried, I then screwed the boards directly down into the 2×4’s. I used a countersink drill bit set to pilot hold where I was going to screw the common boards down. This way, after I screwed in the boards, I could put some wood filler over the top of the screw and hide the screws.
You can see on the top of the boards in the picture below, where I filled in the screw holes with wood filler.

Most important, DO NOT screw in the common board closest to you because this will be the board that opens and closes to access the storage area. The board in the front is attached with hinges on both the left and right sides.
Finally, it is time to put the hinges on the front common board. I put two small decorative hinges on each side of the desk as seen in the photo below. Now the floating desk can open and close!

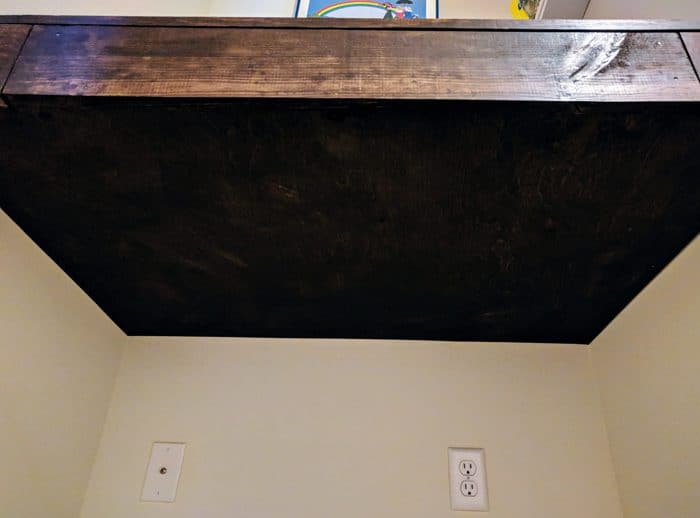
Step 8: Attach a Board for Underneath the Floating Desk
Measure the entire bottom area of the floating desk. This measurement is needed to be able to cut a thin piece of board to use as the bottom of the desk. I used wood glue and hammer and brad nails to attach it to the 2×4’s under the desk.
The board I used I found in the scrap pile at Home Depot that worked perfectly. It is about 1/4 in thick. I used the table saw to cut it down to size.
Before attaching this board, I also stained it in the garage first. Staining boards before they are attached is a much easier task to do.
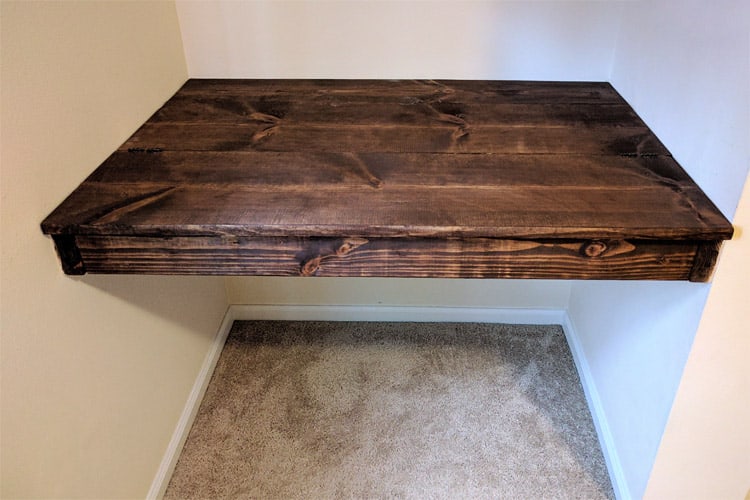
The DIY Floating Desk is Done!
The floating desk is done and now ready to decorate and put things in the storage area.
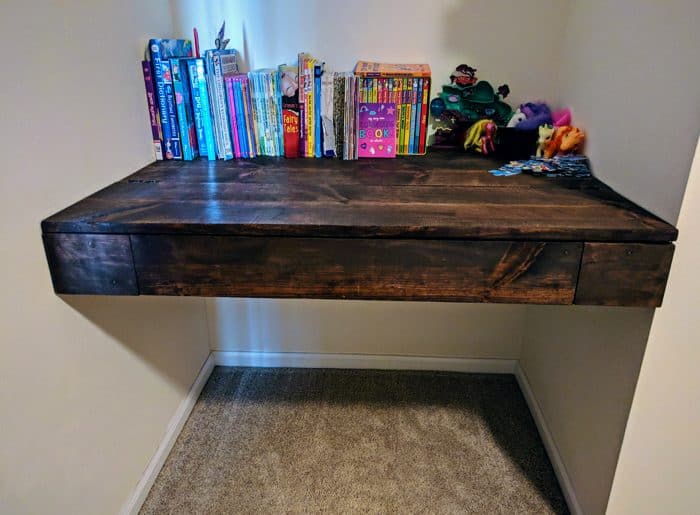
My Daughter Loves it!
My daughter loves her new desk, as do I! I am very pleased with the final result, and I wish I had a desk like this in my room when I was growing up!
I wish my youngest daughter’s room had this same nook area in her room, so I could build her an identical desk, but it doesn’t. I’m still going to build her a floating desk in her room, but I haven’t figured out how I am going to do it yet. Stay tuned.
Ex-Division I basketball player who has always loved eating food, but has not always loved cooking it. After the birth of her daughters, she now loves cooking new meals and recipes for her family to try and enjoy. She loves to stay active, work on DIY projects, spend time with family, and all things photography. More by Tammy ➜